QJ3003P QJ3005P
5. Cleaning and Maintenance
1. Disconnect the device from the mains prior to maintenance activities.
2. The power supply cables must not show any damage. Have a qualified technician maintain
the device.
3. Wipe the device regularly with a moist, lint-free cloth. Do not use alcohol or solvents.
4. There are no user-serviceable parts, apart from the fuse. Contact your dealer for spare parts if
necessary.
5. Store the device in a dry, well-ventilated, dust-free room.
Replacing the Fuse
1
Only replace the fuse by a fuse of the same type and rating.
2
Before replacing the fuse, unplug the mains lead.
3
Wedge the fuse holder out of its housing with a flat-head screwdriver.
4
Remove the damaged fuse from its holder and replace with the exact same type of fuse.
5
Insert the fuse holder back in its place and reconnect power.
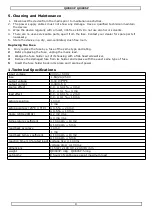
1.Technical Specifications
input voltage
230 V~/ 50 Hz
fuse
1.6A/2A /250 V
output voltage
0-30 V
output current
0-3A/0-5 A
source effect
C.V. ≤ 0.01 % + 3 mV
C.C. ≤ 0.1 % + 3 mA
load effect
C.V. ≤ 0.01 % + 2 mV
C.C. ≤ 0.1 % + 10 mA
setup resolution
10 mV
1 mA
setup accuracy (25°C ± 5°C)
≤ 0.5 % + 20 mV
≤ 0.5 % + 10 mA
ripple (20Hz-20MHz)
≤ 2 mV rms
≤ 3 mA rms
temperature coefficient
≤ 100 ppm + 10 mV
≤ 100 ppm + 5 mA
read back accuracy
10 mV
1 mA
read back temp. coefficient
≤ 100 ppm + 10 mV
≤ 100 ppm + 5 mA
reaction time (10% rated load) voltage rise: ≤ 100 ms
voltage drop: ≤ 100 ms
dimensions
115 (W) x 190 (H) x 240 (D) mm
weight
QJ3003P: 4Kg QJ3005P:5.3Kg
autonomy
8 hours of continuous use at maximum load
9
Содержание QJ3003P
Страница 1: ...QJ3003P QJ3005P EN PROGRAMMABLE DC LAB POWER SUPPLY 0 30V USB 2 0...
Страница 2: ...QJ3003P QJ3005P 16 2 15 17...
Страница 7: ...QJ3003P QJ3005P 2 The main screen appears 7...


