QJ3003P QJ3005P
4.
Features
dual LED display for voltage and current
coarse and fine adjustments of voltage and current
protection mode: current limiting
output connectors: insulated safety plugs
organic glass front panel / other panels made of steel
memory:3 programmable memories
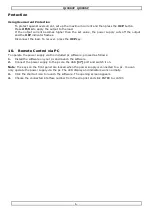
computer connectivity: pc remote control via USB
software included for Windows XP, Vista and W7, W8, W8.1 (32 bits + 64 bits)
5.
Description
The QJ3003P QJ3005P is a highly accurate, DC-regulated power supply with an adjustable output. This
output can be used for constant voltage (C.V.) and constant current (C.C.).
The output voltage can be adjusted between 0V and 30V when the device is in the constant
voltage mode. The current-limiting point can be set arbitrarily in this mode.
The output current can be adjusted continuously between 0A and 5A in the constant current mode.
The output current and voltage are indicated on the LED displays.
1
Power
: on/off button
11
Voltage/Current
: select between voltage
2
Off/On
: output on/off
or current for adjustment
3
MEN:
memory save
12
Output terminals-
4
M1-M3
: memory recall
13
Earth (ground) terminal, connected to the
5
Voltage/Current
: select between voltage
14
Output te
or current
15
Power supply socket
6
OCP:
over current protection
16
Fan
7
CC
indicator: constant current mode
17
USB port (type B) for remote control via pc
8
CV
indicator: constant voltage mode
9
Voltage display (volt)
10
Current display (ampere)
6.
Operation
Switching the Power Supply On or Off
1.
Connect the included power cord to the back of the device
[
15
]
and plug the other end into a
suitable, earthed power socket.
Always connect the device to an
earthed
power socket.
2.
Press the
Power
button
[1]
to switch the power supply on.
At this moment, there is no output voltage or current on the output terminals.
3.
Press the
Power
button
[1]
to switch the power supply off.
4
Содержание QJ3003P
Страница 1: ...QJ3003P QJ3005P EN PROGRAMMABLE DC LAB POWER SUPPLY 0 30V USB 2 0...
Страница 2: ...QJ3003P QJ3005P 16 2 15 17...
Страница 7: ...QJ3003P QJ3005P 2 The main screen appears 7...


