background image

QH32DVR4C User’s Manual 


20

4.3    User Name and Password


Note: When the DVR is delivered from the factory, there is only one default 

administrator  named  “admin”,  and  the  password  is  “12345”.  The 
administrator’s name can not be modified, while  the password can be modified. 
The administrator can create 15 users and define their user rights.   


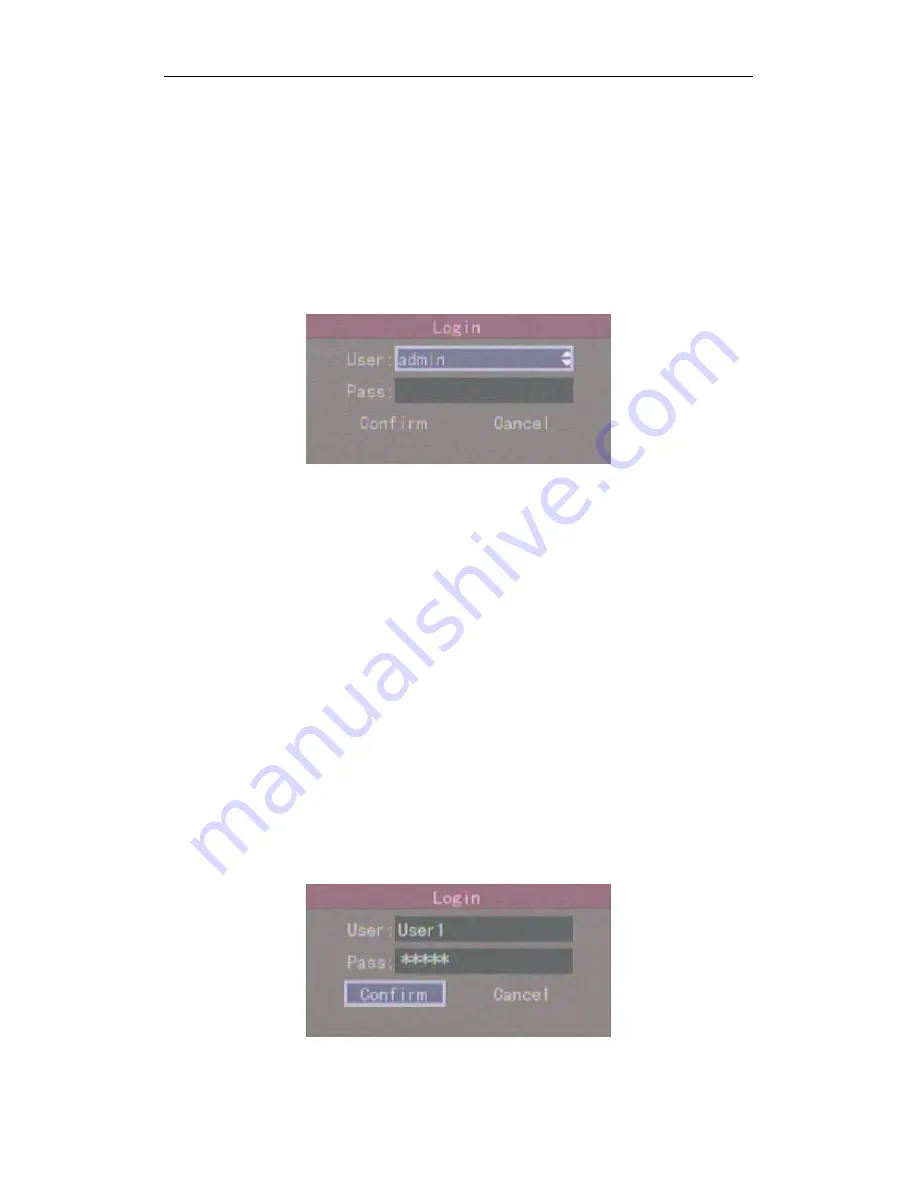
Login 


Fig 4.3 Login dialog 


Use

/

keys to select one user, press

key to enter into “Password” 

edit  box,  input  corresponding  password,  press

ENTER

key  to  exit  edit  box.  The 

“Active Frame” will be moved to the “Confirm” button. Press

ENTER

key to enter 

into  main  menu.  If  there  is  beeping  alarm,  it  means  the  user  name  and  password  do 
not match. After three incorrect tries, the DVR will enter into preview mode.   


Change Password 

For those users created by admin, they can change their password as follows


Step1: Enter into main menu 

Press

MENU

key, in the login dialog, select your user name, input the correct 

password, you can enter into the main menu. As the following picture shows: 


Fig 4.4 Input password 


Содержание QSC26404 QH32DVR4C

Страница 1: ...s Manual V2 1 Contact Us Q See Products 8015 E Crystal Dr Anaheim CA 92807 Website http www q see com Customer Service Phone 877 998 3440 x 538 Email cs dpsi usa com Tech Support Phone 877 998 3440 x...

Страница 2: ...PTZ Pan Tilt Zoom Control 22 4 5 Manual Record 24 4 6 Playback 25 4 7 Backup Recorded Files 29 4 8 Shutting Down DVR 31 Chapter 5 Parameters Setup Guide 32 5 1 Administrator and Password 32 5 2 Add an...

Страница 3: ...review Interface 80 2 PTZ Interface 80 3 Channel Name or OSD Position Configuration Interface 80 4 Area Configuration Interface 80 5 Test Input Interface 81 6 Playlist Interface 81 7 User Interface 81...

Страница 4: ...ure that you can use the device correctly and safely The contents of this Manual are subject to change without notice Contact Us Q See Products 8015 E Crystal Dr Anaheim CA 92807 Website http www q se...

Страница 5: ...tures Compression H 264 video compression algorithm and each channel can be real time PAL is 25FPS and NTSC is 30FPS Supports multi zone motion detection Supports mask function to mask sensitive areas...

Страница 6: ...E dialup function Remote parameters setup Remote playback download the recorded files in DVR Remotely upgrade DVR firmware Remotely control PTZ Supports Internet Explore for network control Remotely g...

Страница 7: ...1 Remote Control with 2 AA Batteries 1 USB Mouse 1 RJ45 Ethernet Cable 1 USB 2 0 Cable 2 2 Hard Drive HDD Installation Installation Notice Note The QH32DVR4C Bundle comes with a 320GB Hard Drive alre...

Страница 8: ...Panel Description Fig 2 1 QSC26404 Rear Panel 1 Video in 2 Video out 3 VGA video out 4 Alarm out 5 RS485 T T R R 6 Power switch 7 USB 2 0 Port 8 Audio in 9 Audio out 10 Ethernet port 11 Alarm in 12 12...

Страница 9: ...ote control Blinking means data is transmitting 4 Numeric Keys Input number lower case upper case character and symbols Function Keys MENU 2 3 ESC EDIT PLAY REC PTZ PREV A 1 Switch preview mode in men...

Страница 10: ...CUS in PTZ control 1 Input switch number lower case upper case and symbol 2 FOCUS in PTZ control 3 In preview mode display or hide the channel status bar Switch between numeric keys and function keys...

Страница 11: ...ys on front panel 4 EDIT Same as EDIT key on front panel 5 A Same as A key on front panel 6 REC Same as REC key on front panel 7 PLAY Same as PLAY key on front panel 8 INFO Same as INFO key on front p...

Страница 12: ...8 can be changed in Display menu and then press the ENTER key If the STATUS light of the DVR front panel is green it means you can use the remote control to operate the DVR Disabling the Remote Contro...

Страница 13: ...ing Overwrite Stop recording Select camera Stream type Resolution Frame rate Bit rate Enable Rec Schedule PreRec time PostRec time Copy to camera function Network DVR IP address DVR port Subnet mask G...

Страница 14: ...user name and password The default user name is admin and password is 12345 Main Menu Description The main menu interface is shown in fig 3 3 Fig 3 3 Main menu There is one highlighted frame called th...

Страница 15: ...ons means enabled and means disabled You can use ENTER or EDIT key to switch 2 List Box Provides more than 2 options However only one of them can be selected After pressing EDIT you can use and to sel...

Страница 16: ...u A button in grey means it can be operated only after it is enabled How to Exit Menu Press PREV key to exit menu and return to preview mode 3 4 Input Text In the menu interface if you are in edit sta...

Страница 17: ...tion If the DSP icon is it means there is a DSP initialization error please contact administrator at once The second line represents HDD initialization If the HDD icon is it means the HDD is not insta...

Страница 18: ...1 Recording status Form 4 1 Camera record status Icon Icon Color Status Description White No video signal Yellow Video input Pink Manual recording Green Real time recording Blue Motion detection recor...

Страница 19: ...mpering alarm Pink Motion External alarm Green No alarm Blue Motion alarm Red External alarm Press numeric keys to switch to individual camera view For example press 2 key to view 2nd camera Press EDI...

Страница 20: ...o Password edit box input corresponding password press ENTER key to exit edit box The Active Frame will be moved to the Confirm button Press ENTER key to enter into main menu If there is beeping alarm...

Страница 21: ...QH32DVR4C User s Manual 21 Fig 4 5 Main menu Step 2 Select the user name by using then move the Active Frame to Password icon by using keys As fig 4 6 shows Fig 4 6 Change users password...

Страница 22: ...to Confirm button press ENTER key If the password is modified successfully you will return to the main menu if not an error dialog box will pop up You can repeat step 3 to try again 4 4 PTZ Pan Tilt...

Страница 23: ...OCUS IRIS control keys IRIS IRIS Adjust preset keys REC SHOT Auto control key PLAY AUTO Wiper control key WIPER MENU Light control key LIGHT F1 Auxiliary device control key AUX F2 Adjust Preset Descri...

Страница 24: ...again and press PLAY AUTO key to stop Exit PTZ Control Mode Press ESC or ENTER to exit and return to preview mode 4 5 Manual Record Note In order to record the user must have recording rights DVR has...

Страница 25: ...ording means you can stop recording Start All Press this button to start all channels recording Stop All Press this button to stop all channel recording Press ESC key to enter into preview mode Press...

Страница 26: ...nding dialog box will pop up Play by Time Playback the recorded stream directly based on the time section Select Page In the file list box each page will only display 8 files If there are more than 8...

Страница 27: ...e to decrease play speed 1 2X 1 4X 1 8X and single Pause Continue Press ENTER to pause continue playback If played frame by frame Press ENTER to play one frame Copy segment EDIT Stop copy EDIT you nee...

Страница 28: ...rd 3 at a time You can click these buttons to select the play speed Click this button to pause Click this button to mute click it again to recover the sound Click this button to start copying the segm...

Страница 29: ...e A pop up dialog box will display the backup status If the backup device is not connected correctly or DVR does not detect the backup device an exception dialog box will pop up Please ask administrat...

Страница 30: ...gment You also can backup the image segments when the image is being played back The steps are 1 Enter into the playback interface playback by file or playback by time 2 Press EDIT key to start select...

Страница 31: ...software on the included CD Exit playback interface Please refer to Chapter 4 6 4 8 Shutting Down the DVR Note Do not switch off the power directly by turning off the power switch or unplugging the c...

Страница 32: ...xternal alarm sensor type View tampering alarm schedule Video lost alarm schedule Motion detection alarm schedule External alarm schedule Alarm output schedule 5 1 Administrator and Password When DVR...

Страница 33: ...QH32DVR4C User s Manual 33 Fig 5 1 Enter into user menu Move Active Frame to User icon press ENTER key to enter into User Management menu shown in fig 5 2 Fig 5 2 User management...

Страница 34: ...ssword edit box input the new password Move Active Frame to Confirm button and press ENTER if password and verified password are the same the password will be saved and take effect If password and ver...

Страница 35: ...User Management menu A total of 15 users can be added See fig 5 5 Fig 5 5 Input user name Step 3 Setup the password for new user After you add a new user the password is blank You can skip this step...

Страница 36: ...me to the Setup Privileges button and press ENTER to enter into the rights setup menu as shown in figure 5 6 Fig 5 6 Setup user rights Operational rights are divided into Local and Remote You can assi...

Страница 37: ...log on DVR Utilities Remotely upgrade firmware format the HDD reboot the DVR and shut down DVR etc Talk Client talks with DVR Alarm Remotely control DVR alarm output Video Out Remotely control DVR vi...

Страница 38: ...t name is Embedded Net DVR Move Active Frame to unit name edit box press EDIT key to enter into edit status you can modify the unit name For instructions on how to input characters please refer to Cha...

Страница 39: ...save and take effect or press Cancel to abort modification 5 4 Video Output Standard and VGA Setup Video Output Standard There is one VOUT BNC connector on the rear panel of the DVR It is used to conn...

Страница 40: ...n input digital number uppercase and lowercase characters refer to Chapter 3 4 The camera name can support 32 characters Step 3 Press ENTER key to exit edit status Move Active Frame to Confirm button...

Страница 41: ...t the modification OSD is an abbreviation for On Screen Display For our embedded DVRDVS it includes displaying system time and camera name OSD settings include System time time format time display pos...

Страница 42: ...he date Fig 5 11 Set position of Date Time 5 6 Video Parameters Setup For different cameras and different backgrounds in order to get the best video image you may need to adjust video parameters such...

Страница 43: ...nterface there is one scroll bar at the bottom you can use keys to adjust and can find the video image will be changed at the same time When you are satisfied with the real time video image press ENTE...

Страница 44: ...ss ENTER key to enter into mask area setup interface shown as fig 5 13 Fig 5 13 Mask area setup Step 4 Setup mask area In the mask area setup interface there is one small yellow panel on the upper lef...

Страница 45: ...areas Step 5 Save mask area You can repeat step 2 step 3 and step 4 to setup mask area for other cameras In Advanced setting menu press the Confirm button to save the mask area press Cancel button to...

Страница 46: ...l and High Selecting one of them will activate Area Setup and Policy configurations Step 4 View tampering area setup Move Active Frame to Area button press ENTER key to enter into area setup interface...

Страница 47: ...and return to main menu Step 9 Save all cameras If you want to setup other cameras repeat step 2 to step 8 In Image Setup menu press Confirm key to save all cameras parameters Press Cancel button or E...

Страница 48: ...se options including On Screen Warning Audible Warning Upload to Center and Trigger Alarm Output You can use and EDIT key to enable or disable them is disabled and is enabled Step 6 Save alarm setup A...

Страница 49: ...ion the DVR will not response even if there is motion detected If you select other options it will activate the Motion Area Setup button and Policy Setup button If you select low sensitivity such as 0...

Страница 50: ...r press EDIT you will find the yellow panel is turned into a black panel You can use key to enlarge or shrink the blue area Press EDIT key to clear this part of the motion area Press Enter key to save...

Страница 51: ...When a motion alarm occurs during a schedule the DVR will respond with a On Screen Warning Audible Warning Upload to Center or Trigger Alarm Output depending on your setup You can setup 4 time period...

Страница 52: ...meters of one camera to any other cameras Note Motion alarm area can not be copied If you want to disable motion alarm area and motion alarm policy you just need to set the motion alarm sensitivity to...

Страница 53: ...image every 20 seconds Audio preview If you enable audio preview when you preview single camera DVR will play the audio of that channel Preview layout setup There is a square frame divided into many w...

Страница 54: ...DVR will handle it as a Hard Disk Full exception please refer to Chapter 5 17 for exception menu Select Camera Here all channels are listed You can use keys to select one Stream Type There are two op...

Страница 55: ...bit rate The lower bit rate the longer PreRecord time is If the bit rate Max bit rate is very low and you select PreRecord Time as 5 Seconds the actual pre record time may be more than 5 seconds On t...

Страница 56: ...on the right side of All Day press ENTER or EDIT key to disable All Day option means disabled and means enabled Step 3 Setup time period and record type There are 4 time periods for one day and each t...

Страница 57: ...1 Select one alarm input Use keys to select one alarm input Step 2 Alarm type This is the sensor type You can select Normal Open or Normal Close according to the sensor type Step 3 Enter into Alarm i...

Страница 58: ...nal alarm occurs in the schedule the DVR will respond according to the handle methods Step 6 Alarm handle method You can select one or more handle methods On Screen Warning Audible Warning Upload to C...

Страница 59: ...er that has been setup already Please refer to Chapter 5 15 for sequence setup Cruise Set the flag as to enable cruise Please refer to Chapter 5 15 for cruise setup Press the Confirm button to save an...

Страница 60: ...You can set the schedule to make alarm output effective Move the Active Frame to the Schedule button on right side of Alarm Out Time press ENTER key to enter into the corresponding schedule menu as sh...

Страница 61: ...into the Exceptions menu as shown in fig 5 26 Fig 5 26 Exceptions setup Includes the following handle methods Audible Warning the DVR will beep Upload to Center Send exception information to center ho...

Страница 62: ...must not be conflict with another IP address on the router If there is a DHCP server in the network you can set the IP as 0 0 0 0 save and reboot the DVR In reboot process the DVR will search the DHC...

Страница 63: ...Full Dup IP server address If DVR uses PPPoE function it can get one dynamic IP address If you set DNS IP with one fixed Internet IP the DVR will send some information such as DVR name DVR serial numb...

Страница 64: ...run Step 5 Input PPPoE parameters Use ENTER or EDIT key to enable PPPoE function set PPPoE flag as Input PPPoE username password and verify password that ISP provided Step 6 Save parameters In the Net...

Страница 65: ...software program To access the DVR through Internet Explorer once you have set up the network settings on the DVR to match the settings of your router you need to modify your browser controls You nee...

Страница 66: ...nd select Turn Off Pop up Blocker You will also need to enable Active X controls To do so go to the Internet Explorer tool bar and select the tools option then Internet Options then Security then clic...

Страница 67: ...ow control etc These parameters must be the same as the PTZ Protocol PTZ address Each PTZ camera has a different address PTZ type DVR supports the following PTZ protocols YouLi LinLin 1016 LinLin 820...

Страница 68: ...the PTZ camera you are using supports the preset function before you setup preset Sequence setup Each sequence is made up of several cruise points Each cruise point includes one preset number dwell ti...

Страница 69: ...et numbers After you setup all preset numbers press the Return button to return to the PTZ menu In PTZ menu press Confirm button to save all parameters Delete preset number In Preset setup menu input...

Страница 70: ...e After you finish sequence setup press the Return button to return to the PTZ menu In PTZ menu press Confirm button to save the modifications Note Please make sure the PTZ camera you are using can su...

Страница 71: ...orePara Upgrade Hard Disk Stop Alarm Out Reboot Power Off View Log and System Info Enter into Utilities menu as shown in fig 6 1 Fig 6 1 Utilities 6 1 Restore Parameters Restore factory parameters for...

Страница 72: ...lect FTP mode you will enter into FTP Upgrade menu Fig 6 4 FTP IP setup Input the ftp server IP and press ENTER key DVR will connect with FTP server through the network and download the firmware file...

Страница 73: ...us Capacity Free space Stand by or not Normal status or not Format HDD Before formatting stop all recording After formatting you must reboot the DVR otherwise DVR will not work correctly 6 4 Stop Alar...

Страница 74: ...d all For operation major type there are many minor types including Power On Shut Down Abnormal Shut Panel Login Panel Logout Panel Config Panel File Play Panel Time Play Local Start Record Local Stop...

Страница 75: ...ccur Time Major Type Minor Type Panel User Net User Host Address Para Type Channel No HDD No Alarm In and Alarm Out You can press More Info button for more information also select page number to view...

Страница 76: ...ress ENTER key to start searching Step 5 After finishing search the DVR will list the matched log information Step 6 Press Return button to return to Utilities menu 6 8 System Information Press the Sy...

Страница 77: ...update old firmware the other is when the code in DVR FLASH has crashed Note Make sure you are using the correct firmware for your DVR model before you upgrade 7 1 FTP Server Setup You can download F...

Страница 78: ...ser dialog box is displayed Input user name target Click OK Fig 7 4 username 5 In the password dialog box input password target in New Password and Verify Password edit box Click OK to save and exit t...

Страница 79: ...do not need to use ftp server software Please refer to the client software user manual for detail information 2 Use FTP function of Upgrade sub menu in Utilities menu You need a host PC to run FTP ser...

Страница 80: ...to the center of the screen For SAE YAAN protocol Drag the left key Select an area to zoom in For SAE YAAN protocol Single click the left key If you selected an area for zooming in this action it will...

Страница 81: ...Select the front file Scroll wheel backward Select the next file Signal click the right key Cancel and return to the preview interface Double click the left key Play the selected file 7 User interfac...

Страница 82: ...orage capacity i m which is the storage needed by each channel unit Mbyte i m i q i h i D 2 In the formula i h Represents the recording time for each day hours i D Represents the number of days for wh...

Страница 83: ...4th cables are the anode and cathode line for receiving 7 is the shared grounding line Pin definition for Standard RS 485 serial port RJ45 plug in 2 How to Make a UTP network Connect Cable Material a...

Страница 84: ...Manual 84 The corresponding relationship of the direct cable 2 Use the following method to make the cross network cable when DVR is directly connected with client end PC The corresponding relationshi...

Страница 85: ...sistance 600 Stream type Video Video Audio Max bit rate 32Kbps 2Mbps self define HDD IDE interface 1 IDE interface support 1 IDE HDD 2000GB maximum Network interface 1 RJ45 10M 100M Self adaptive Ethe...

Страница 86: ...ernal Sync Horizontal Resolution 420 TV Lines Video Output 1 0 V p p 75 ohm S N Ratio 48 dB Gamma Characteristic 0 45 White Balance Auto Lens 2 with 6 mm 2 with 3 6 mm Minimum Illumination 0 Lux w IR...

Страница 87: ...d has problems There are no images in the monitor connected with VOUT after DVR is started 1 The cable connected with the monitor is damaged 2 Real board of DVR has problems 3 Main board of DVR has pr...

Страница 88: ...ation 2 Improper environment and conditions in on which the equipment operates e g improper power environment temperature humidity and lightening strike etc that cause equipment damage 3 Damage caused...

Страница 89: ...User s Manual 89 Appendix G Customer Information Card User s Name Mr Mrs Company Name Postal Address Postal code Phone Number E mail Model Number of Product Serial Number of Product Purchase Date Dis...

Страница 90: ...s Contact Us Q See Products 8015 E Crystal Dr Anaheim CA 92807 Website http www q see com Customer Service Phone 877 998 3440 x 538 Email cs dpsi usa com Tech Support Phone 877 998 3440 x 539 Email ts...

Отзывы: