16
17
CAMERA SETUP
1 CAMERA CONTROL
2 IMAGE SETUP
3 FOCUS NEAR LIMIT: 1M
4 ZOOM SPEED: MIDDLE
5 DZOOM:
OFF
6 PAL/NTSC
NTSC
0 EXIT
CAMERA SETUP WINDOW
Settings affecting the camera’s video image are
located in this menu.
CAMERA CONTROL
- This submenu contains
settings to maximize image quality.
CAMERA CONTROL
1 BLC:
OFF
2 HLC:
OFF
3 HLC LEVEL: 20
4 3D-DNR:
LOW
5 COLOR LEVEL: 08
6 SHARPNESS: 08
7 IMAGE FLIP: OFF
8 GAMMA:
DEFAULT
0 RETURN
IMAGE CONTROL
1 BRIGHTNESS: 10
2 AGC:
05
3 SHUTTER MODE: AUTO
4 SHUTTER:
01
5 WB MODE:
ATW
6 MWB RED GAIN: 15
7 MWB BLUE GAIN: 15
8 DAY NIGHT MODE: AUTO
0 RETURN
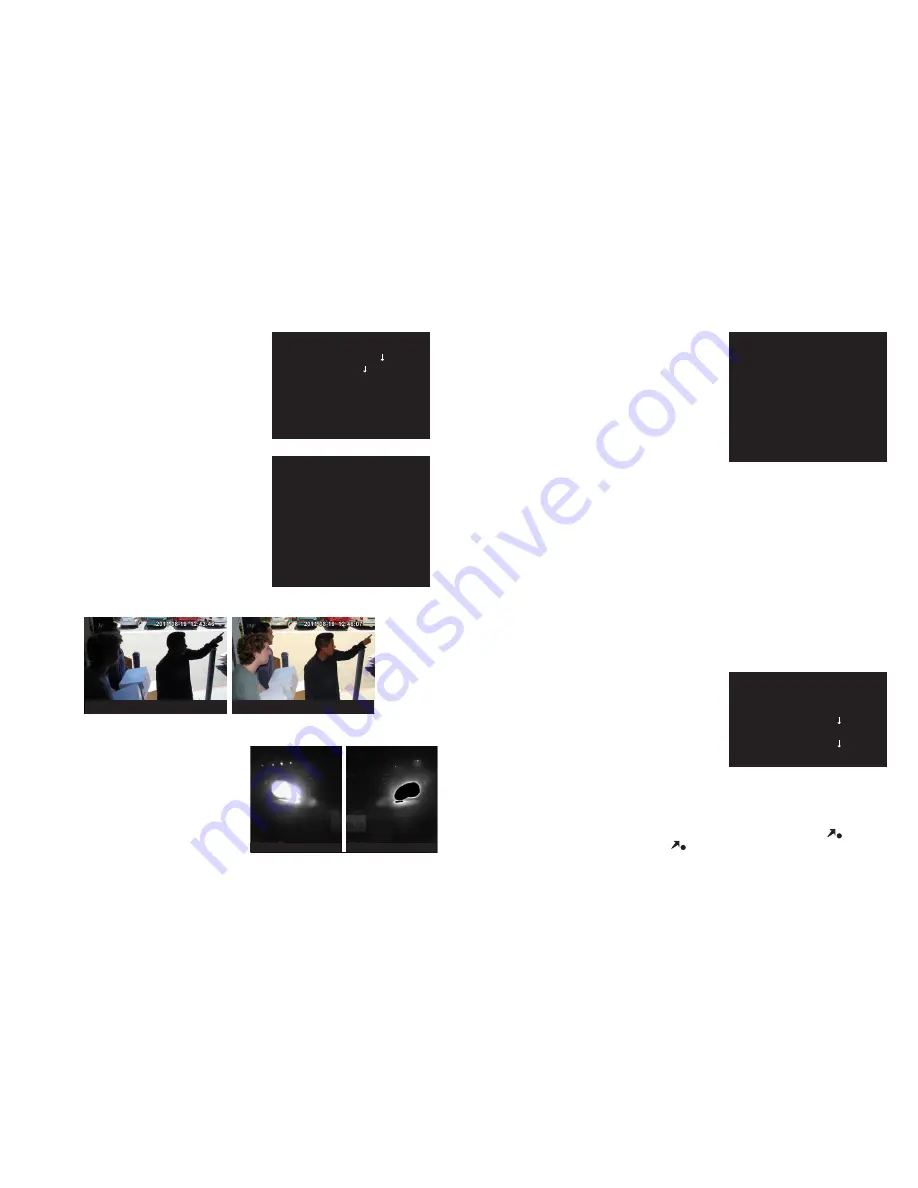
BLC
- Back Light Compensation. This can be
set either On or Off and allows the camera to
digitally adjust the image to make items in the
foreground clearer when there is a bright light
behind them.
HLC -
High Light Compensation. When this is
enabled, bright lights, such as headlights, will
be digitally blacked out in order to make other
details clearer. An example would be to see a
license plate that would normally be washed
out by the vehicle’s headlights.
HLC Level -
Adjusts the level of compensation.
Examples of BLC and HLC are below and
below right:
HLC On
HLC Off
3D-DNR
- 3D Digital Noise Reduction reduces
the graininess of images in low-light conditions.
Color Level
- Adjusts the on-screen color
levels. Settings range from 1 to 14.
Sharpness
- Adjusts image definition. Settings
range from 1 to 20.
Image Flip
- The camera’s image can be
flipped horizontally, vertically or both.
Gamma
- Adjusts the contrast of the video.
IMAGE CONTROL
- This submenu contains more
controls for the camera’s video.
Brightness
- Adjust the brightness from dark
(00) to light (20).
AGC
- Automatic Gain Control “amplifies” the
image for more detail, but it may be grainy.
Shutter Mode
- Manual or Automatic
Shutter
- Only active when the shutter is in
manual mode. The lower the value, the brighter
the image.
WB Mode
- White Balance allows you to adjust to the specific light conditions. Choose from
Auto, Manual and ATW (Automatic Tracking White) where the camera attempts to keep a “neu-
tral” white.
MWB Red Gain/MWB Blue Gain
- These two settings are only available when the white bal-
ance mode is set to Manual and they affect the red and blue color levels.
Day/Night Mode
- The camera will normally adjust between day (color) and night (black and
white) modes automatically based on light levels. However, you can set the camera to operate
permanently in one mode or the other.
Focus Near Limit
- This allows you to set the closest distance that the camera can focus on. This
is useful if there is some item, like part of the building, that the camera will automatically focus upon
at the expense of items in the distance.
Zoom Speed
- Adjusts the zoom speed.
Digital Zoom
- Allows the camera to electronically zoom beyond the camera’s 20x optical limit up
to 240x. Objects in digitally zoomed video will not be as clear as those in optical zoom.
Video Format
- NTSC (Americas) or PAL (Europe, Asia, Brazil, Argentina and Uruguay)
PRESET SETUP
1 TITLE DISP: OFF
2 CUR PRESET NO: 001
3 PRESET SETTING
4 DEL CUR PRESET
5 DEL ALL PRESET
0 EXIT
PRESET SETUP WINDOW
If you wish to program your camera’s movements
in the camera rather than the DVR, this menu lets
you set up the preset points.
Title Display
- You can name preset points if
desired in the Preset Setting, (option 3). This
option lets you display the name on screen.
CREATING A PRESET POINT
STEP 1.
Use the DVR controls to position the camera
STEP 2.
Return to the camera’s menu by selecting
Preset 95
STEP 3.
Set the number of the current preset point (option 2)
STEP 4.
Enter the
Preset Setting
submenu (option 3)
STEP 5.
Enter a title, if desired. Select
Preset 001
from the DVR’s pull down and click
to save this
point. Or, select
Preset 002
and click
to exit out of the menu without saving changes.
BLC Off
BLC On


