Fountain Classic Owner’s Manual
Page 9
6.
Turn the saddle tapping valve handle clockwise until you feel it is firmly seated.
Note:
Note:
Note:
Note:
Note: You have now pierced the copper tube and the valve is closed.
7.
Turn the handle counterclockwise to open the valve. Turn the household water
supply ON and check all connections for leaks.
8.
Open the saddle tapping valve completely. Check the line for leaks. Tighten where
required.
Step 3
Step 3
Step 3
Step 3
Step 3 Plug the unit into an appropriate power plug:
Plug the unit into an appropriate power plug:
Plug the unit into an appropriate power plug:
Plug the unit into an appropriate power plug:
Plug the unit into an appropriate power plug:
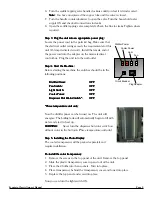
Locate the power cord in the parts kit bag. Make sure that
the electrical outlet rating exceeds the requirements for this
unit (15 Amp dedicated circuit). Install the female end of
the power cord into the adapter on the main electrical
control box. Plug the unit into the wall outlet.
Step 4
Step 4
Step 4
Step 4
Step 4 Start the Machine:
Start the Machine:
Start the Machine:
Start the Machine:
Start the Machine:
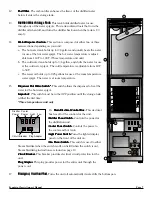
Before starting the machine the switches should be in the
following positions:
Distiller Power:
Distiller Power:
Distiller Power:
Distiller Power:
Distiller Power:
OFF
OFF
OFF
OFF
OFF
Fan Switch:
Fan Switch:
Fan Switch:
Fan Switch:
Fan Switch:
OFF
OFF
OFF
OFF
OFF
Light Switch:
Light Switch:
Light Switch:
Light Switch:
Light Switch:
OFF
OFF
OFF
OFF
OFF
Cooler Power:
Cooler Power:
Cooler Power:
Cooler Power:
Cooler Power:
OFF
OFF
OFF
OFF
OFF
Dispenser Hot Water Switch*:
Dispenser Hot Water Switch*:
Dispenser Hot Water Switch*:
Dispenser Hot Water Switch*:
Dispenser Hot Water Switch*:
OFF
OFF
OFF
OFF
OFF
*Three temperature unit only
*Three temperature unit only
*Three temperature unit only
*Three temperature unit only
*Three temperature unit only
Now the distiller power can be turned on. The unit will
energize. The boiling tank will automatically begin to fill with
water and start to heat up.
WARNING:
WARNING:
WARNING:
WARNING:
WARNING:
Never turn the dispenser hot water switch on
without water in the hot tank. (Three temperature unit only)
Step 5
Step 5
Step 5
Step 5
Step 5 Installing the Photo Display:
Installing the Photo Display:
Installing the Photo Display:
Installing the Photo Display:
Installing the Photo Display:
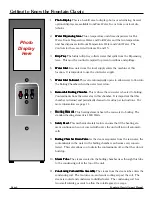
The cooler transparency will be packed separately and
require installation.
To install the color transparency:
To install the color transparency:
To install the color transparency:
To install the color transparency:
To install the color transparency:
1.
Remove the screws in the top panel of the unit. Remove the top panel.
2.
Slide the plastic transparency cover up and out of the unit.
3.
Place the 2 bulbs into their sockets. Turn into place.
4.
Place transparency behind the transparency cover and lower into place.
5.
Replace the top panel and screw into place.
Now you can turn the light switch ON.
Circuit Breaker
Distiller Power
Cooler Power
Light
Fan
Plug Adapter
Содержание Fountain Classic
Страница 2: ...Page 2 Fountain Classic Owner s Manual...
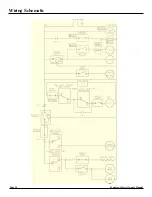
Страница 14: ...Page 14 Fountain Classic Owner s Manual Wiring Schematic...
Страница 15: ...Fountain Classic Owner s Manual Page 15 Exploded Drawing 48998 Two Temperature Unit...
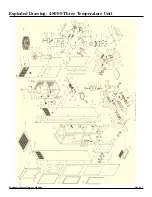
Страница 17: ...Fountain Classic Owner s Manual Page 17 Exploded Drawing 48999 Three Temperature Unit...
Страница 19: ......


