Page 8
Fountain Classic Owner’s Manual
Installation
CAUTION:
CAUTION:
CAUTION:
CAUTION:
CAUTION:
DO NOT use a hot water line for the raw water supply.
DO NOT use a hot water line for the raw water supply.
DO NOT use a hot water line for the raw water supply.
DO NOT use a hot water line for the raw water supply.
DO NOT use a hot water line for the raw water supply.
CAUTION:
CAUTION:
CAUTION:
CAUTION:
CAUTION:
DO NOT turn the saddle tapping valve handle before or during installa-
DO NOT turn the saddle tapping valve handle before or during installa-
DO NOT turn the saddle tapping valve handle before or during installa-
DO NOT turn the saddle tapping valve handle before or during installa-
DO NOT turn the saddle tapping valve handle before or during installa-
tion. Be sure the piercing lance does not protrude beyond the rubber
tion. Be sure the piercing lance does not protrude beyond the rubber
tion. Be sure the piercing lance does not protrude beyond the rubber
tion. Be sure the piercing lance does not protrude beyond the rubber
tion. Be sure the piercing lance does not protrude beyond the rubber
gasket. Failure to do this may result in damage to the piercing needle.
gasket. Failure to do this may result in damage to the piercing needle.
gasket. Failure to do this may result in damage to the piercing needle.
gasket. Failure to do this may result in damage to the piercing needle.
gasket. Failure to do this may result in damage to the piercing needle.
NOTE
NOTE
NOTE
NOTE
NOTE:::::
The use of softened water for the raw water supply is recommended to
minimize scale buildup in the boiling tank and drain valve.
NOTE
NOTE
NOTE
NOTE
NOTE:::::
The Fountain Classic comes standard with a saddle-tapping valve. In
some areas a saddle-tapping valve may not be permitted. In such in-
stances, contact your authorized Pure Water Distributor for other water
line connection options.
NOTE
NOTE
NOTE
NOTE
NOTE:::::
Do not plug the unit into the power source until instructed to do so.
The installation of the Fountain Classic is very simple. The steps are as follows:
1.
Position the unit in a well ventilated area.
2.
Connect the unit to the water supply so that it can operate automatically.
3.
Plug the unit into an appropriate power plug.
4.
Start the machine.
5.
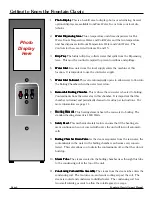
Install the Photo Display
6.
Steam Sterilize the machine.
7.
Start Distillation.
8.
Rinse the Post Filter.
9.
Turn the dispensing unit on.
Step 1
Step 1
Step 1
Step 1
Step 1 Positioning the unit:
Positioning the unit:
Positioning the unit:
Positioning the unit:
Positioning the unit:
The unit should be positioned on a level floor that has an appropriate electrical plug
and water supply available. If the ground is not completely level, the leveling feet on the
bottom of the unit can be used to adjust the machine.
Step 2
Step 2
Step 2
Step 2
Step 2 Connecting the water supply:
Connecting the water supply:
Connecting the water supply:
Connecting the water supply:
Connecting the water supply:
This unit comes complete with a saddle-tapping valve to connect the distiller water inlet
directly to an existing waterline.
Connecting the Saddle Tapping Valve:
Connecting the Saddle Tapping Valve:
Connecting the Saddle Tapping Valve:
Connecting the Saddle Tapping Valve:
Connecting the Saddle Tapping Valve:
1.
Turn the raw water supply off.
2.
Install the saddle tapping valve on the COLD
water copper tubing so the outlet is in a conve-
nient direction. See figure.
3.
Tighten screws evenly. Brackets should be
parallel. Tighten firmly. Do not over tighten.
4.
Connect tubing to the saddle tapping valve
outlet.
5.
Plug the other end of the 1/4” tubing into the Raw Water Inlet on the back of the
Fountain Classic.
Saddle Tapping Valve
Note:
Note:
Note:
Note:
Note:
The Fountain
Classic must be posi-
tioned on a level surface.
Allow at least 2” of
clearance behind unit for
proper air circulation.
Содержание Fountain Classic
Страница 2: ...Page 2 Fountain Classic Owner s Manual...
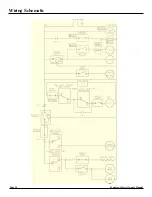
Страница 14: ...Page 14 Fountain Classic Owner s Manual Wiring Schematic...
Страница 15: ...Fountain Classic Owner s Manual Page 15 Exploded Drawing 48998 Two Temperature Unit...
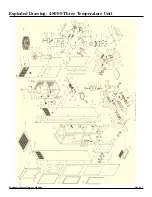
Страница 17: ...Fountain Classic Owner s Manual Page 17 Exploded Drawing 48999 Three Temperature Unit...
Страница 19: ......


