6
7
Descaling
•
Depending on usage and water type, cleaning to remove scale
may be required weekly or every other week to optimize the
product’s performance.
•
If you live in a hard water area, we recommend distilled water
for your humidifier to help reduce the precipitation of minerals
or white dust.
•
Do not clean the unit or water tank with harsh detergents or
cleaning chemicals. A decalcification cartridge or humidifier
cleaner capsule may be used to keep the water tank free of
hard mineral deposits.
Ultrasonic Disk
1. Unplug the humidifier.
2. Remove the tank and empty all water from the base and tank.
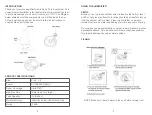
3. Locate the ultrasonic disk using the diagram on page 6.
4. Use the enclosed cleaning brush to gently clean and remove
build up and deposits.
NOTE:
Do not scrub or scrape the ultrasonic disk.
FUNCTIONS & FEATURES
Power Button
The power button on the humidifier controls both the high and
low mist settings as well as the optional night light in the following
manner:
•
1st press: low setting, light off
•
2nd press: low setting, light on
•
3rd press: high setting, light on
•
4th press: high setting, light off
The blue light on the power button displays when the unit is working
correctly. After about 10 seconds at the desired setting, the blue light
in the power button turns off automatically. When the unit runs out
of water, the light will turn red, and the unit will shut off. Simply add
more water to continue to use.
Cleaning Brush
The humidifier includes a cleaning brush that should be used to keep
the ultrasonic disk free from dust and debris.
CLEANING
Always unplug the humidifier before servicing it in any way.
General Cleaning
•
Inside the base of the unit.
Pour excess water out of the unit.
Wash out the unit with fresh water using the cleaning brush and
a soft cloth as needed. Do not submerge the base of the unit in
water or allow water to enter inside the dry air exhaust port of
the unit.
•
Water tank.
Empty water tank. Remove mist nozzle and clean
the mist tube with fresh water and a bottle cleaning brush (not
included).
•
Outer surface of the unit.
Wipe the surface of the unit with
a soft, damp cloth if needed. If you notice an accumulation of
water during usage, reduce humidity and dry outer surface with
a cloth.
*C
l e a n
t h e
d i s k
w i t h
t h e
b r u s h
o n l y
. n
o
o t h e r
C l e a n i n g
t o o l
should
be
used
.
8
9

