Pulsar PTG1121HD Скачать руководство пользователя страница 17

Care, Cleaning and Storage

Protect wheels and axles from rust by removing the lockpin 
and sliding the wheel off the hub.

Coat the axles lightly with axle grease.

Slide wheel back on hub and insert lock pin.

Drain fuel system completely or add fuel stabilizer to prevent 
fuel from gumming up during extended storage period.

While engine is still warm, drain the oil from the engine. 
Refill with fresh oil of the recommended grade.

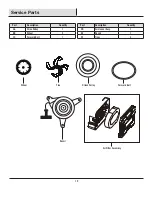
Clean external surfaces, engine and cooling fan.

Remove spark plug, pour one ounce of SAE 30 oil into spark
plug hole.

Plug hole and pull starter cord slowly to distribute oil evenly
in cylinder head area.

Reinstall spark plug.

Transport unit to a suitable storage location. If you have
chosen to use a fuel stabilizer and have not drained the fuel 
system, follow all safety instructions storage precautions in
this manual to prevent the possibility of fire from the ignition 
of gasoline fumes. Remember, gasoline fumes can travel to 
distant sources of ignition and ignite, causing risk of
explosion and fire.

If there is any possibility of unauthorized use or tampering,
remove the spark plug and store it in a safe place before
storing the rototiller unit.

Be sure to plug the spark plug hole to prevent foreign
material from entering.

17

Follow the steps below to prepare your tiller for storage.

WARNING:

 Do not store tiller in an unvetilated area where 

fuel fumes may reach flame, sparks, pilot lights or an ignited
object. Drain fuel outdoors away from any ignition sources.
Use only approved fuel containers.

Содержание PTG1121HD

Страница 1: ...arning The Engine Exhaust from this product contains chemicals known to the State of California to cause cancer birth defects or other reproductive harm support pulsar products com 866 591 8921 STOP D...

Страница 2: ...This machine is a precision piece of power equipment Therefore exercise extreme caution at all times Regularly inspect the tiller Make sure parts are not bent damaged or loose Use this equipment for...

Страница 3: ...lling Always be sure of your footing keep a firm hold on the handle and walk never run Never operate the tiller at high transport speeds on slippery surfaces If the equipment should start to vibrate a...

Страница 4: ...ners on the ground away from your vehicle before filling CHILDREN SAFETY Remove gas powered equipment from the truck or trailer and refuel it on the ground If this is not possible then refuel such equ...

Страница 5: ...thrown For safety protection frequently check components and replace immediately with original equipment manufacturer s O E M parts only listed in this manual Use of parts which do not meet the origi...

Страница 6: ...Quantity A A Tiller Body Upper Handle 1 B Wheel 2 Part Description Quantity E Tines D Tiller Protective Shield 1 2 C Depth Regulator 1 F Bumper 1 G Use And Care Guide 1 Part Description Quantity AA B...

Страница 7: ...t to secure See Figure 1 2 Figure 1 2 3 1 Assembling the Upper Handle 2 Assembling the Depth Regulator 4 Assembling the Tines First attach the depth regulator to the drag bar holder choose proper heig...

Страница 8: ...tive shield end caps to the main protective shield and secures with M6x16 bolts and M6 nuts See Figure 1 5 5 WARNING Make sure the tiller protective shield is installed in place before starting the ma...

Страница 9: ...ified for service SF SG SH SJ or higher Do not use special additives Outdoor temperatures determine the proper oil viscosity for the engine Use the chart to select the best viscosity for the outdoor t...

Страница 10: ...the tillers action to start the self propell and tine rotation ON OFF SWITCH The On Off switch is needed to start and stop the tiller 2 DEPTH REGULATOR TINES In hard compacted soil it helps restrain t...

Страница 11: ...tion Press the primer bulb 3 times Pull the starter grip lightly until resistance is felt then pull rapidly RESTARTING A WARM ENGINE Put the engine switch located on the back of the engine on the I po...

Страница 12: ...e of muffler and nearby areas may exceed 150 F Avoid these areas Do not move choke control to stop engine backfire or engine damage may occur To stop wheels and tines at any time release drive safety...

Страница 13: ...ollably lower the depth regulator by placing the cleves pin in a higher hole This will allow for shallower tilling Hold firmly to the handlebars to control sudden lurches If weeds tall grasses vines o...

Страница 14: ...und gasoline Use only a nonflammable solvent not gasoline to clean parts Keep cigarettes sparks and flames away from all fuel related parts Lubricate the wheels at least once a season with light oil o...

Страница 15: ...the life of your tiller Service more frequently when used in dusty areas MAINTENANCE SCHEDULE 15 Before Each Use Maintenance Operation Belt Tension Engine Oil Air Filter Tiller Transmission Oil Tine S...

Страница 16: ...lubrication of moving mechanical parts is critical for proper care and maintenance Oil the moving parts shown at 10 hour intervals using a 30 weight oil CLEAN TINE AXLE SHAFT Turn off engine Engine mu...

Страница 17: ...to a suitable storage location If you have chosen to use a fuel stabilizer and have not drained the fuel system follow all safety instructions storage precautions in this manual to prevent the possib...

Страница 18: ...ngine Oil Engine oil is not at proper level The spark plug is fouled The air filter is clogged The fuel is contaminated The carburetor is out of adjustment Excessive vibration and noise Tighten all fa...

Страница 19: ...Part Description Quantity AA Drive Pulley 1 BB Wheel 2 CC Forward Belt 1 Part Description Quantity DD Air cleaner Assy 1 EE Recoil 1 FF Tines 4 Air Filter Assembly Recoil Forward Belt Driven Pulley T...

Отзывы: