background image


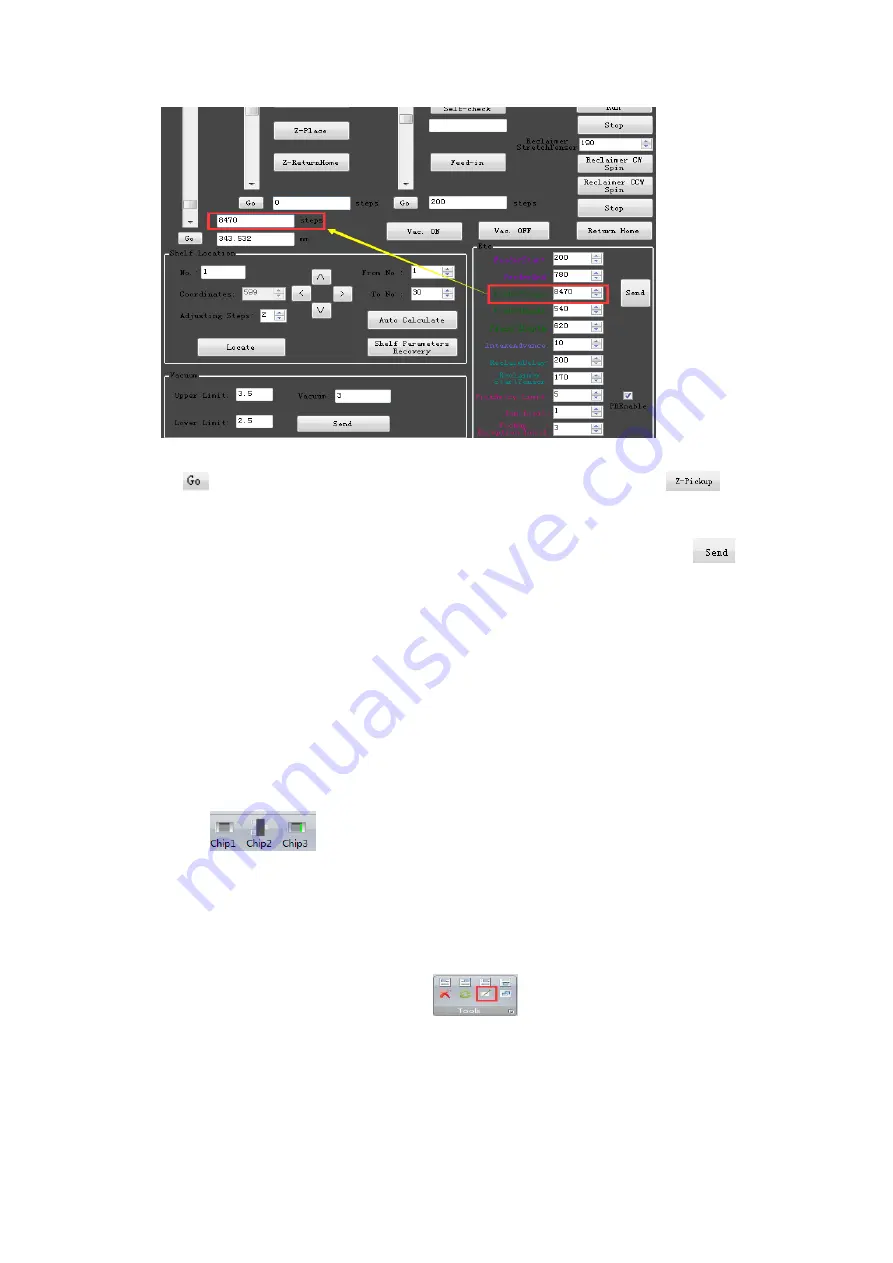
Click 

,  the  nuzzle  will  be  moved  over  the  component.  Click 

,  the 

nuzzle    lands  on  the  component,  check  whether  the  nuzzle  locates  in  the 

middle of component. Copy the data to entry the pick Y steps., click 

  to 

save data. 
 

Operation 3 

— Create placement data document 

  (Create coordinate ) 

1. Basic Operation 

    a. components edit 

1). Place component   

Click 

  to  choose  a  component  type,  click  on  the  left  side  of 

the mouse for placing component in the plot area. 

Tips: press the space bar to change the direction of rotation before placing; 

press F2 bar to change 90 degree of rotation. Click on the right side of mouse 
for quitting placing components state. 

2) Copy and paste 

Select the copy components, click

, select any component as the 

aim point, then move mouse to the paste point, click mouse to finish. 
 
b. Set mark point 
Purpose: find the corresponding coordinate, which corresponds to one point of 
PCB in the plate. 

Содержание MT-60

Страница 1: ...User Manual MT 60 User Manual Auto Chip Mounter Tai an Puhui Electric Technology CO LTD Http www tech168 cn...

Страница 2: ...and electrical source connected with the machine to normal 3 Security considerations a Before moving to the machine shut off the power disconnect cables b Handling personnel pay attention to personal...

Страница 3: ...367mm Weight 110Kg Fault detection Leak detection Congestion detection Pressure detection Machine Appearance Suction Mechanism Pushing Mechanism Spindle motor S Control cabinet Emergency stop switch...

Страница 4: ...he Reed for press the feed Vacuum suction nozzle solenoid valve Take up gear box Take up motor C Pushing motor CAM mechanism Pushing feed motor T Pushing to adjust seat Pushing feed adjustment bolts L...

Страница 5: ...ital axis 5The bearing of S axis 6The bearing pedestal of S axis 7The casing of S axis 8The slab of S axis 9Synchronous belt 10Synchronous belt clamp mechanism Suction Mechanism 1Absorb feed skeleton...

Страница 6: ...X 2 Circuit board positioning bracket 3The pallet track bearing 4The pallet slider 5Pallet orbit X axis 6The limit switch for X axis 7Synchronous belt for X axis 8Synchronous belt clamp mechanism 9 S...

Страница 7: ...curity essentials 1Don t hinder the moving parts when the machine is moving 2Don t push the moving parts when the machine stop 3Make sure that the terminal connection is good 4After power off please a...

Страница 8: ...Software panel The mouse pointer move up Continue The mouse pointer move up Pause Confirm The tray in and out Return Main menu tab Element list Toolbar Plot area Status bar...

Страница 9: ...Unit manager panel Parameter Interface System Parameters Setting Interface Backup recovery zone Shelf parameter Shelf landing Shelf location Other parameter adjustment...

Страница 10: ...ameter setting dialog box click serial port you will see the current name of the serial port 3 Select the serial port which match with RS232 wire 4 Click OK you will see the notice information in the...

Страница 11: ...rs Feeders NO 1 10 suit for diode triode with plastic feeders 31 34 suit for 12mm components 35 36 suit for 16mm components The others suit for 8mm components 2 entryformation of feeders Click main me...

Страница 12: ...and check whether the nuzzle locates in the middle of component If not click and then click click again the nuzzle wiil move the new coordinate check again to confirm the position Click after adjuste...

Страница 13: ...a component type click on the left side of the mouse for placing component in the plot area Tips press the space bar to change the direction of rotation before placing press F2 bar to change 90 degre...

Страница 14: ...e nuzzle rises 4 Select a component as aim component move mouse to make nozzle land in the center of aim component Press Enter bar the mouse pointer changes blue 5 Press ESC bar to quit Mark state c A...

Страница 15: ...ve to the mark point by align aim Operation 5 Entry information of component 1 Basic operation a edit a single component In the edit file tab double click the component to bring up a formula bar of co...

Страница 16: ...2 After optimizing click main menu save the placement document is saved on computer 3 click main menu transform select the block number to save in the machine...

Страница 17: ...ning how to operate Unit Manager 1 Shelf Location Select Shelf click locate click Z pickup Z ReturnHome see the nozzle position on chip adjust coordinates click locate repeat until the nozzle is in th...

Страница 18: ...erve add reduce the step numbers make sure the nozzle in the centre of chip Select Shelf click locate click Feed in click Reclaimer CW Spin then Stop copy pick ysteps here then click go click Z pickup...

Страница 19: ...ll continue to pick same components from feeders in reserve Production Pick and Place Turn on the power Press to Offline operation press select placement file press select file press press check if no...

Страница 20: ...o continue 8mm 12mm 16mm Multi place 1 There are 2 models to mounting They are multi and single to place In the multi model It can be mounted 8 12 16mm once not need to change nuzzle In the single mod...

Страница 21: ...2 Click File CAM manager Next choose Pick Place then click Next Next choose CSV or Text then choose Next Choose Metric and then click Next Finish 3 Click Tools Preferences choose output path then clic...

Страница 22: ...pop up dialog 2 Click choose P P file to open 3 choose output software model choose DXP generally 4 Click 5 For polarized components 360 replace with 0 For unpolarized components 180 replace with 0 27...

Страница 23: ......

Отзывы: