28
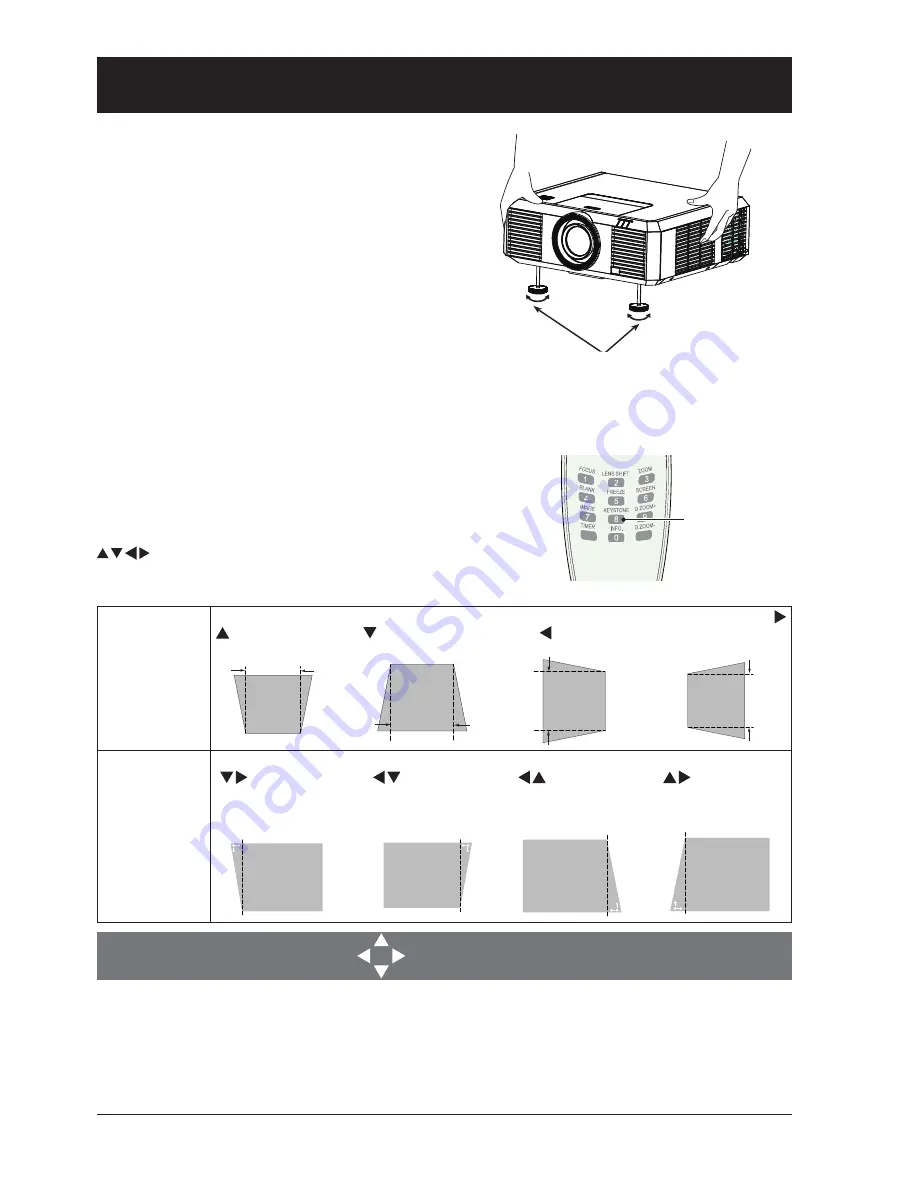
Adjustment pad
Keystone adjustment
Adjustable
pad
You may use the adjustment leg to raise your pro-
jector up to 5.0 degree.
Turn the pad to tilt your projector to desired height.
To raise your projector, turn both pads clockwise.
To lower down your projector or close the pad, turn
both pads counterclockwise.
You may use the auto setup function to adjust your
projector’s keystone distortion or do this with the
remote controller or OSD menu manually.
You may adjust keystone distortion of image in your pro-
jector with the H/V and Corner keystone adjustment.
Follow steps below to adjust keystone distortion of pro-
jected image manually.
Press the KEYSTONE key on your remote controller. The
keystone adjustment dialog box displays, press arrow key
to adjust keystone distortion. You may save your
settings for keystone adjustment.
H/V keystone
adjustment
Press arrow key
to narrow upper
part of the image
Press arrow key
to narrow lower
part of the image
Press arrow
key to reduce
height to the left.
Press arrow key
to reduce height
to the right.
Corner key-
stone adjust-
ment
Press arrow key
to adjust
keystone distortion
at the upper left
corner
Press arrow key
to adjust key-
stone distortion
at the upper right
corner
Press arrow key
to adjust
keystone distor-
tion at the lower
right corner
Press arrow key
to adjust
keystone distor-
tion at the lower
left corner
Keystone adjustment
●
The arrow key looks white when there is no keystone adjustment in existence.
●
The arrow key indicating the adjustment direction turns red.
●
The arrow key disappears when the maximum adjustment limit reaches.
●
The keystone adjustment will be canceled if you press the keystone adjustment key when it is
displaying.
●
The adjustable range is subject to source of signal input.
Keystone
adjustment
key
Basic operation


