


NAS System
User’s Manual
17
2.5 Installing Hard Drives
This section describes the physical locations of the hard drives supported by the
NAS system and give instructions on installing a hard drive. The system supports
hot-swapping allowing you to install or replace a hard drive while the NAS system
is running.
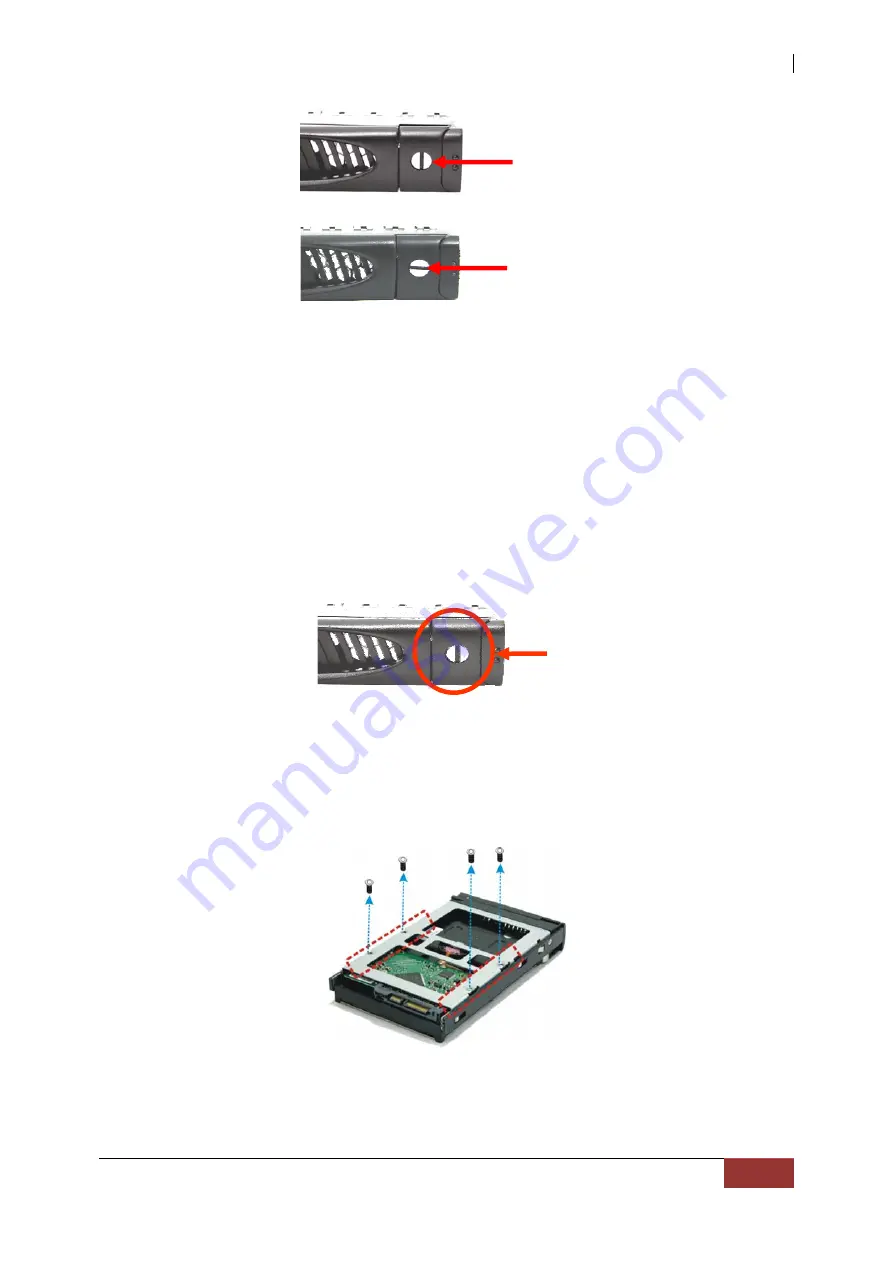
a.
To remove a drive tray, make sure it is in unlocked position. Then press the
carrier open button. The Drive Carrier handle will flip open.
c. Pull out an empty disk tray. Pull the handle outwards to remove the carrier from
the enclosure.
d. Place the hard drive in the disk tray. Make sure the holes of the disk tray align
with the holes of the hard drive.
e. Install the mounting screws on the bottom part to secure the drive in the disk
tray.
f. Slide the tray into a slot.
g.
Close the handle until you hear the latch click into place.
Carrier
Open
Button
Drive Carrier
is locked
Drive Carrier is
Unlocked


