background image


  PRONAR Sp. z o.o. 

17-210 NAREW, UL. MICKIEWICZA 101A, PODLASKIE PROVINCE 


phone: 

+48 085 681 63 29 

+48 085 681 64 29 


+48 085 681 63 81 

+48 085 681 63 82 


fax: 

+48 085 681 63 83 

+48 085 682 71 10 

www.pronar.pl 

OPERATOR`S MANUAL 

SNOW PLOUGH  

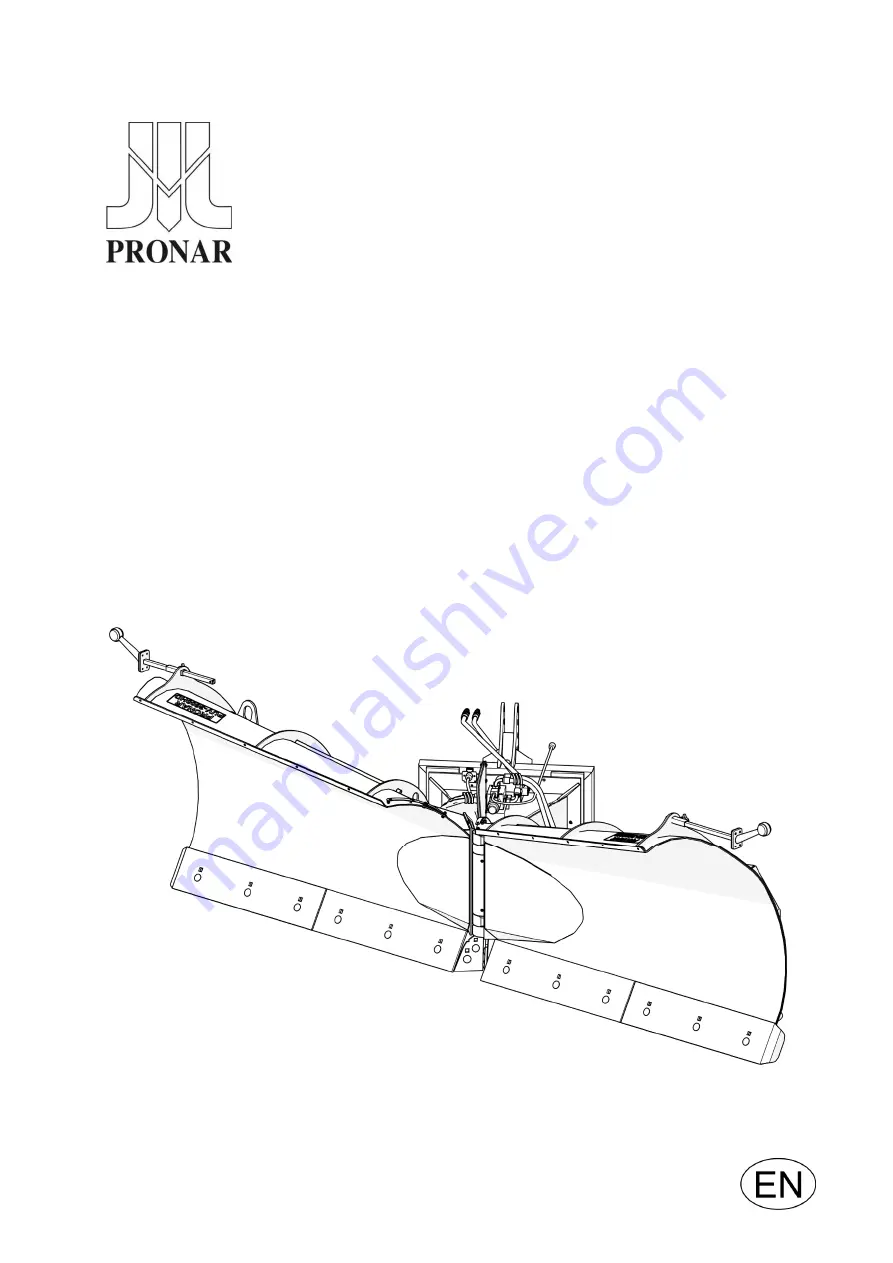
PRONAR PUV-3600HD 
PRONAR PUV-4000HD 

TRANSLATION OF THE ORIGINAL COPY OF THE MANUAL 


EDITION 2A-09-2017 

PUBLICATION NO 517N-00000000-UM 

Содержание PUV-3600HD

Страница 1: ...85 681 63 29 48 085 681 64 29 48 085 681 63 81 48 085 681 63 82 fax 48 085 681 63 83 48 085 682 71 10 www pronar pl OPERATOR S MANUAL SNOW PLOUGH PRONAR PUV 3600HD PRONAR PUV 4000HD TRANSLATION OF THE ORIGINAL COPY OF THE MANUAL EDITION 2A 09 2017 PUBLICATION NO 517N 00000000 UM ...

Страница 2: ......

Страница 3: ...SNOW PLOUGH PRONAR PUV 3600HD PRONAR PUV 4000HD MACHINE IDENTIFICATION TYPE SERIAL NUMBER ...

Страница 4: ...ation Before using the machine the user must carefully read this Operator s Manual and observe all recommendations This guarantees safe operation and ensures failure free work of the machine The machine is designed to meet obligatory standards documents and legal regulations currently in force The manual describes the basic safety rules and operation of PUV 3600HD PUV 4000HD snow plough If the inf...

Страница 5: ... and also preceded by the word ATTENTION Failure to observe the instructions may lead to damage to the machine as a result of improper operation adjustment or use In order to focus the user s attention on the need to perform maintenance the relevant section of the Operator s Manual is marked with the pictogram Additional tips and advice for machine operation are marked with the sign and also prece...

Страница 6: ......

Страница 7: ...VICE 2 1 2 1 BASIC SAFETY RULES 2 2 2 1 1 USE OF MACHINE 2 2 2 1 2 HITCHING AND UNHITCHING THE MACHINE 2 2 2 1 3 HYDRAULIC SYSTEM 2 3 2 1 4 TRANSPORTING THE MACHINE 2 4 2 1 5 MAINTENANCE 2 4 2 1 6 SNOW PLOUGH OPERATION 2 6 2 2 RESIDUAL RISK 2 6 2 3 INFORMATION AND WARNING DECALS 2 7 3 DESIGN AND OPERATION 3 1 3 1 TECHNICAL SPECIFICATION 3 2 3 2 GENERAL DESIGN 3 4 3 3 HYDRAULIC SYSTEM 3 5 3 4 ELECT...

Страница 8: ...BODY 4 10 4 4 2 ADJUSTING THE SNOW PLOUGH WORKING POSITIONS 4 11 4 4 3 SETTING WORKING HEIGHT 4 14 4 5 DRIVING ON PUBLIC ROADS 4 16 4 6 UNHITCHING THE MACHINE FROM CARRYING VEHICLE 4 17 5 MAINTENANCE 5 1 5 1 CHECKING AND REPLACEMENT OF COLLECTING BLADES 5 2 5 2 REPLACEMENT OF FENDERS 5 13 5 3 SLIDE REPLACEMENT 5 14 5 4 ADJUSTMENT OF COLLECTING BLADE SPRINGS 5 15 5 5 HYDRAULIC SYSTEM MAINTENANCE 5 ...

Страница 9: ...SECTION 1 BASIC INFORMATION ...

Страница 10: ...r D year of manufacture E machine tare weight kg F Quality Control stamp G Unfilled box or extension of name box A The snow plough is marked with the data plate located on the left snow plough wing When buying the machine check that the serial numbers on the machine agree with the number written in the WARRANTY BOOK in the sales documents and in the OPERATOR S MANUAL ...

Страница 11: ...t loaders and other slow moving vehicles that meet the requirements set out in Table 1 1 Using it as intended also involves all actions connected with the safe and proper operation and maintenance of the machine Due to the above the user is obliged to carefully read the OPERATOR S MANUAL and comply with its recommendations understand the machine s operating principle and how to operate it safely a...

Страница 12: ...ne hydraulic section located on the front of the carrying vehicle depending on the snow plough version Electrical system Solenoid supply cigarette lighter socket in the operator cab Clearance lamps 3 pin or 7 pin socket option at the front of the carrying vehicle Electrical system voltage V 12 or 24 depending on the snow plough version Other requirements Power range for PUV 3600HD for PUV 4000HD h...

Страница 13: ...or s Manual Warranty Book Equipment versions rubber snow plough blades vertical with or without fenders steel snow plough blades set at the angle of 60 to the ground with or without fenders 600HB steel snow plough blades set at the angle of 60 to the ground with or without fenders vertical steel snow plough blades set at the angle of 90 to the ground with or without fenders perforated steel snow p...

Страница 14: ...arew guarantees the reliable operation of the machine when it is used according to its intended purpose as described in the OPERATOR S MANUAL Defects discovered during the warranty period will be removed by the Warranty Service The repair period is specified in the WARRANTY BOOK The warranty does not cover those parts and sub assemblies of the machine which are subject to wear in normal usage cond...

Страница 15: ...he written consent of the Manufacturer is forbidden In particular do NOT weld drill holes in cut or heat the main structural elements which have a direct impact on the machine operation safety 1 5 TRANSPORT The machine is prepared for sale completely assembled and does not require packing Packing is only required for the machine operator s manual and electrical system components Delivery is either...

Страница 16: ...should take particular care while transporting the machine This is due to the vehicle s centre of gravity shifting upwards when loaded with the machine FIGURE 1 2 Positioning of transport lugs The machine should be attached to lifting equipment in places specially designed for this purpose i e by the transport lugs on the reinforcements of the right wing and left wing FIGURE 1 2 Suspension points ...

Страница 17: ...ulic and electrical system components and fragile elements of the machine FIGURE 1 3 Centre of gravity The centre of gravity is specified for the snow plough equipped with slides and category II three point linkage with the mouldboards set straight ATTENTION Centre of gravity depending on the snow plough model and version with slides or wheels rubber or metal strips hydraulic system with shock abs...

Страница 18: ...from heat sources flammable materials and food Oil which has been used up or is unsuitable for further use owing to loss of its properties should be stored in its original packaging in the conditions described above 1 7 WITHDRAWAL FROM USE In the event of decision by the user to withdraw the machine from use comply with the regulations in force in the given country concerning withdrawal from use a...

Страница 19: ...SECTION 2 SAFETY ADVICE ...

Страница 20: ...n operating this machine and follow all relevant safety instructions The machine must never be used by persons who are not authorised to drive carrying vehicle including children and people under the influence of alcohol or other drugs The machine must not be used for purposes other than those for which it is intended Anyone who uses the machine other than the way intended takes full responsibilit...

Страница 21: ... ensure that it is possible to connect it again The mouldboards should be folded to the rear 2 1 3 HYDRAULIC SYSTEM The hydraulic system is under high pressure when operating Regularly check the technical condition of the connections and the hydraulic conduits There must be no oil leaks In the event of the hydraulic system malfunction discontinue using the machine until the malfunction is correcte...

Страница 22: ...ne is used Do not exceed the permitted speed arising from road conditions and design limitations Adjust travel speed to the prevailing road conditions and other limitations arising from road traffic regulations limits Do NOT leave the machine raised and unsecured while the carrying vehicle is parked When parked the machine should be lowered Do NOT ride on the machine or transport any materials on ...

Страница 23: ...rsons do not have access to the tractor cab Servicing and repair work should be carried out in line with the general principles of workplace health and safety In the event of injury the wound must be immediately cleaned and disinfected In the event of more serious injuries seek a doctor s advice Should it be necessary to change individual parts use only original parts Non adherence to these requir...

Страница 24: ...stand within the machine s working zone and also between the tractor and the machine Do NOT operate the snow plough while reversing While reversing the machine should be raised Do NOT use the snow plough with additional ballast 2 2 RESIDUAL RISK Pronar Sp z o o in Narew has made every effort to eliminate the risk of accidents There is however a certain residual risk which could lead to an accident...

Страница 25: ...rained to do so use close fitting protective clothing ensure unauthorised persons have no access to the machine especially children maintain a safe distance from forbidden or dangerous places do not climb on the machine when it is operating 2 3 INFORMATION AND WARNING DECALS All signs should always be legible and clean visible to the operator and also to persons possibly being in the vicinity of t...

Страница 26: ...bystanders in designated areas If any work is required in these areas make sure the carrying vehicle is stationary and whether the implement is disconnected from the power source Warning decal I 17N 12000004 5 Thrown out objects endanger the whole body Keep a safe distance from the operating machine Decal XI 12N 15000008 6 Pressurised liquid Keep a safe distance Decal XII 12N 15000009 7 Danger Hyd...

Страница 27: ...e warning decal left 126N 16000002L 9 Machine model Type decal PUV 4000HD 517N 97000001 9 Machine model Type decal PUV 3600HD 566N 97000001 10 Transport suspension points Information decal I 35N 27000009 Numbers in the Item column correspond to decals FIGURE 2 1 Decal item 7 is included in the optional equipment of the snow plough ...

Страница 28: ...PUV 3600HD PUV 4000HD SECTION 2 2 10 FIGURE 2 1 Locations of information and warning decals Meaning of decals is explained in table 2 1 ...

Страница 29: ...SECTION 3 DESIGN AND OPERATION ...

Страница 30: ...ntrol hydraulic using solenoid Supply external hydraulic system and electrical system of the carrying vehicle 12V or 24V depending on the snow plough version Type of collecting blades depending on the snow plough version rubber blades set at the angle of 90o to the ground steel blades set at the angle of 60o or 90o to the ground steel blades 600HB set at the angle of 60o to the ground perforated s...

Страница 31: ... PUV 3600HD PUV 4000HD 3 3 FIGURE 3 1 Width depending on the operating position L snow clearing to the left P snow clearing to the right S symmetrical snow clearing to the left to the right SO collecting inside ...

Страница 32: ...0HD SECTION 3 3 4 3 2 GENERAL DESIGN FIGURE 3 2 General design of the snow plough 1 frame 2 linkage 3 right wing 4 left wing 5 swinging collecting strips 6 spring 7 main pin 8 hydraulic system 9 slides 10 clearance lamp ...

Страница 33: ...l collecting strips 5 with shock absorbing springs 6 are able to swing backwards when an obstacle is encountered The snow plough s functions are managed by means of hydraulic system 8 Depending on the its version the snow plough can be equipped with wheels 11 and other linkage systems 2 for hitching the snow plough to a wide range of carrying vehicles 3 3 HYDRAULIC SYSTEM FIGURE 3 3 Hydraulic syst...

Страница 34: ...gram A hydraulic system standard version B hydraulic system with shock absorbers and independent control system C hydraulic system with shock absorbers and independent simultaneous control 1 hydraulic cylinder 2 hydraulic solenoid valve 3 quick couplers 4 hydraulic accumulator ...

Страница 35: ...raulic system via two conduits terminated with quick couplers 3 The snow ploughs with hydraulic shock absorbers B and C are also equipped with hydraulic accumulator 4 and solenoid valve 2 with overpressure valve instead of standard solenoid valve FIGURE 3 43 3 4 ELECTRICAL SYSTEM FIGURE 3 5 Design of solenoid valve electrical control system independent control 1 cigarette lighter plug 2 switch 3 s...

Страница 36: ...FIGURE 3 6 Design of solenoid valve electrical control system independent simultaneous control 1 cigarette lighter plug 2 switch 3 solenoid valve plug 3 solenoid valve 4 solenoid valve Electrical lighting system of the snow plough FIGURE 3 7 is designed for 12V or 24V DC supply In basic equipment the snow plough clearance lights electrical system is connected using a lead with 3 pin plugs In optio...

Страница 37: ...SECTION 3 PUV 3600HD PUV 4000HD 3 9 FIGURE 3 7 Clearance lights electrical system 1 clearance light 2 3 pin socket 3 connection lead ...

Страница 38: ...PUV 3600HD PUV 4000HD SECTION 3 3 10 ...

Страница 39: ...SECTION 4 CORRECT USE ...

Страница 40: ...igation to check the machine s condition after delivery and before first use The machine is delivered to the user completely assembled unless otherwise agreed with the customer Prior to connecting to the carrying vehicle machine operator must verify the machine technical condition In order to do this the user must carefully read this Operator s Manual and observe all recommendations understand the...

Страница 41: ...dual systems checked In order to do this hitch the machine to carrying vehicle see 4 3 HITCHING TO CARRYING VEHICLE after connecting the electrical system leads and hydraulic system conduits check the correct operation of individual machine functions and operation of lighting system and inspect the hydraulic system and hydraulic cylinders for tightness In the event of a disruption in the operation...

Страница 42: ... if complete and correctly mounted Technical condition of the linkage locking bolts and pins Check the technical condition if complete and correctly mounted Technical condition of the hydraulic system Visually inspect the technical condition check the operation Technical condition of the electrical system and lighting system components Visually inspect the technical condition check the operation B...

Страница 43: ...w plough to tractor three point linkage make sure that the category of the tractor linkage is compatible with that of the snow plough Hitching the snow plough to tractor three point linkage do the following move the lower links of tractor three point linkage to the lower linking points of the snow plough set lower links at an appropriate height turn off tractor engine and prevent tractor from movi...

Страница 44: ...4 1 Linkage system interlock A linkage unlocked B linkage locked To unlock the linkage FIGURE 4 1 raise the snow plough above the ground using the carrying vehicle s three point linkage turn off the carrying vehicle s engine engage the parking brake take out securing cotter pin 2 pull the lock 1 and turn to position A secure the lock with cotter pin 2 ...

Страница 45: ...ting points on quick mounting frame are below the mounting points of the plough drive loader close to the plough and insert mounting points in the appropriate places in the quick mounting frame lift the arm B so that the upper mounting points are in the plough hooks controlling the loader frame tilt it back C causing the locking of the quick mounting mechanism check if mounting is secure engage th...

Страница 46: ...4000HD SECTION 4 4 8 FIGURE 4 2 Hitching to front loader A B C successive stages of hitching 4 3 3 CONNECTING THE HYDRAULIC SYSTEM FIGURE 4 3 Connecting the hydraulic system 1 quick coupler plug 2 quick coupler socket ...

Страница 47: ...tem prior to connecting the snow plough s hydraulic system 4 3 4 CONNECTING THE ELECTRICAL SYSTEM FIGURE 4 4 Connecting the electrical system 1 power lead of lighting system 2 control lead of hydraulic solenoid valve 3 solenoid valve control switch 4 3 pin socket 5 cigarette lighter plug 6 3 pin plug 7 7 pin plug option Connect power lead 1 of lighting system FIGURE 4 4 ended with a 3 pin plug 6 t...

Страница 48: ...g vehicles with three point linkage is done by adjusting the central link FIGURE 4 5 FIGURE 4 5 Levelling the snow plough body suspended on three point linkage In the carrying vehicles equipped with extension arms e g front loaders levelling of the snow plough is done by proper positioning of implement mounting frame FIGURE 4 6 The swing linkage of the snow plough must be set so that when the snow...

Страница 49: ... solenoid valve coils the switch should be set in 0 or OFF position switched off when the required snow plough position is reached Depending on type of control system independent or independent simultaneous control the snow plough can be equipped with 2 position switch FIGURE 4 7 or 3 position switch FIGURE 4 8 When the switch is set to OFF or 0 position switched off a single snow plough blade can...

Страница 50: ...or independent control FIGURE 4 8 Changing the working position for simultaneous independent control Simultaneous independent control option enables setting any position of the snow plough blades FIGURE 4 8 When the switch is set to position 1 the left snow plough wing can be ...

Страница 51: ...nditions with a speed exceeding 6 km h Working speed depends on the quantity and quality of collected material but also on the type of terrain It is not recommended to operate the snow plough mounted on the front loader when blades are set to the right or to the left in severe conditions i e on uneven terrain in unknown terrain with obstacles on packed or frozen snow or ice on snow layer thicker t...

Страница 52: ... and proper sliding out or sliding in slide 1 mounted in guide 2 Location of the slide in the guide can be changed every 12 mm using one of the two openings in the guide When the height is set the slides must be secured with a pin 3 and securing cotter pin 4 Slides of the left and right blade should be put forward at the same height FIGURE 4 9 Working height adjustment in the snow ploughs equipped...

Страница 53: ...ing In the snow ploughs equipped with supporting wheel FIGURE 4 8 the working height adjustment is performed by withdrawal or insertion of wheel 1 in the body 2 by turning the knob 3 The knob is protected by a lock 4 After setting the wheel height appropriately set knob 3 and secure it with lock 4 It is recommended that both wheels are set at the same height ...

Страница 54: ...maximum speed allowed by road traffic regulations must not be exceeded Speed of travel should be adjusted to prevailing road conditions and other conditions While driving on public roads turn on the machine s lights and set properly the brackets of the clearance lights While working with the snow plough turn on the orange beacon light included in the carrying vehicle equipment Avoid ruts depressio...

Страница 55: ...he snow plough so that the wings are folded to the rear FIGURE 4 11 protect the snow plough s linkage against dropping FIGURE 4 12 if necessary lower the snow plough until it fully rests on the ground turn off the carrying vehicle s engine engage the parking brake reduce residual pressure in the hydraulic system by movement of appropriate lever controlling hydraulic circuit disconnect hydraulic li...

Страница 56: ... linkage after disconnecting from the carrying vehicle the snow plough should rest on the ground leaning against collecting strips and slides or supporting wheels option DANGER Before unhitching from the carrying vehicle position the snow plough so that the wings are folded to the rear Reduce pressure prior to disconnecting the hydraulic system FIGURE 4 12 Linkage system interlock protecting again...

Страница 57: ...plough above the ground turn off the carrying vehicle s engine engage the parking brake take out securing cotter pin 2 pull the lock 1 and turn to position B secure the lock with cotter pin 2 ATTENTION In order to facilitate hitching the machine suspended on the carrying vehicle s front three point linkage the linkage interlock can be set to position B before lowering the snow plough to the ground...

Страница 58: ...PUV 3600HD PUV 4000HD SECTION 4 4 20 ...

Страница 59: ...SECTION 5 MAINTENANCE ...

Страница 60: ...ts If the snow plough is hitched and raised on the front three point linkage protect it from falling and immobilise the carrying vehicle turn off the engine and engage the parking brake DANGER During inspection and replacement of the snow plough blades turn off the vehicle s engine and remove the key from the ignition FIGURE 5 1 Replacement of steel blades set at the angle of 60o PUV 4000HD ...

Страница 61: ... Quantity pcs A Steel blade 600HB 517N 03000003 4 B External steel blade 600HB 517N 03000004 2 C Internal steel blade 600HB 517N 03000002 2 Steel blades consist of segments To remove a blade segment unscrew proper nuts 2 remove bolts 1 that fix the blade segment to the mouldboard Damaged blade should be replaced The blades that are worn on one side can be turned on the other side and reused List o...

Страница 62: ...her TABLE 5 4 STEEL BLADES 600HB SET AT THE ANGLE OF 60o PUV 3600HD Marking FIGURE 5 2 Name catalogue No Quantity pcs A Steel blade 600HB 566N 03000003 4 B Internal steel blade 600HB 517N 03000002 2 used as external blade instead of A blade TABLE 5 5 STEEL BLADES 600HB SET AT THE ANGLE OF 60o PUV 3600HD Marking FIGURE 5 2 Name catalogue No Quantity pcs A Steel blade 600HB 566N 03000003 4 B Interna...

Страница 63: ...al blade D external bent steel blade option 1 bolt 2 nut 3 washer TABLE 5 6 PUV 4000 VERTICAL STEEL BLADES OPTION Marking FIGURE 5 3 Name catalogue No Quantity pcs A Internal steel blade 446N 09000001 2 B Steel blade 446N 03000003 2 C External steel blade 517N 03000001 2 D External bent steel blade 517N 09000001 2 used as external blade instead of C blade ...

Страница 64: ...FIGURE 5 4 Name Catalogue No Quantity pcs A Internal steel blade 566N 05000001 2 B Steel blade 566N 03000001 2 C External bent steel blade 566N 03000002 2 used as external blade instead of B blade In the snow ploughs equipped with rubber collecting blades FIGURE 5 5 FIGURE 5 6 rubber blade segments are fixed with bolts 1 using cover plates 4 and 5 In order to replace blades undo individual nuts 2 ...

Страница 65: ... 5 Replacement of PUV 400HD rubber blades option A internal rubber blade B rubber blade C rubber blade 1 bolt 2 nut 3 washer 4 cover plate 5 external cover plate TABLE 5 8 PUV 4000HD RUBBER BLADES OPTION Marking FIGURE 5 5 Name catalogue No Quantity pcs A Internal rubber blade 446N 04000004 2 B Rubber blade 446N 04000003 2 C External rubber blade 517N 04000001 2 ...

Страница 66: ...HD rubber blades option A internal rubber blade B external rubber blade 1 bolt 2 nut 3 washer 4 nut TABLE 5 9 PUV 3600HD RUBBER BLADES OPTION Marking FIGURE 5 6 Name catalogue No Quantity pcs A Internal rubber blade 566N 04000001 2 B External rubber blade 566N 04000002 2 ...

Страница 67: ...rforated blade B external perforated blade C internal perforated blade 1 bolt 2 nut 3 washer TABLE 5 10 PERFORATED STEEL BLADES SET AT THE ANGLE OF 60O PUV 4000HD OPTION Marking FIGURE 5 7 Name catalogue No Quantity pcs A Perforated blade 446N 12000002 4 B Perforated blade 446N 12000009 2 C Internal perforated blade 446N 12000001 2 ...

Страница 68: ...ternal perforated blade 1 bolt 2 nut 3 washer TABLE 5 11 PERFORATED STEEL BLADES SET AT THE ANGLE OF 60O PUV 3600HD OPTION Marking FIGURE 5 8 Name catalogue No Quantity pcs A Perforated blade 566N 07000002 4 B Internal perforated blade 446N 12000001 2 TIP Bolt and nut connections of steel blades should be tightened using the tightening torque of 240 Nm ...

Страница 69: ...l perforated blade B perforated blade C external perforated blade 1 bolt 2 nut 3 washer TABLE 5 12 PUV 4000HD PERFORATED VERTICAL STEEL BLADES OPTION Marking FIGURE 5 9 Name catalogue No Quantity pcs A Internal perforated blade 446N 12000003 01 2 B Perforated blade 446N 12000002 2 C External perforated blade 446N 12000009 2 ...

Страница 70: ...blade B external perforated blade 1 bolt 2 nut 3 washer TABLE 5 13 PUV 3600HD PERFORATED VERTICAL STEEL BLADES OPTION Marking FIGURE 5 10 Name Catalogue No Quantity pcs A Internal perforated blade 566N 07000001 2 B External perforated blade 566N 07000002 2 DANGER Do NOT perform service or repair work under raised and unsupported machine ...

Страница 71: ...s A fenders for vertical blades B fenders for vertical blades set at the angle of 60o to the ground 1 fender 2 bolt 3 nut 4 washer TABLE 5 14 FENDERS OF COLLECTING BLADES Marking FIGURE 5 11 Name Catalogue No Quantity pcs Left fender of vertical blade 517N 12010000L 1 A Right fender of vertical blade 517N 12010000P 1 Left fender 517N 13010000L 1 B Right fender 517N 13010000P 1 Depending on type of...

Страница 72: ... 12 Slide replacement 1 slide 2 slider 3 pin 4 bolt 5 nut 6 washer Excessively worn or damaged slide elements must be replaced with new ones FIGURE 5 12 In order to do this raise the snow plough and support it with sufficiently stable and strong supports If the snow plough is hitched and raised on the front three point linkage protect it from falling and immobilise the carrying vehicle turn off th...

Страница 73: ...lade springs should be performed only when the carrying vehicle s engine is stopped and the machine is raised and secured The snow plough is equipped with swinging segments of collecting blades When an obstacle is encountered individual segments of collecting blades FIGURE 5 13 can independently swing backward and return to working position thanks to shock absorbing springs 4 Inclination of blades...

Страница 74: ...NANCE DANGER Do not repair hydraulic system on your own All hydraulic system repairs must be performed only by suitably qualified personnel The duties of the operator connected with the hydraulic system maintenance include checking tightness of cylinders and hydraulic connections checking technical condition of hydraulic conduits checking technical condition and leak tightness of hydraulic connect...

Страница 75: ...hen oil is strongly atomised oil vapour or in the case of fire during which toxic compounds may be released DANGER Oil fires should be quenched with carbon dioxide CO2 foam or extinguisher steam Do NOT use water for fire extinguishing TABLE 5 16 HL32 HYDRAULIC OIL CHARACTERISTICS ITEM NAME VALUE 1 ISO 3448VG viscosity classification 32 2 Kinematic viscosity at 400 C 28 8 35 2 mm2 s 3 ISO 6743 99 q...

Страница 76: ...ystem During work on hydraulic system use the appropriate personal protection equipment i e protective clothing footwear gloves and eye protection Avoid contact of skin with oil In the event of oil leak on hydraulic conduit connections tighten the connection and if this does not remedy faults then change conduit or connection elements Always exchange each mechanically damaged component ATTENTION T...

Страница 77: ...r ELECTRICAL SYSTEM MAINTENANCE All electrical system repairs must be performed only by suitably qualified personnel 5 7 LUBRICATION DANGER Lubrication may only be performed when the snowplough is lowered and resting on the ground Before lubricating switch off engine remove key from ignition and engage tractor parking brake Machine lubrication should be performed with the aid of a manually or foot...

Страница 78: ...PUV 3600HD PUV 4000HD SECTION 5 5 20 FIGURE 5 14 Lubrication points Lubrication points are detailed in TABLE 5 17 ...

Страница 79: ...chnical condition of individual elements Used or damaged elements should be repaired or replaced In the event of damage to the paint coat clean rust and dust from damaged area degrease and then paint with undercoat and after it is dry paint with surface coat paint retaining colour uniformity and even thickness of protective coating Until the time of touch up painting the damaged place may be cover...

Страница 80: ...r Non adherence to these requirements may put the user and other people s health and life at risk and also cause damage to the machine TABLE 5 18 TIGHTENING TORQUE FOR NUT AND BOLT CONNECTIONS 5 8 8 8 10 9 THREAD DIAMETER mm TIGHTENING TORQUE Nm M6 8 10 15 M8 18 25 36 M10 37 49 72 M12 64 85 125 M14 100 135 200 M16 160 210 310 M20 300 425 610 M24 530 730 1 050 M27 820 1 150 1 650 During maintenance...

Страница 81: ...le if installed The machine hydraulic system is damaged Repair at an authorised service point Mouldboard position cannot be changed Electrical system of solenoid valve is damaged Repair at an authorised service point Incorrectly positioned linkage Ground surface tracking is not possible Check and if necessary adjust Incorrectly positioned slides or wheels option Check and adjust if necessary Exces...

Страница 82: ...PUV 3600HD PUV 4000HD SECTION 5 5 24 ...

Страница 83: ...NOTES ...

Отзывы: