background image

MOUNTING YOUR INVERTER

To mount the TruePower400PS Inverter:

1

. Turn the On/Off switch on the front panel of the inverter to Off position.

2

. Select an appropriate mounting location and orientation.

3

. Hold the inverter against the mounting surface, mark the position of the mounting

    screws, and then remove the inverter.

4

. Drill pilot holes for the four mounting fasteners.

5

. Fasten the inverter to the mounting surface with four #10 hardware fasteners.

Mount your inverter prior to connecting any wires or cables: For the best load starting performance,
the DC cables should be short and large as possible. See table 3 for minimum recommended
cable size. Using a smaller cable may cause the inverter to shut down under a heavy load.

I n s t a l l a t i o n   G u i d e l i n e s

6

13

Minimum Recommended DC Input cable (copper) – AWG

Minimum Recommended
Cable Size – AWG

No.  6
No.  4
No.  2
No.  0

Cable Length: Battery to Inverter
(Each Cable)

0 – 10 Feet
10 – 15 Feet
15 – 30 Feet
30 – 40 Feet

DC Fuse and Disconnect or DC Circuit Breaker: The DC fuse and disconnect switch or
the DC circuit breaker shall be rated 60 amps. Additionally, the fuse type must be selected
to match code requirements.

Connecting the Chassis Ground: The chassis ground lug is used to connect the chassis
of the inverter to your system’s chassis grounding point, as required by installation codes.

Use copper cable that is provided with green insulation. 

Do not use the chassis ground

lug for your AC output grounding wire.

Tr o u b l e s h o o t i n g

TROUBLE SHOOTING GUIDE

This section is designed to accommodate you in identifying and troubleshooting
common problems that may result with a Sine Wave inverter. Review this section
before contacting customer service. If you can not resolve the problem, record the
data of the instance based on information provided here with in this manual.

WARNING

Electrical shock and fire hazards. 

Professional Mariner recommends

that all wiring be done by qualified personnel. Disconnect all AC and DC power
sources to prevent accidental shock. Please do not attempt to disassemble the
TruePower400PS inverter. It does not contain any user-serviceable parts. Attempting
to service the unit yourself could result in electrical shock or fire.

This troubleshooting section will aid you in identifying the source of common
problems you may encounter. If you are unable to resolve the problem from the
troubleshooting reference table, contact your dealer or customer service.

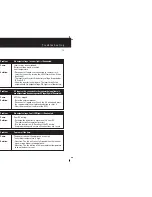
Problem:

Cause:

Solution:

No output voltage. No indicator lights are illuminated.

The switch is in Off position.
No input power to the inverter.
DC fuse is open.

-Turn the ON/Off switch to the ON position.
-Check the DC wiring to the inverter for loose connections
  or frayed wiring.
-Have a qualified service technician check & replace the fuse.

Problem:

Cause:

Solution:

No output voltage. Inverter light is illuminated.

Circuit breaker has tripped.
GFCI has tripped.

-Disconnect all appliances to reduce the overload, check
  the AC wiring, and reset the breaker by turning the ON/Off
  switch to Off and then back to ON.
-Clear the ground fault, and reset the GFCI by pressing the
  reset on the GFCI button.

Problem:

Cause:

Solution:

Fan does not turn on.

The power rating of the appliance may be too low or the
ambient temperature is too cool.

-No action. The fan will run at full speed when the inverter
 is powering a higher rated appliance.

150.5mm

163.5mm

63.25mm

267mm

32mm

331mm

AC OUTPUT

 WIRING

N

L

G

Figure 6

Содержание 79400

Страница 1: ...om or call ProMariner directly at 1 800 824 0524 30 am to 5pm Eastern Time MPORTANT SAFETY NOTICE SAVE THESE INSTRUCTIONS ease read all safety operating and installation instructions before installing applying AC power to your ProMariner On Board Solutions power inverter odels Part No Description uePower400PS 79400 GFCI Protected Outlets uePower400PS 79405 Hardwired OnBoard Solutions A ProMariner ...

Страница 2: ...ns on your recent purchase of the TruePower400PS Power Inverter or over 30 years ProMariner has been a leading designer and manufacturer of ower conversion products On Board Solutions serves customers in the automotive ecreational vehicle industrial and mobility markets and is a proud division of roMariner We have expanded our offering to include our latest line of ruePower400PS Power Inverters ea...

Страница 3: ......

Страница 4: ...to 400 watts of ontinuous power and with a surge rating of 1000 watts it can power complete ntertainmentsystemsincludingtwo27 televisions oritcouldalsopowersmallappliances hargers and power tools he TruePower400PS sine wave inverter includes a built in transfer switch that utomatically transfers between inverter and incoming AC power The inverter comes andard with dual AC outlets and AC hardwire c...

Страница 5: ...shall be on the condition and agreement that Professional Mariner HALL NOT BE LIABLE FOR INCIDENTAL OR CONSEQUENTIAL DAMAGES OF ANY KIND Some states do not low the exclusion or limitation of incidental or consequential damages so the above limitations may not apply you ProfessionalMarinerneitherassumesnorauthorizesanypersonforanyobligationorliabilityinconnection ith the sale of this product o make...

Страница 6: ...a short circuit GFCI opening enables the Reset and Test monthly capabilities Fan internal activates when the internal temperature of the inverter increases The fan speed varies with the internal temperature and turns off when the inverter cools down DC Input Cables AC Receptacles AC Input cord for shorepower Wiring box access panel Top panel AC Strain Relief for hardwiring 6 Chassis ground lug 7 R...

Страница 7: ...e than 12 6 volts DC The inverter will automatically restart Turn the inverter to Off Disconnect the DC wiring Use proper wiring and ensure all connections are secure Problem Cause Solution AC input cord is connected to shorepower but appliance s arenotpoweredfromshorepower ACInputlightisilluminated GFCI has tripped Reset the external breaker Disconnect all appliances Check the AC wiring and press...

Страница 8: ...lercablemaycausetheinvertertoshutdownunderaheavyload Ins talla tion G uide line s 6 Minimum Recommended DC Input cable copper AWG Minimum Recommended Cable Size AWG No 6 No 4 No 2 No 0 Cable Length Battery to Inverter Each Cable 0 10 Feet 10 15 Feet 15 30 Feet 30 40 Feet C Fuse and Disconnect or DC Circuit Breaker The DC fuse and disconnect switch or heDCcircuitbreakershallberated60amps Additional...

Страница 9: ...r or ProMariner to have a qualified chnician inspect the unit esetting as the Result of an Overload he TruePower400PS has a high surge capacity of 1000 watts for 5 seconds the appliance s connected to the unit try to draw excess power for more than seconds the TruePower400PSwill shut down and the Red Fault light will illuminate fter removing the overload condition the TruePower400PS will cycle thr...

Страница 10: ...ions Turn the inverter On Off switch to Off Locate the wiring box access panel and remove the two screws to access the iring box as illustrated in Figure 5 gure 5 Removing the Two Screws on the Wiring Box Access Panel Remove the wiring box access panel from the unit Loosen the clamping nut of the Strain Relief Locate the terminal block he three terminals are labeled as follows L Line N Neutral G G...

Страница 11: ... either the ON or Off position verter Mode If the ON Off switch is in the ON position the TruePower400PS will utomatically supply the appliance s with the inverter power if the shorepower source ils or becomes disconnected NSTALLING YOUR REMOTE CONTROL Find a location for the remote with enough area to mount the 1 3 4 by 2 1 4 panel Using tape painters masking tape is preferred cover the area wher...

Отзывы: