background image

6


VEHICLE JUMPSTARTING INSTRUCTIONS 


1.   Your Jumpstarter should be charged for 8 hours prior to first use and as soon as  
 

possible after each use. 


2. 

Before making any connections, check the Jumpstarter battery status by turning on the 


Jumpstarter. The Jumpstarters battery capacity should show at least 2 bars or 50% 

 charged.


3.   Turn your vehicle’s ignition OFF before connecting the Jumpstarters clamps to  
 

your vehicle. 


4.   Connect the Red Positive (+) clamp to the positive (+) terminal of the battery in the  
 

vehicle and the Black Negative (-) clamp to the negative (-) terminal of the battery  


or any non moving metal part of the engine block. DO NOT CONNECT TO FUEL LINE.  


Always double check that you have the proper connections. 


5. 

Press and hold the Jump Start  button for 1 second. The Clamp LED should turn  


on to Green.


6.   Turn the vehicle’s ignition to ON and start the vehicle. After the engine has started,  
 

turn the Jumpstarter off. If the Jumpstarter fails to start your vehicle refer to the  


Clamp Connection LED table below for any error it may indicate & check that the  


clamps are correctly connected with good contact.


7.   Disconnect the Black clamp and then the Red clamp. 


8.   Recharge the Jumpstarter.


UNDERSTANDING YOUR JUMPSTARTER 


CLAMP CONNECTION LED


Jumpstart Status 

LED State


  Jumpstarter clamps connected to vehicle and ready to jumpstart  Green Solid


  Jumpstarting for more than 5 seconds  

2 x Yellow Flash,  


pause & repeat


  Battery or Jumpstarter switch, Over-temperature  

Red/Green Alternate 


flashing


  Battery Charging in Temperatures >60°C or <0°C 

Red/Green Alternate 


flashing and Siren


  Short Circuit  

Red Flashing &  


Beeping Siren


  Clamps reverse connected to battery  

Red Solid and  


Siren on


  Jumpstarter is connected to vehicle battery and the Smart  

Red fast flash, Siren 

  Module has failed. Go to store to get P/n: ISECLAMP. 

Steady on


  Jumpstarter is not connected to a vehicle battery.  

Red fast flash, Siren 

  Jumpstarter has an internal fault and can not be used. 

Steady on

Содержание IS1210E

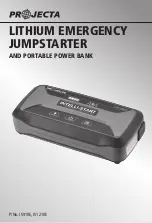
Страница 1: ...1 LITHIUM EMERGENCY JUMPSTARTER P No IS910E IS1210E AND PORTABLE POWER BANK...

Страница 2: ...disposed of properly Ensure correct polarity when connecting to vehicle Although the Jumpstarter is rain proof it is not designed to be left outside for extended periods or submerge in water Although...

Страница 3: ...ECTION INDICATION Confirms clamp connectivity and status INBUILT LED FLOOD LIGHT Inbuilt LED flood light provides illumination for safer more convenient operation at night ADDED PROTECTION SAFETY AND...

Страница 4: ...itive 23 5cm Negative 16 5cm Cable 8mm 8 AWG Polarity Protection MCU controlled with Electronic Switch Smart Module Overload Protection MCU controlled with Electronic Switch Smart Module Recharging Ca...

Страница 5: ...ble Padded Carry Case 2 1A USB Accessory port Battery Status Indicator Clamp Connection LED 2 x 0 5 Watt LED Flood Light with SOS Function Micro USB Charging Lead Flood Light On Off 12V 2 1A USB Charg...

Страница 6: ...gine has started turn the Jumpstarter off If the Jumpstarter fails to start your vehicle refer to the Clamp Connection LED table below for any error it may indicate check that the clamps are correctly...

Страница 7: ...B charge adaptor into a 12V socket 2 Use the provided USB to micro USB cable a Connect the USB end into the 12V to USB socket b Connect the micro USB end to the Jumpstarter The Jumpstarter will now tu...

Страница 8: ...ices from the Jumpstarter will drain the battery and potentially cause the Jumpstarter to fail to start your vehicle in an emergency Recharge the Jumpstarter as soon as possible FLOOD LIGHT The Flood...

Страница 9: ...t from the vehilce battery after the engine has started Once the engine has started the jumpstarter has already internally disconnected so the jumpstarter is not providing any benefit to the vehicle a...

Страница 10: ...10 NOTES...

Страница 11: ...11 NOTES...

Страница 12: ...or to any other place which may be nominated by either BWI or the retailer from where the product was bought in order that a warranty assessment may be performed The consumer must also deliver the or...

Отзывы: