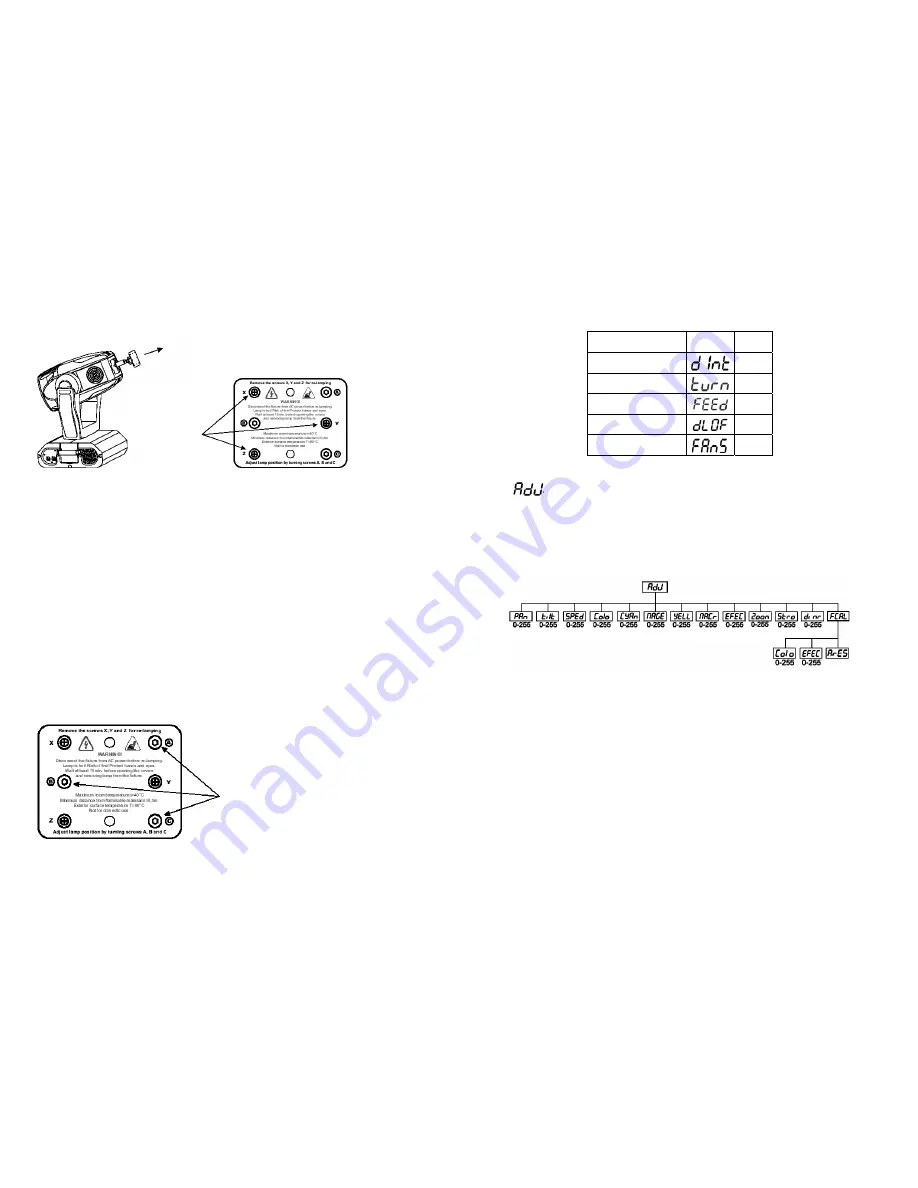
viti X, Y, Z
Non accendere l’apparecchio finché l’alloggiamento della lampada non sia chiuso.
Prima di riaccendere la nuova lampada resettare il contaore con la funzione “LAti”, nel
menù principale del pannello di controllo, premendo contemporaneamente i tasti “UP” e
“DOWN” e confermando con il tasto “ENTER”
REGOLAZIONE DELLA LAMPADA
La lampada viene già centrata in fabbrica. A causa di differenze tra le varie lampade,
una ulteriore regolazione fine potrebbe migliorare la qualità luminosa.
Accendere la lampada, aprire lo shutter e l’iris, portare l’intensità del dimmer al 100% e
mettere a fuoco l’impronta luminosa su una superficie piana (es. muro). Centrare la parte
più luminosa del raggio usando le tre viti di regolazione (A,B,C). Girare una vite alla volta
in modo da veder scorrere il centro luminoso del raggio lungo la diagonale dell’impronta
luminosa sul muro. Nel caso non si riesca a distinguere la parte più luminosa del raggio,
regolare la lampada, fin quando l’impronta luminosa non sia uniforme.
Per ridurre l’intensità del centro luminoso, tirare la lampada verso il riflettore, girando le
tre viti in senso orario ¼ di giro alla volta fino a quando la luce non sia uniformemente
distribuita.
viti A, B, C
8
Function
Display
Default
value
Display intensity
100
Display reverse
TURN
Feedback function
ON
Lamp OFF via DMX
ON
Ventilation fan
AUTO
- Adjusting the default positions
By this function you can calibrate and adjust the different wheels to their standard / right
positions. Use the “UP” and “DOWN” keys to browse through the adjusting menu - the
display shows step by step these messages: "Pan”, “Tilt”, “SPEd”, “Colo”, “CYAn”,
“MAGE”, “YELL”, “MACr”, “EFEC”, “Zoom”, “Stro”, “dimr”, “FCAL" by which you can
adjust the fixture to the required / desired position (0-255) before the function calibration.
Then when the positioning is finished use the last "FCAL" function (Fixture calibration).
1. Calibration via the control board
Press “ENTER” and the “UP” and “DOWN” keys in order to display the following
messages: "Colo”, EFEC" for very smooth function calibration. Select one of them, press
“ENTER” and use the “UP” and “DOWN” keys in order to adjust their right value from 0 to
255. Then press “ENTER” to confirm or “MODE” to cancel and return to the menu. This
can be repeated for each calibration parameter if it is required. When the calibration is
finished, it is necessary to use the "ArES" function in order to write the calibration values
to the memory (EEPROM) and to make a reset in order to check the newly adjusted
positions of the colour, gobo and effect wheels. When the reset of the fixture is finished,
the display will show the "FCAL" message. Press “ENTER” to repeat the calibration or
“MODE” to return to the "AdJ" menu.
53


