background image

2

Visit  www.probrite.com/install  for installation video tutorials and product support

Table of Contents..........................  2
Safety Information........................  2
Pre-Installation..............................  3
Planning Installation............................  3
Specifications........................................ 3
Tools Required......................................  3


Hardware Included............................... 4

Package Contents............................... 4

Installation......................................  5
Operation .......................................  9
Care & Cleaning............................. 10
Troubleshooting............................  10
Warranty..........................................  11

TABLE OF CONTENTS

SAFETY INFORMATION

IMPORTANT

THIS PRODUCT MUST BE INSTALLED IN ACCORDANCE WITH THE APPLICABLE 
NATIONAL ELECTRICAL CODE AND LOCAL BUILDING CODES BY A PERSON FAMILIAR 
WITH THE CONSTRUCTION AND OPERATION OF THE PRODUCT AND THE HAZARDS 
INVOLVED.

PRECAUTIONS


Please read and understand this entire 
manual before attempting to assemble, 
install, or operate this light fixture.


This light fixture requires a 120-Volt AC 
power source.


Some codes require installation by a 
qualified electrician.


This light fixture must be properly 
grounded.


Make sure connections are secure using 

connecting devices


This light fixture should be installed 
outdoors to a wall or eave.

WARNING: 
breaker or fuse. Place tape over the circuit 

Turn the power off at the circuit

light fixture.

WARNING: Risk of fire. Keep the fixture heads at 
least 3 in. (76mm) from combustible materials.

CAUTION:  Burn hazard. Allow the light fixture 
to cool before touching.

NOTICE:  Do not connect this fixture to a 
dimmer switch.

NOTICE:  FCC Regulations state that any 
unauthorized changes or modifications to 
this equipment not expressly approved by the 
manufacturer could void the user’s authorization 
to operate this equipment. 

INFORMATION:  The device is tested and found to comply with Part 15 of the FCC Rules. Operation is subject 
to two conditions: (1) This device may not cause harmful interference and, (2) this device must accept any 
interference received, including any interference that may cause undesired operation.

These limits are designed to provide reasonable protections against harmful interference when the 
equipment is operated in a commercial environment.

wire nuts, crimp-on lugs or other approved 

Содержание STLR15-PC-4K-BZ

Страница 1: ...support PROBRITE com PROBRITE COM Questions Missing Parts Need Accessories Visit us online anytime or call us to get information on our product range download detailed spec photometric files find prod...

Страница 2: ...secure using connecting devices This light fixture should be installed outdoors to a wall or eave WARNING breaker or fuse Place tape over the circuit Turn the power off at the circuit light fixture WA...

Страница 3: ...mens 22 Watts LED Replaces 75W Halogen bulbs Lumens Watts Efficacy 100 Lumens per watt 102 Lumens per watt Power Requirements Input Voltage 120VAC 60 Hz Light Color CCT 4000 Kelvin 2700K 3000K 3500K 4...

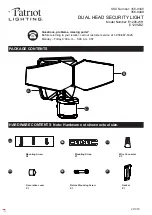
Страница 4: ...ption Quantity AA 8 32 x 3 4 Philips head screw 2 BB Wire nut 3 CC Hex head screwdriver 1 CC PACKAGE CONTENTS Part Description Quantity A Light fixture 1 B Photocell light sensor 1 C Mounting plate se...

Страница 5: ...on fig 3 2 SHUT OFF ELECTRIC POWER OFF Verify wall switch is in OFF position fig 4 the circuit breaker that supplies power At the main electrical panel turn off to the junction box you are working on...

Страница 6: ...e mounting plate set screw C using the hex head screwdriver DD 4 For wall mount the TOP arrow must point upward For eave mount the TOP arrow must point toward the building TIP Only unscrew the set scr...

Страница 7: ...h hands to make the electrical connections fig 8 A D E B E D B fig 8 A A E D BB fig 9 Black Line White Common Green Ground Junction Box If necessary strip 3 8 of insulation from junction box and light...

Страница 8: ...desired If one or both heads on the fixture A appear loose use a philips head screwdriver to tighten the screws located on the arms of the light heads To test light fixture illumination cover photoce...

Страница 9: ...lly turn ON when dark outside and turn OFF when the sun rises thus saving you energy NOTE If photocell is located in an area under heavy shade the photocell may not detect enough light and may turn th...

Страница 10: ...th clear water and a soft damp cloth only Do not use abrasive cleaners or cleaners that contain alcohol Do not apply paints solvents or any other chemicals on this light fixture They could cause a pre...

Страница 11: ...he product on presenting valid purchase receipt or other proof of date of original purchase acceptable to Probrite The receipt is required for rendering the warranty performance Any warranty claims wi...

Страница 12: ...PROBRITE Customer Service 9am 5pm EST Monday to Friday 1 844 507 5651 support PROBRITE com PROBRITE COM Questions Missing Parts Need Accessories RETAIN THIS MANUAL FOR FUTURE USE Para las translacione...

Отзывы: