background image

5

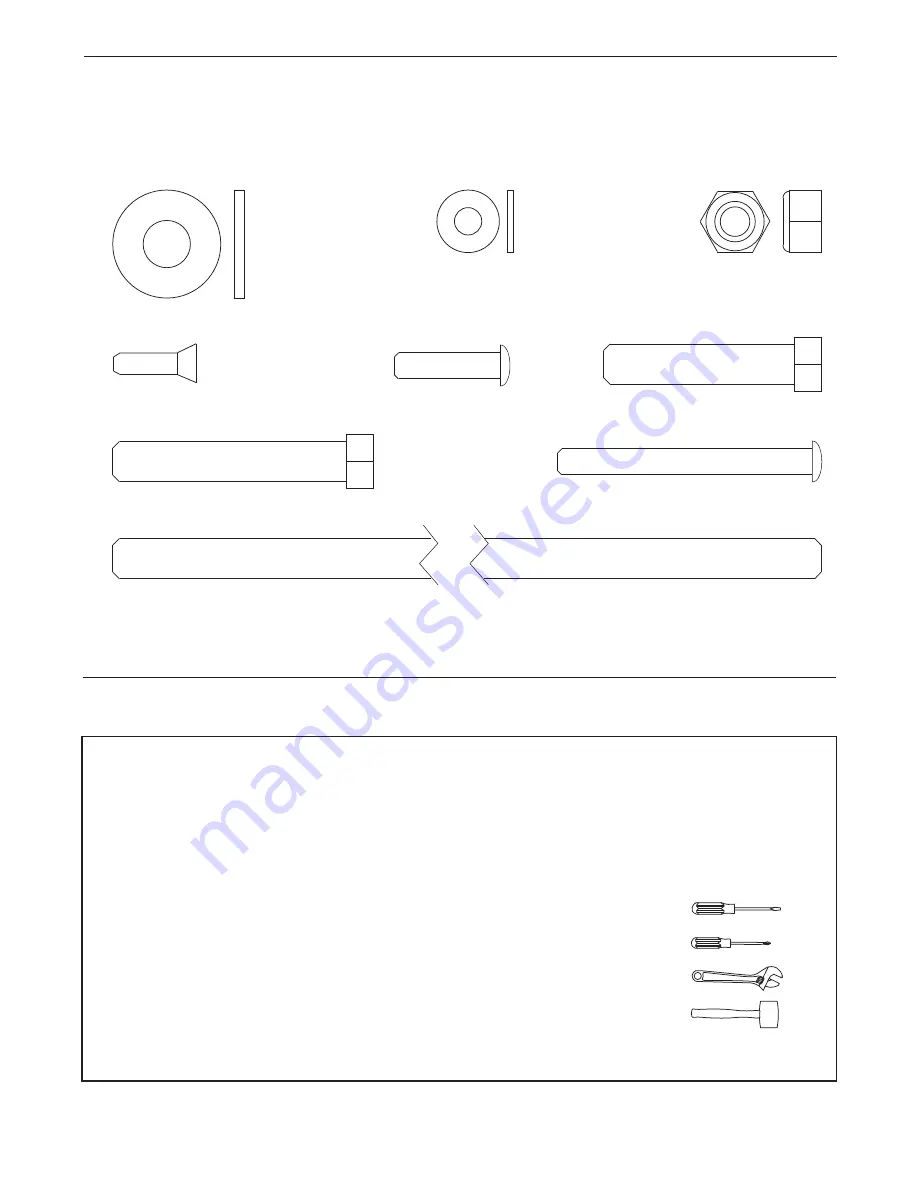
M10 x 55mm Screw (16)

M

M10 Nylon

Locknut (24)

M6 Washer (23)

M6 x 60mm Screw (19)

M10 x 256mm Bolt (17)

M10 x 45mm Screw (18)

M6 x 25mm

Screw (20)

M10 Washer (22)

M5 x 15mm

Screw (21)

PART IDENTIFICATION CHART

See the drawings below to identify small parts used in assembly. The number in parentheses by each drawing is
the key number of the part, from the PART LIST on page 10. 

Note: Some small parts may have been pre-

assembled. If a part is not in the parts bag, check to see if it has been preassembled.

To hire an authorized service technician to
assemble the weight bench, call toll-free 
1-800-445-2480.

Before beginning assembly, carefully read the
following information and instructions:

Place all parts in a cleared area and remove the
packing materials. Do not dispose of the packing
materials until assembly is completed. 

Tighten all parts as you assemble them, unless
instructed to do otherwise. 

As you assemble the weight bench, 

make sure all

parts are oriented as shown in the drawings.

Assembly requires two persons.

• For help identifying small parts, use the PART

IDENTIFICATION CHART above.

In addition to the included grease packet,
assembly may require the following tools:

• one standard screwdriver

• one Phillips screwdriver

• one adjustable wrench

• one rubber mallet

ASSEMBLY

Содержание Fusion 1.3X

Страница 1: ...damaged or missing PLEASE CONTACT OUR CUSTOMER SERVICE DEPARTMENT DIRECTLY CALL TOLL FREE 1 888 533 1333 Mon Fri 6 a m 6 p m MST ON THE WEB www proformservice com USER S MANUAL Visit our website at w...

Страница 2: ...4 PART IDENTIFICATION CHART 5 ASSEMBLY 5 ADJUSTMENTS 8 EXERCISE GUIDELINES 9 PART LIST 10 EXPLODED DRAWING 11 ORDERING REPLACEMENT PARTS Back Cover LIMITED WARRANTY Back Cover TABLE OF CONTENTS PROFOR...

Страница 3: ...ench at all times 9 Always wear athletic shoes for foot protec tion while exercising 10 The weight bench is designed to support a maximum user weight of 300 pounds and a maximum total weight of 510 po...

Страница 4: ...er of this manual To help us assist you please note the product model number and serial number before calling The model number is PFBE1216 0 The serial number can be found on a decal attached to the w...

Страница 5: ...o assemble the weight bench call toll free 1 800 445 2480 Before beginning assembly carefully read the following information and instructions Place all parts in a cleared area and remove the packing m...

Страница 6: ...ake assembly easier read the infor mation on page 5 and use the PART IDENTIFICATION CHART on page 5 1 24 2 3 2 Attach the Foot Plate 10 to the Left and Right Frames 2 3 with four M5 x 15mm Screws 21 S...

Страница 7: ...an M10 x 256mm Bolt 17 Attach the Backrest Frames 5 to the Seat Frame 3 with the Bolt two M10 Washers 22 and two M10 Nylon Locknuts 24 Do not overtighten the Nylon Locknuts the Backrest must pivot fre...

Страница 8: ...r gent do not use solvents to clean the weight bench ADJUSTING THE BACKREST To adjust the Backrest 7 pull the Backrest Knob 15 raise or lower the Backrest and then slowly release the Backrest Knob Mak...

Страница 9: ...strength training and aerobic exer cise will reshape and strengthen your body plus devel op your heart and lungs PERSONALIZING YOUR EXERCISE PROGRAM Determining the appropriate length of time for eac...

Страница 10: ...performed the weight used and the numbers of sets and repetitions completed Record your weight and key body measurements at the end of every month Remember the key to achieving the greatest results i...

Страница 11: ...11 1 2 3 4 5 5 6 7 8 9 10 11 11 11 12 13 13 14 14 14 14 14 21 21 16 16 17 18 18 19 19 20 15 22 22 22 22 22 23 23 24 24 24 24 24 22 22 24 20 23 23 23 EXPLODED DRAWING Model No PFBE1216 0 R0906A...

Страница 12: ...This warranty does not extend to any product or dam age to a product caused by or attributable to freight damage abuse misuse improper or abnormal usage or repairs not provided by an ICON authorized s...

Отзывы: