8
Step
11
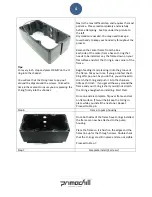
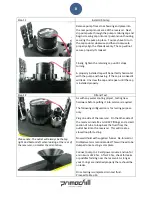
Install
D5
Pump
Remove
pump
from
stock
housing
and
place
into
the
rear
pump
mount
area
of
the
reservoir.
Next,
slip
pump
wire
through
the
pump
retaining
cap
and
begin
screwing
cap
onto
rear
pump
mount
housing,
securing
the
pump
in
place.
You
may
have
to
turn
the
cap
counter
clockwise
and
then
clockwise
to
properly
align
the
threads
evenly.
The
cap
will
not
secure
properly
if
crooked.
Finally,
tighten
the
retaining
cap
until
it
stops
turning.
A
properly
installed
cap
will
be
perfectly
horizontal
with
the
pump
and
housing.
If
the
cap
is
crooked
it
will
leak.
Unscrew
the
cap
and
repeat
until
the
cap
is
installed
properly.
Step
12
Fill
and
Test
Please
note:
The
outlet
will
always
be
the
top
right
and
bottom
left
when
looking
at
the
rear
of
the
reservoir,
no
matter
the
orientation.
As
with
any
water
cooling
project,
testing
new
hardware
before
putting
it
into
service
is
required.
The
following
configuration
is
for
testing
purpose
only.
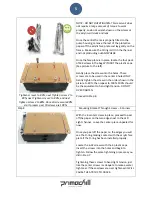
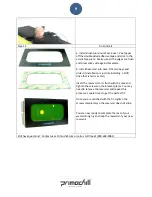
Plug
one
side
of
the
reservoir.
On
the
other
side
of
the
reservoir
install
2x
G
¼
BSPP
fittings
and
a
small
section
of
tube
to
loop
back
the
fluid
from
the
outlet
back
into
the
reservoir.
This
will
create
a
closed
loop
for
testing.
Now
add
fluid
with
supplied
funnel.
De
‐
Ionized
or
Distiled
water
is
recommended.
This
will
need
to
be
dumped
once
testing
is
complete.
Connect
pump
to
12
volt
power
source
and
run
for
a
minimum
of
24
hrs.
After
24
hrs,
check
for
leaks
or
puddles
forming
near
the
reservoir.
As
long
as
your
O
‐
rings
are
installed
properly
there
should
be
no
leaks.
Once
testing
is
complete
drain
test
fluid.
Proceed
to
Step
13.


