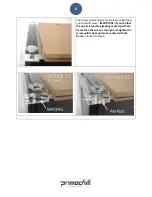
5
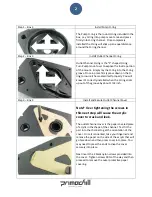
Tighten
screw
1
to
80%,
next
Tighten
screw
2
to
80%,
next
Tighten
screw
3
to
80%,
and
next
Tighten
screw
4
to
80%.
Once
all
screws
are
80%,
start
process
over
till
screws
are
100%.
NOTE:
DO
NOT
OVERTIGHTEN.
This
reservoir
does
not
require
a
large
amount
of
torque
to
work
properly,
so
do
not
wrench
down
on
the
screws
or
the
acrylic
will
crack
and
leak.
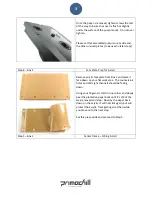
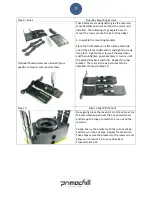
Once
the
central
frame
is
properly
fitted
to
the
pump
housing,
remove
the
rest
of
the
protective
paper
off
the
acrylic
face
plate
and
lay
gently
on
the
frame.
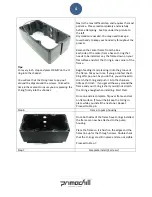
Make
sure
the
O
‐
ring
is
still
in
the
channel
and
not
protruding
out
ANYWHERE.
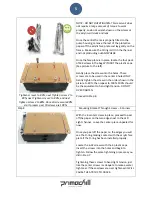
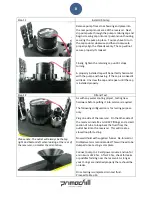
Once
the
face
plate
is
in
place,
locate
the
four
pack
of
M4
screws
in
the
bag
WITHOUT
the
plastic
caps.
(See
picture
to
the
left).
Gently
place
the
screws
into
the
holes.
These
screws
are
to
be
used
in
the
center
4
holes
ONLY.
Gently
tighten
the
screws
in
the
order
shown
in
the
picture
to
80%,
then
repeat
to
100%.
100%
should
be
the
equivalent
to
hand
tight
tension.
DO
NOT
OVERTIGHTEN.
Proceed
to
Step
8.
Step
8
Mounting
Bracket
Through
Screws
–
4
Corners
With
the
4
center
screws
in
place,
proceed
to
peel
off
the
paper
on
the
two
edges
next
to
the
LED
Light
channel.
Leave
the
center
piece
unpeeled
for
now.
Once
you
peel
off
the
paper
on
the
edges
you
will
see
the
O
‐
ring
making
contact
with
the
acrylic
face
plate
if
the
O
‐
ring
has
been
installed
properly.
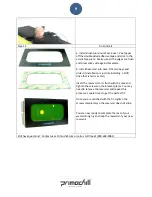
Locate
the
6
‐
32
screws
with
the
4
plastic
caps.
Insert
the
screws
into
the
holes
and
begin
to
tighten.
Follow
the
same
tightening
process
as
you
did
in
Step
7.
Tightening
these
screws
to
hand
tight
tension
just
like
the
center
screws
is
adequate
to
make
a
water
tight
seal.
If
these
screws
are
over
tightened
it
WILL
CAUSE
THE
ACRYLIC
TO
CRACK.


