


P O W I S P R I N T E R
Ô
M O D E L 3 1 U S E R ’ S M A N U A L
P R I N T I N G M O R E E L A B O R A T E T I T L E S
15
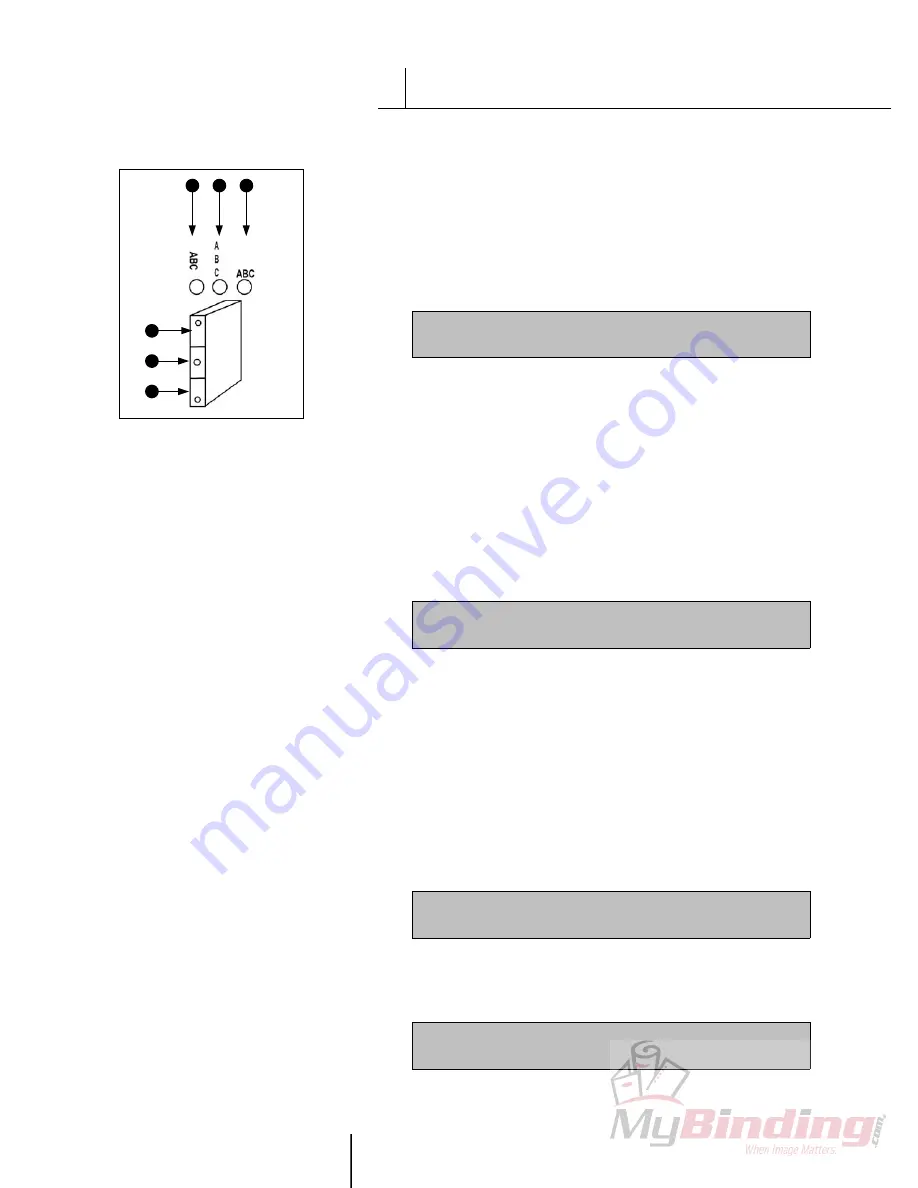
D I A G R A M A / S C H É M A / F I G U R E 11
Orientation Keys
A Landscape
B Stacked
C Portrait
Zone Keys
D Top
E Middle
F Bottom
P R I N T I N G M O R E E L A B O R A T E
T I T L E S
V
A. Step-by-step Procedure
This section describes how to print a more elaborate Binderstrip™ title,
using various zones and different orientations. In this procedure, we
provide specific orientations and zones strictly for example’s sake. Feel
free to use any zones or orientations you like. It’s your strip, so design it
the way you want.
1. To enter a document title, press the ESC key several times until
you see the following on the keyboard display:
This display is called the Text Screen. Two lines of text per zone are
usually available.
2. Make sure you are in the middle zone by pressing the Middle Zone key
(Figure 13).
3. Now press the Landscape orientation key. (If you choose a different
orientation, remember that for most books, only a few characters will
fit in Portrait Orientation.)
4. Type a title (for example, your favorite color) on the first line and press
ENTER.
5. Type another title (like your favorite food) on the second line. Your
screen now might say something like, “Purple hamburgers.” Press
ENTER. The keyboard display changes to:
[
■
]
[ ]
Before we add more zones, let’s adjust the font type.
NOTE:
you can
change the font type, size, and style at any point while designing your
strip.
6. Press MENU.
7. Press 1 (SELECT FONT). Select a font. For example, Times.
8. Choose which zone(s) this change will affect.
After confirming your choice, the printer returns to the Text Screen.
9. Since we want to add more zones, press the Bottom Zone key.
10. Press the Portrait orientation key. Because the bottom zone is empty,
the display reads:
Press PRINT or use ZONE KEYS in left
corner to add text to other zones
11. Type in a word (for example, your first name) on the first line and
press ENTER.
12. Type in another word (like your last name) on the second line and
press ENTER. The keyboard display changes to:
[
■
]
[ ]
Before we print, we want to adjust the font style.
Press PRINT or use ZONE KEYS in left
corner to add text to other zones
C
A B
D
F
E
Содержание Fastback P31
Страница 2: ...M O D E L 3 1 U S E R S M A N U A L P O W I S P R I N T E R...
Страница 34: ...P O W I S P R I N T E R M O D E L 3 1 U S E R S M A N U A L USER S MANUAL FOR THE FABULOUS POWIS PRINT SOFTWARE...
Страница 61: ...P O W I S P R I N T E R M O D E L 3 1 U S E R S M A N U A L TAKING PRINTING TO THE 21ST CENTURY...


