background image


22 

MAINTENANCE AND USE 


This device requires a regular check-up to prevent physical injury. This means that bolts and nuts should be 
frequently checked for cracks and sharp edges etc. 


Defective components must be replaced immediately. If this is not possible, the device must be put out of 
order until the necessary repairs have been made. 


Clean only with a damp cloth, do not use solvent cleaners. 


This product is intended for use in clean, dry conditions. You should avoid storage in excessively cold or damp 
places as this may lead to corrosion and other related problems. 


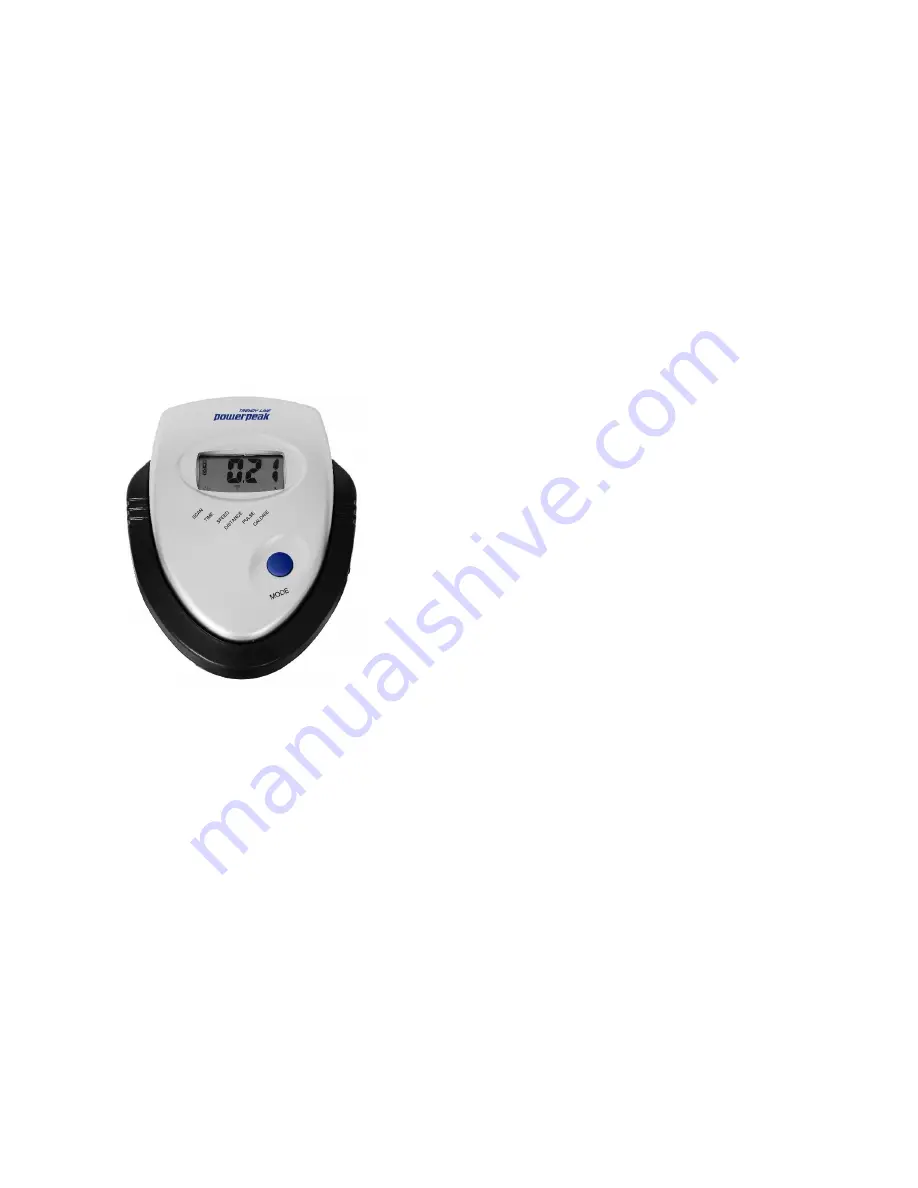
COMPUTER 


Turn computer on and off 

The monitor uses two 1.5V “AA” batteries.


This system turns on when any key is pressed or when it receives an 

signal input from the speed sensor.


If the computer does not receive a signal for more than 4 minutes, the computer will automatically switch to 
sleeping mode. Press a key or move the pedals to start the computer.


Attention: 

If there is an improper display on the monitor, please replace the batteries. Please take care to remove 

all batteries at the same time.  
 

Reset 

To computer can be reset by either changing the battery or pressing the mode key for 3 seconds.  

 
Mode key 

Press the MODE key to choose SCAN or LOCK. If you do not want the scan mode, press the MODE key if the 
function you want starts to blink. On overview of the functions is shown below. 
 

Select function


TIME: 

Press the MODE key until the pointer locks on to time. The total working time will be shown after the 

exercise is started. 

Содержание FET6702

Страница 1: ...Powerpeak Elliptical Trainer FET6702 6 14 Gebruiksaanwijzing User manual Gebrauchsanweisung Mode d emploi...

Страница 2: ...s 40 De foto s dienen ter illustratie Wijzigingen voorbehouden The photographs serve as an illustration Subject to changes Die Fotos dienen zur Illustration nderungen vorbehalten Les photos sont donn...

Страница 3: ...gsmateriaal spelen er bestaat verstikkingsgevaar 6 Zorg dat het apparaat juist is ge nstalleerd voordat het in gebruik wordt genomen Wees er zeker van dat alle schroeven bouten en moeren op de juiste...

Страница 4: ...4 HET PRODUCT...

Страница 5: ...SCHARNIERBOUT PEDAAL L 1 2 1 16R SCHARNIERBOUT PEDAAL R 1 2 1 17 BUS1 28 16 16 8 18 BOOGRING 2 19 GEBOGEN SLUITRING 1 2 2 20L NYLON MOER 1 2 1 20R NYLON MOER 1 2 1 21 ZESKANTBOUT M10 40 S 14 4 22 NYLO...

Страница 6: ...0 16 4 55 SCHROEF ST4 2 19 5 56 KLEINE KAP L 1 57 KETTINGKAST L 1 58 BEVESTIGINGSMOER 1 59 BEVESTIGINGSRING L 1 60 SLUITRING 1 61 KRAAGBAL 2 62 KRAAGBEHUIZING 2 63 BEVESTIGINGSRING r 1 64 SLUITRING 1...

Страница 7: ...plosietekening met alle losse onderdelen gemarkeerd met nummers waaruit het apparaat bestaat Stap 1 het monteren van de voorste en achterste stabilisator Bevestig de voet voorkant 73 en de voet achter...

Страница 8: ...e rechtopstaande buis 7 met bout 30 gebogen sluitring 31 sluitring 32 boogring 18 Bevestig de pedaalbuizen 3 4 met de pedaalcrank met behulp van scharnierbout pedaal 16 gebogen sluitring 19 en nylon m...

Страница 9: ...n om lichamelijk letsel te voorkomen Kijk regelmatig of bouten en moeren goed zijn aangedraaid of er beginnende scheuren ontstaan en of er geen scherpe randen e d zijn wat tot lichamelijk letsel kan l...

Страница 10: ...n gebruik wilt maken van de scanmodus druk dan op MODE tot de functie die u wilt gebruiken knippert Hieronder vindt u een overzicht van de verschillende functies Een functie selecteren TIME Druk op MO...

Страница 11: ...or de lichamelijke belasting meer dan de aanbevolen hoeveelheid van 2 liter per dag zult moeten drinken Draag gemakkelijk zittende kleding terwijl u het apparaat gebruikt en draag bij voorkeur sport o...

Страница 12: ...ervoet op zo dicht mogelijk tegen uw billen Voel een comfortabele spanning in de voorkant van uw dijbeen Houd deze positie 30 seconden vast en herhaal deze oefening 2 keer voor elk been Binnenkant dij...

Страница 13: ...rvice telefoonnummer 0900 8732728 email info powerpeak com UW OUDE APPARAAT WEGDOEN 1 Als het symbool met de doorgekruiste verrijdbare afvalbak op een product staat betekent dit dat het product valt o...

Страница 14: ...gebruik Schade en of storingen door bedrijfsmatig gebruik worden uitgesloten van garantie U kunt gebruik maken van de garantie indien Het product volgens de gebruiksaanwijzing is gebruikt U in het bez...

Страница 15: ...use Ensure that all screws nuts and bolts have been fitted correctly and tightened properly Use only the parts that are recommended by Powerpeak and those that have been delivered with the device 7 Ch...

Страница 16: ...16 THE PRODUCT...

Страница 17: ...PEDAL HINGE BOLT L 1 2 1 16R PEDAL HINGE BOLT R 1 2 1 17 BUSHING1 28 16 16 8 18 ARC WASHER 2 19 CURVED WASHER 1 2 2 20L NYLON NUT 1 2 1 20R NYLON NUT 1 2 1 21 HEX HEAD BOLT M10 40 S 14 4 22 NYLON NUT...

Страница 18: ...SCREW ST4 2 19 5 56 LITTLE COVER L 1 57 CHAIN COVER L 1 58 FIXING NUT 1 59 FIXING WASHER L 1 60 WASHER 1 61 COLLAR BALL 2 62 COLLAR HOUSING 2 63 FIXING WASHER R 1 64 WASHER 1 65 CHAIN WHEEL 1 66 CHAI...

Страница 19: ...g with all single parts marked with numbers which this item consists of Step 1 assembling the front and rear stabiliser Attach the Front Stabilizer 73 and the Rear Stabilizer 1 to the Main Frame 2 wit...

Страница 20: ...Upright Post 7 with Bolt 30 Curved Washer 31 Washer 32 Arc Washer 18 Fix the Pedal Tubes 3 4 with the Pedal Crank by Pedal Hinge Bolt 16 Curved Washer 19 and Nylon Nut 20 Step 4 assembling the pedals...

Страница 21: ...sor wire B to the Computer 40 fix the Computer 40 onto the Upright Post 7 with Screw 41 Caution make sure you have tightened all the bolts and nuts well before starting your workout PLEASE NOTE the en...

Страница 22: ...stem turns on when any key is pressed or when it receives an signal input from the speed sensor If the computer does not receive a signal for more than 4 minutes the computer will automatically switch...

Страница 23: ...ML CALORIE 0 0 9999 KCALs PULSE 40 240 BPM IMPORTANT ADVICE FOR TRAINING Before you start the training consult your doctor Ask what kind of training is suitable for you Wrong or excessive training can...

Страница 24: ...Neck exercises 1 Tilt your head to the right and feel the tension in your neck Slowly drop your head down to your chest in a semi circle and then turn your head to the left You will feel a comfortable...

Страница 25: ...to your toes Maintain this position for 20 30 seconds if possible Exercises for the knees 7 Sit on the floor and stretch out your right leg Bend your left leg and place your foot on your right upper...

Страница 26: ...anty you must submit the original invoice or receipt with clear mention of the date of purchase name of retailer and the description and model number of the appliance You are advised to keep these doc...

Страница 27: ...VICE E mail service vdbergproducts com Accessories and parts of the product that are susceptible to wear and tear are not included in the guarantee Should you wish to reorder these please visit www mu...

Страница 28: ...er t richtig installiert wird bevor Sie darauf zu trainieren beginnen Vergewissern Sie sich dass s mtliche Schrauben Bolzen und Muttern richtig angebracht und festgezogen sind Verwenden Sie nur Zubeh...

Страница 29: ...29 DAS PRODUKT...

Страница 30: ...L 1 2 1 16R SCHRAUBE PEDALSCHARNIER R 1 2 1 17 MUFFE1 28 16 16 8 18 GEW LBTE UNTERLEGSCHEIBE 2 19 SPANNSCHEIBE 1 2 2 20L NYLONMUTTER 1 2 1 20R NYLONMUTTER 1 2 1 21 SECHSKANTSCHRAUBE M10 40 S 14 4 22...

Страница 31: ...LEINE ABDECKUNG L 1 57 KETTENABDECKUNG L 1 58 STELLMUTTER 1 59 FIXIERSCHEIBE L 1 60 UNTERLEGSCHEIBE 1 61 GELENKKUGEL 2 62 MANSCHETTENGEH USE 2 63 FIXIERSCHEIBE R 1 64 UNTERLEGSCHEIBE 1 65 KETTENRAD 1...

Страница 32: ...tt 1 Montage des vorderen und hinteren Stabilisators Befestigen Sie den vorderen Standfu 73 und den hinteren Standfu 1 am Hauptgestell 2 Verwenden Sie daf r die Schlossschraube 11 die Hutmutter 15 und...

Страница 33: ...ibe 32 und die gew lbte Unterlegscheibe 18 Befestigen Sie die Pedalf hrungen 3 4 an der Pedalkurbel Verwenden Sie daf r die Pedalscharnierschraube 16 die Spannscheibe 19 und die Nylonmutter 20 Schritt...

Страница 34: ...zungen zu vermeiden Das bedeutet dass regelm ig gepr ft werden muss ob Schrauben und Muttern gut festgezogen sind oder ob Haarrisse oder scharfe Kanten u vorhanden sind die zu k rperlichen Verletzunge...

Страница 35: ...Sie die Taste MODE und w hlen Sie die Option SCAN oder LOCK Falls Sie nicht den Scan Modus ausw hlen m chten dr cken Sie MODE wenn die von Ihnen gew nschte Funktion blinkt Nachfolgend werden alle Fun...

Страница 36: ...ol Down Phase wieder auf Nutzen Sie dazu die bungen die in dieser Anleitung beschrieben werden Achten Sie darauf dass Sie w hrend des Trainings gen gend trinken Bedenken Sie dass die empfohlene Trinkm...

Страница 37: ...ken Seite Wiederholen Sie diese bung mehrmals bungen f r die Oberschenkel 4 St tzen Sie eine Hand an der Wand ab reichen Sie zu Ihrem Fu nach hinten und Ziehen Sie den rechten bzw linken Fu so nah wie...

Страница 38: ...erholen Sie diese bung 15 mal f r jedes Bein ENTSORGUNG VON ALTGER TEN 1 Wenn dieses Symbol eines durchgestrichenen Abfalleimers auf einem Produkt angebracht ist unterliegt dieses Produkt der europ is...

Страница 39: ...antie berufen wenn Das Gerat entsprechend der Gebrauchsanweisung benutzt worden ist Sie einen g ltigen Ankaufsbeweis vorlegen k nnen und dieser nicht auf irgendeine Weise ge ndert oder unlesbar gemach...

Страница 40: ...mballage en plastique Ils peuvent s y emp trer en jouant et touffer 6 Assurez vous que l appareil est correctement install avant de l utiliser V rifiez si tous les vis boulons et crous sont bien insta...

Страница 41: ...41 18 LE PRODUIT...

Страница 42: ...DE P DALE G 1 2 po 1 16R BOULON DE CHARNI RE DE P DALE D 1 2 po 1 17 BAGUE 1 28 16 16 8 18 RONDELLE ARC 2 19 RONDELLE COURBE 1 2 po 2 20L CROU NYLON 1 2 po 1 20R CROU NYLON 1 2 po 1 21 BOULON T TE HEX...

Страница 43: ...2 19 5 56 PETITE PROTECTION I 1 57 PROTECTION DE CHAINE I 1 58 CROU DE FIXATION 1 59 RONDELLE DE FIXATION G 1 60 RONDELLE 1 61 BILLE COLLIER 2 62 BOITIER COLLIER 2 63 RONDELLE DE FIXATION D 1 64 RONDE...

Страница 44: ...ec toutes les pi ces marqu e avec des nombres dont cet objet est constitu tape 1 assemblage de l avant et l arri re du stabilisateur Attachez le stabilisateur avant 73 sur le cadre principal 2 avec le...

Страница 45: ...e courbe 31 une rondelle 32 et une rondelle arc 18 Fixez les tubes de p dales 3 4 sur la manivelle de p dale avec le boulon de charni re de p dale 16 une rondelle courbe 19 et un crou nylon 20 tape 4...

Страница 46: ...es corporelles Cela signifie galement qu une v rification r guli re doit avoir lieu afin de s assurer que les boulons et les crous sont bien viss s et de pouvoir constater des d buts d usure des bords...

Страница 47: ...s Faites attention de bien enlever toutes les piles en m me temps R initialisation Le moniteur peut tre r initialis soit en changeant les piles soit en appuyant sur la touche mode pendant 3 secondes T...

Страница 48: ...xercices d crits dans ce manuel Veillez boire suffisamment pendant l entra nement N oubliez pas que la quantit recommand e de 2 litres environ par jour doit tre augment e en cas d efforts physiques Po...

Страница 49: ...votre pied vers le haut avec la main droite Essayez de rapprocher votre pied le plus pr s possible de vos fesses R p tez cet exercice 15 fois de suite Puis changez de jambe Extension de l int rieur d...

Страница 50: ...due R p tez cet exercice 15 fois pour chaque jambe LIMINATION DE VOTRE ANCIEN APPAREIL 1 Ce symbole repr sentant une poubelle sur roulettes barr e d une croix signifie que le produit est couvert par l...

Страница 51: ...1 SERVICE Pour toute question contactez le service client le Powerpeak email service vandenberg com Powerpeak Thermiekstraat 1a 6361 HB Nuth Pays Bas Email info powerpeak com Internet www powerpeak co...

Страница 52: ...oute panne caus s par un usage professionnel sont exclus de la garantie Vous pouvez faire jouer la garantie dans les cas suivants Si l appareil est utilis conform ment au mode d emploi Si vous tes en...

Отзывы: