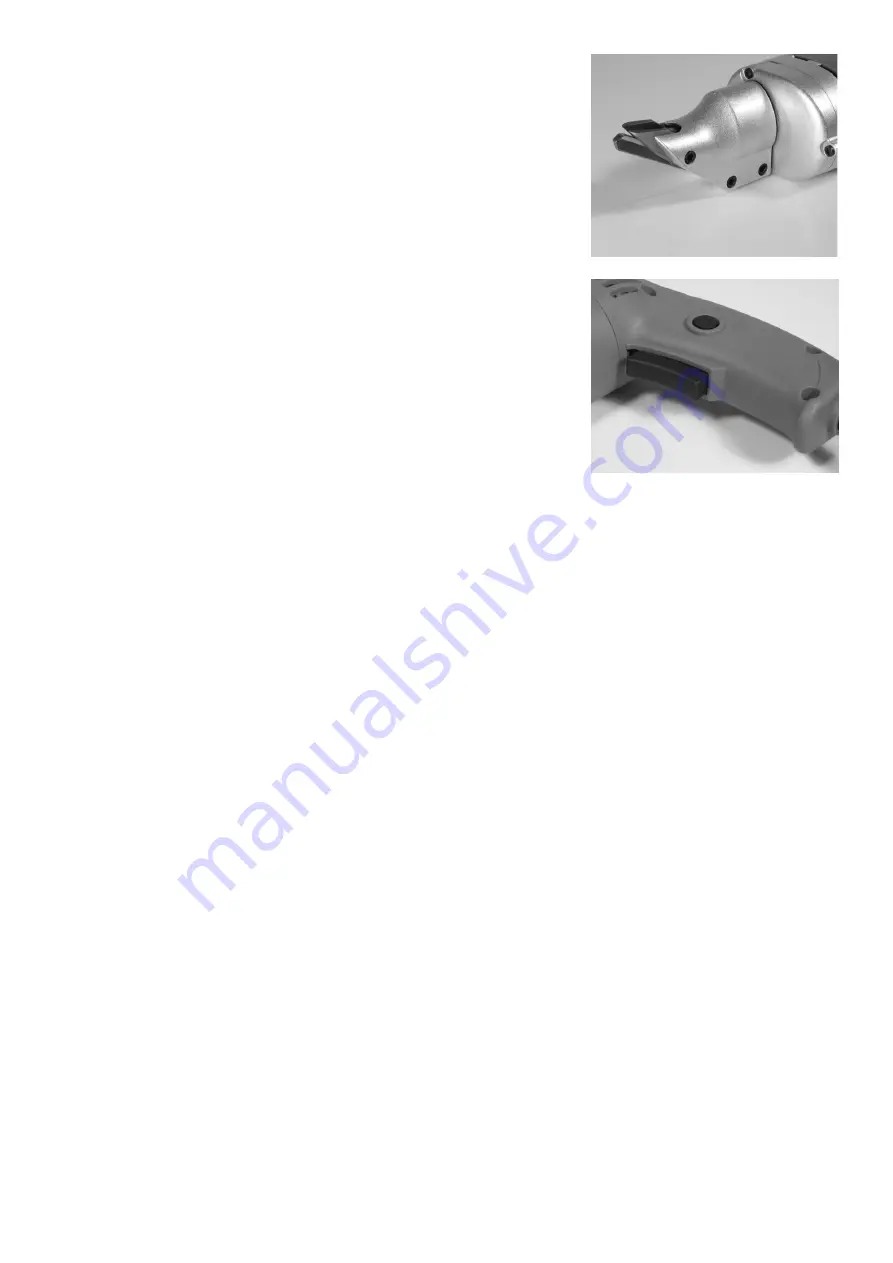
rOtatInG tHe HeaD anD blaDe assembly
To facilitate cutting at odd angles, the head and blade assembly can be
rotated to any angle (see Fig. 1).
1. loosen the cap screws (5) on the head and blade assembly
(44).
2. rotate the head to the desired angle then tighten the screws
again.
3. make sure you reassemble the tool correctly.
If you notice
any parts loosening or wobbling while in use, unplug the tool and
reassemble the tool correctly, making sure the pieces are in the
correct spot.
swItcH actIOn
1. when starting the tool, hold it firmly with both hands i.e. One
hand on the handle and one underneath the gear base (22).
warnInG:
be certain that you do not hold your hands too close to the
moving blades!
Touching these could result in serious injury!
2. the switch can be locked in the "On" position, convenient
for long cutting operations.
To lock the switch "ON", press the
switch button down and press the lock button located on the
handle (see Fig. 2).
3. to unlock the switch, press and release the switch.
The switch
is spring loaded and will snap forward automatically.
maintEnancE
check the condition of this tool before each use.
1. Plug in the tool, and turn it on to run freely for one minute.
2. after the tool has run for one minute, turn it off and put 3-4 drops of light machine oil inside the
blade set assembly (43)
tO remOve Or rePlace tHe blaDes:
1. unplug this tool before attempting any maintenance.
2. loosen the screws (5) holding the head and blade assembly closed (44). remove the head.
3. remove the screw (5) holding blades in place.
4. to reinstall new blades, first assemble the center blade (1) in between the side knife blades (2).
Insert the assembled blades inside the aluminum head (7), and tighten the screws.
5. make sure you reassemble the tool correctly.
If you notice any parts loosening or wobbling while in
use, unplug the tool and reassemble the tool correctly, making sure the pieces are in the correct spot.
rePlacInG carbOn brusHes
After considerable use, your electric metal shear may not run as well as usual. If it starts or runs slowly, makes a
grinding noise or will not run at all, the problem may be worn carbon brushes.
1. unplug your tool before beginning work.
2. to examine the condition of the brushes, remove the screws (35) holding the handle half (42).
remove the handle half and locate the carbon brushes (32).
nOte:
record the position of each carbon brush as you remove it, so you can replace them in exactly the
same way.
Carbon brushes wear into the armature. If they are replaced in a different orientation, they will
have to undergo additional wear before they again fit properly.
3. If the carbon brushes are worn (less than 1/8" carbon remaining) they should be replaced.
If either
brush is cracked or chipped, replaced both brushes. If they are glazed, but more than 1/8" in length,
remove the glaze with a pencil eraser. If they are in good condition and more than 1/8" remains, replace
the original brushes in their original position.
4. to replace a carbon brush, insert it into the brush holder (31) carbon end first, with the spring end
to the outside.
Replace the brush cap.
nOte:
when replacing carbon brushes always replace both carbon brushes at the same time.
5. after replacing the carbon brushes, reassemble the tool and let it run freely for 2 minutes before
using it.
This will allow the carbon brushes (42) to wear into the armature.
for any technical questions, please call 1-800-665-8685
5
fIG. 2
fIG. 1
8257370


