
Powered by Safety
®
44
Maintenance
PowlVac® ARG & ARM Series 4 Vacuum Circuit Breakers
5kV & 15kV - 1200A, 2000A, & 3000A - 25kA, 36kA, 50kA, & 63kA
01.4IB.60306
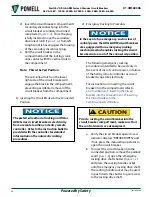
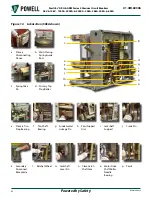
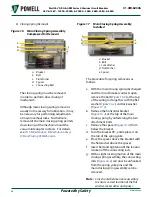
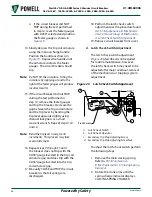
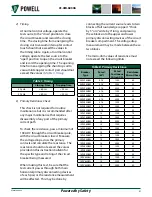
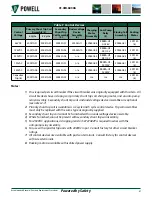
3) Closing Spring Removal
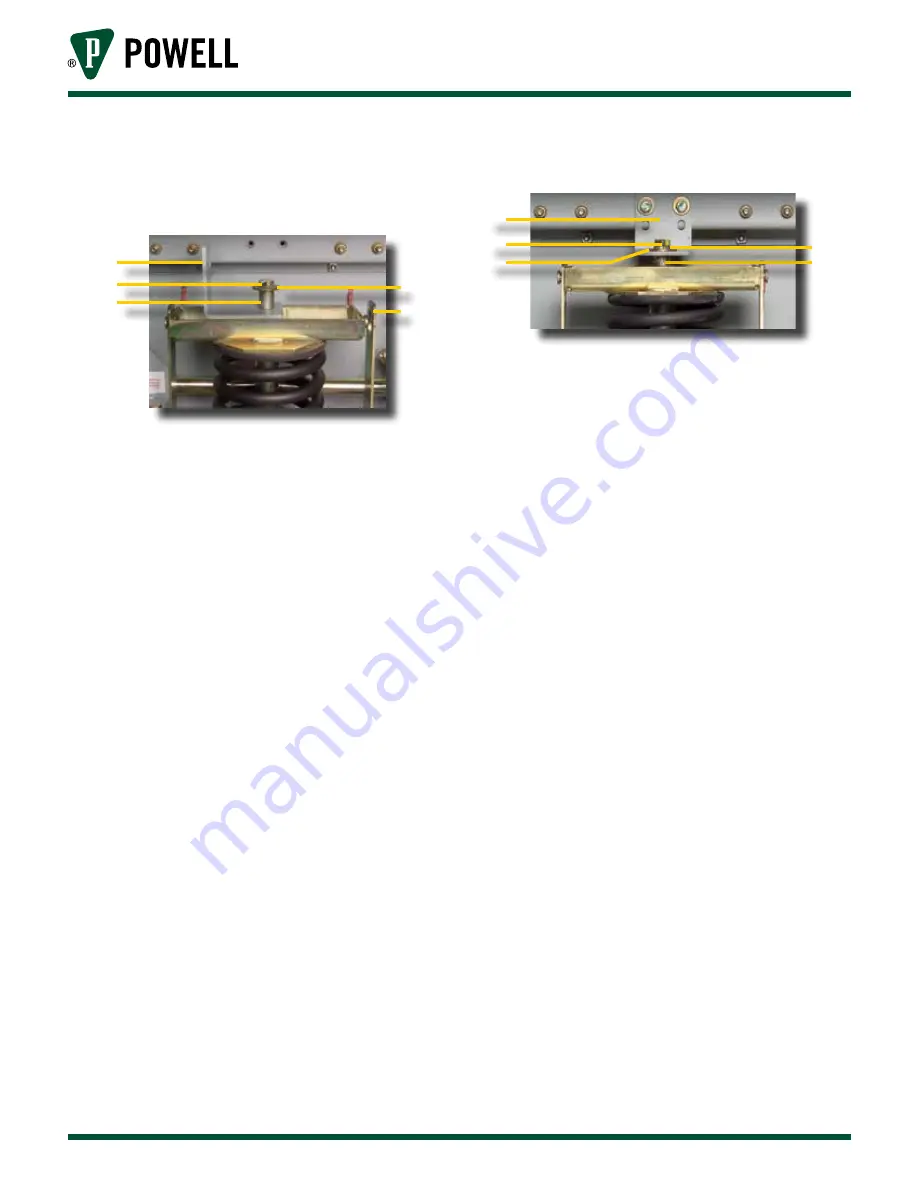
Figure 16 Main Closing Spring Assembly
Compressed for Removal
a. Bracket
b. Bolt
c. Flat Washer
d. Spacer
e. Connecting Rod
c
d
e
b
a
The closing spring must be removed
in order to perform slow closing of
mechanism.
Although main closing spring removal is
usually not necessary for lubrication, it may
be necessary for performing adjustments
or major overhaul tasks. Furthermore,
removal of the main closing spring permits
slow closing of the mechanism and the
vacuum interrupter contacts. For details,
see
Ch 5 Maintenance, B. Mechanism Area,
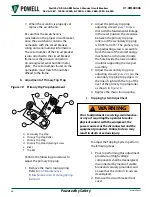
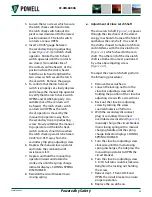
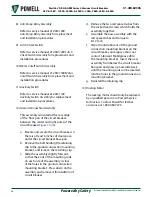
Figure 17 Main Closing Spring Assembly
Installed
a
c
e
d
b
a. Bracket
b. Bolt
c. Lock Washer
d. Flat Washer
e. Spacer
The procedure for spring removal is as
follows:
a. With the main closing spring discharged
and the circuit breaker contacts open,
remove the bolt (
) at the top
of the spring rod together with the flat
washer (
), and lock washer
b. Remove the horizontal bracket
) at the top of the main
closing spring by unfastening the two
attachment bolts.
c. Remove the spacer (
) from
below the bracket.
d. Turn the bracket 90˚, and replace it on
the top of the spring yoke.
e. Place the spacer above the bracket with
the flat washer above the spacer.
f. Insert bolt and tighten until the tension
is taken off the connecting rods.
g. With a slight rocking motion of the main
closing spring assembly, the connecting
rods (
) can now be unhooked
from the spring yoke pins and the
main closing spring assembly can be
removed.
Note:
Care should be taken on reassembly
to ensure correct location of the flat
washer, lock washer and spacer.


