8
Copyright
This publication, including all photographs, illustrations and software, is protected under international copyright law
with all rights reserved to the manufacturer. Neither this manual, nor any of the material contained herein, may be
reproduced without express written consent of the author.
BLUO D25
and POSBANK are trademarks of POSBANK Co., Ltd. in the United States and other countries.
* Other names and brands may be claimed as the property of others.
Copyright© POSBANK Co., Ltd. All rights reserved.
Содержание BLUO D25
Страница 1: ...Point of sale system BLUO D25 Use r manual BLUO_D25_UM_eng_PBUM_E Rev002 140926...
Страница 5: ...5 Specification Outside size...
Страница 15: ...15 Optional Devices 2nd LCD monitor 12 1 Optional Devices 2nd LCD monitor 10...
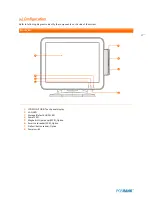
Страница 18: ...18 Side view 1 I O port cover 2 Storage Default HDD 3 Customer display Option 4 USB port Option 1 4 2 3...
Страница 20: ...20 Standard I O port...
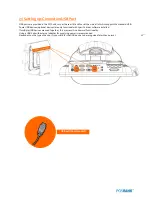
Страница 25: ...25 10 Setting up Printer Connection Connect printer cable to either Serial USB port as required...
Страница 31: ...31 LCD monitor module Step4 Lift up the LCD monitor module and detach from the Stand...
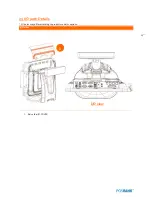
Страница 33: ...33 HDDModule Step4 See printed image for details Zoom in Check an arrow sign...
Страница 46: ...46 CDP Option Step7 Reassemble a unit using the Reverse procedure of step 1 3 above...
Страница 51: ...51 MSR Option Step3 Assemble the MSR Step4 I O part put holes in the sample place RJ45 PORT...
Страница 61: ...61 Speaker Option Step4 Turn two hand screws Step5 Lift up the LCD monitor module and detach from the Stand...
Страница 65: ...65 LPT Option Step4 Turn two hand screws Step5 Lift up the LCD monitor module and detach from the Stand...
Страница 67: ...67 LPT Option Step8 Remove the LPT dummy from I O bracket Step9 Assemble the LPT with the I O bracket LPT dummy...
Страница 68: ...68 LPT Option Step10 Reassemble a unit using the Reverse procedure of stpe1 5 above...
Страница 70: ...70 USB PCB Option Step4 Turn two hand screws Step5 Lift up the LCD monitor module and detach from the Stand...
Страница 72: ...72 USB PCB Option Step8 Use cutter and ripper to remove USB dummy ZOOM IN...
Страница 75: ...75 RAM option Step4 Turn two hand screws Step5 Lift up the monitor module and detach from the Stand...
Страница 77: ...77 RAM option Step8 Place Mother board as in image Stetp9 Install the Memory ZOOM IN...
Страница 78: ...78 RAM option Step10 Assemble the SODIMM from the socket Retaining clip DDR SODIMM notch...
Страница 79: ...79 RAM option Step11 Reassemble a unit using the Reverse procedure of stpe1 5 above...
Страница 83: ...83 2nd storage HDD Option Step8 Assemble 4 screw from HDD bracket as show above ZOOM IN 1 2...
Страница 85: ...85 2nd storage HDD Option Step11 Reassemble a unit using the Reverse procedure of stpe1 5 above...
Страница 92: ...92 Cash drawer Option Step4 Turn two hand screws Step5 Lift up the LCDmonitor module and detach from the Stand...
Страница 94: ...94 Cash drawer Option Step8 Use cutter or ripper to remove Io bracket blanking ZOOM IN...
Страница 95: ...95 Cash drawer Option Step9 Assemble a hexa bolt and fasten Screw to cash drawer ZOOM IN...
Страница 103: ...103 4 LVDS Backlight power selection JLVDS_P3 5 VGA2 power selection CRT_SEL 1 3 3V 5V Default 1 1 5V 12V Default 1...
Страница 104: ...104 6 OnboardTouch function Enable Disable selection USB_SEL 1 Disable Enable Default 1...
Страница 111: ...111 2 4 Launch PXE 0Prom Disable Configuration options Disabled Enabled...
Страница 118: ...118 2 10 Hardware Monitor Smart Fan Mode configuration Smart Fan Mode select...
Страница 119: ...119 System smart fan mode Disable System smart Fan mode select CPU smart fan mode Disable System smart Fan mode select...
Страница 120: ...120 2 11 Chipset...
Страница 121: ...121 2 12 Host Bridge Host bridge parameters Memory Frequency and Timing Display memory Frequency andTiming settings...
Страница 122: ...122 2 13 Boot Display Configuration...
Страница 124: ...124 Color depth 24Bits Select color Depth for LVDS...
Страница 125: ...125 2 15 South Bridge parameters Into South Bridge Subdiredtory...
Страница 127: ...127 2 16 Boot...
Страница 128: ...128 2 17 Security Administrator password Set administrator password User password Set User password...


