113
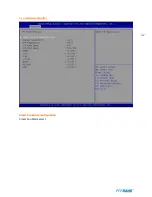
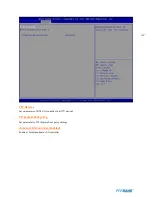
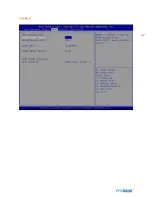
2.6 CPU Configuration
Hyper-Threading[Enabled]
Enabled for Windows XP and Linux (OS optimized for Hyper-Threading Technology)
And Disable for other OS(OS not optimized for Hyper-Threading Technology)
Execute Disable Bit [Enabled]
XD can prevent certain classes of malicious buffer overflow attacks when combine with a supporting OS (Windows
Server 2003 SP1,Windows XP SP2,SuSE Linux9.2, RedHat Enterprise 3 update 3.)
Limit CPUID Maximum[Disable]
Disable for Windows XP
Содержание BLUO D25
Страница 1: ...Point of sale system BLUO D25 Use r manual BLUO_D25_UM_eng_PBUM_E Rev002 140926...
Страница 5: ...5 Specification Outside size...
Страница 15: ...15 Optional Devices 2nd LCD monitor 12 1 Optional Devices 2nd LCD monitor 10...
Страница 18: ...18 Side view 1 I O port cover 2 Storage Default HDD 3 Customer display Option 4 USB port Option 1 4 2 3...
Страница 20: ...20 Standard I O port...
Страница 25: ...25 10 Setting up Printer Connection Connect printer cable to either Serial USB port as required...
Страница 31: ...31 LCD monitor module Step4 Lift up the LCD monitor module and detach from the Stand...
Страница 33: ...33 HDDModule Step4 See printed image for details Zoom in Check an arrow sign...
Страница 46: ...46 CDP Option Step7 Reassemble a unit using the Reverse procedure of step 1 3 above...
Страница 51: ...51 MSR Option Step3 Assemble the MSR Step4 I O part put holes in the sample place RJ45 PORT...
Страница 61: ...61 Speaker Option Step4 Turn two hand screws Step5 Lift up the LCD monitor module and detach from the Stand...
Страница 65: ...65 LPT Option Step4 Turn two hand screws Step5 Lift up the LCD monitor module and detach from the Stand...
Страница 67: ...67 LPT Option Step8 Remove the LPT dummy from I O bracket Step9 Assemble the LPT with the I O bracket LPT dummy...
Страница 68: ...68 LPT Option Step10 Reassemble a unit using the Reverse procedure of stpe1 5 above...
Страница 70: ...70 USB PCB Option Step4 Turn two hand screws Step5 Lift up the LCD monitor module and detach from the Stand...
Страница 72: ...72 USB PCB Option Step8 Use cutter and ripper to remove USB dummy ZOOM IN...
Страница 75: ...75 RAM option Step4 Turn two hand screws Step5 Lift up the monitor module and detach from the Stand...
Страница 77: ...77 RAM option Step8 Place Mother board as in image Stetp9 Install the Memory ZOOM IN...
Страница 78: ...78 RAM option Step10 Assemble the SODIMM from the socket Retaining clip DDR SODIMM notch...
Страница 79: ...79 RAM option Step11 Reassemble a unit using the Reverse procedure of stpe1 5 above...
Страница 83: ...83 2nd storage HDD Option Step8 Assemble 4 screw from HDD bracket as show above ZOOM IN 1 2...
Страница 85: ...85 2nd storage HDD Option Step11 Reassemble a unit using the Reverse procedure of stpe1 5 above...
Страница 92: ...92 Cash drawer Option Step4 Turn two hand screws Step5 Lift up the LCDmonitor module and detach from the Stand...
Страница 94: ...94 Cash drawer Option Step8 Use cutter or ripper to remove Io bracket blanking ZOOM IN...
Страница 95: ...95 Cash drawer Option Step9 Assemble a hexa bolt and fasten Screw to cash drawer ZOOM IN...
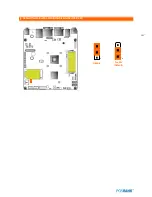
Страница 103: ...103 4 LVDS Backlight power selection JLVDS_P3 5 VGA2 power selection CRT_SEL 1 3 3V 5V Default 1 1 5V 12V Default 1...
Страница 104: ...104 6 OnboardTouch function Enable Disable selection USB_SEL 1 Disable Enable Default 1...
Страница 111: ...111 2 4 Launch PXE 0Prom Disable Configuration options Disabled Enabled...
Страница 118: ...118 2 10 Hardware Monitor Smart Fan Mode configuration Smart Fan Mode select...
Страница 119: ...119 System smart fan mode Disable System smart Fan mode select CPU smart fan mode Disable System smart Fan mode select...
Страница 120: ...120 2 11 Chipset...
Страница 121: ...121 2 12 Host Bridge Host bridge parameters Memory Frequency and Timing Display memory Frequency andTiming settings...
Страница 122: ...122 2 13 Boot Display Configuration...
Страница 124: ...124 Color depth 24Bits Select color Depth for LVDS...
Страница 125: ...125 2 15 South Bridge parameters Into South Bridge Subdiredtory...
Страница 127: ...127 2 16 Boot...
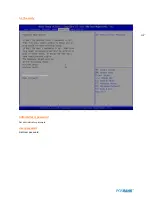
Страница 128: ...128 2 17 Security Administrator password Set administrator password User password Set User password...

