background image

7. 

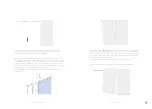
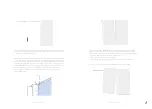
Place Panel A onto the wall brackets by lifting it up, holding it against the wall    


above the brackets and slide it downwards in the wall brackets. Make sure the    


panel is perfectly level.

8. 

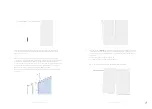
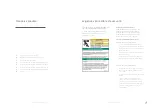
Clean the groove before inserting the vertical profile. Insert the vertical profile    


in the groove starting 10 mm (3/8") from the top of the panel. Use the pre-drilled holes    


as a template to mark the holes. Remove the profile and pre-drill 6,5 mm (1/4")   


hole in the drywall. Insert anchors into the holes and screw them flush. Reinsert the  


vertical profile and fix the profile at the area where the profile touches the wall.    


Make sure the profile is fixed at least on top, middle and bottom.


Make sure the vertical profile is inserted completely in the groove over the length  


of the panel.

10. 

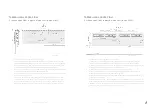
Place Panel B/C: 

carefully

 insert bottom of panel at an angle at the bottom corner.  


Let the panel slide towards the previous installed panel, make sure the panels make  


contact over the length of the panel and snap it down firmly onto the horizontal  


wall bracket.


Repeat as many times as there is a panel B.  


Once all B panels are installed, repeat for panel C


Tip: To remove the panel, use opposite handling from installation.

Doc # 143200 | Rev A | Page 11 of 38

Doc # 143200 | Rev A | Page 10 of 38

Содержание a3 CeramicSteel Flow 1830

Страница 1: ...CeramicSteel Flow Frameless Application Installation Guide Guidelines for installing your new a3 CeramicSteel Frameless Flow Americas 2019 English Espa ol Fran ais Canadien Doc 143200 Rev A Page 1 of...

Страница 2: ...24 centers Must be at least 2 x 12 5 mm 49 Type X gypsum drywall 35 mm 1 34 drywall screws on 250 mm 12 centers Verify Wall Construction CAUTION Adequate wall construction is required to support the w...

Страница 3: ...ls on hard flat surfaces that are not subject to standing water a3 CeramicSteel panels should be stacked no more than three high Panels should never be stored vertically or in such a way that the corn...

Страница 4: ...ed and fixed firmly Repeat for all the brackets Frontview Frameless Flow 2420 Vertical Wall Bracket Positioning 1 Define the centerline of the Frameless Flow installation 2 Define the centerline of pa...

Страница 5: ...rmly Repeat for all the brackets Frontview Frameless Flow 2420 Horizontal Wall Bracket Positioning 1 Define the centerline of the Frameless Flow installation 2 Define the centerline of panel A and pan...

Страница 6: ...al profile and fix the profile at the area where the profile touches the wall Make sure the profile is fixed at least on top middle and bottom Make sure the vertical profile is inserted completely in...

Страница 7: ...not covered by the Accessories warranty Should any failure to conform to this warranty become apparent then upon written notice from the customer PolyVision at its option will correct such nonconform...

Страница 8: ...0 mm 24 como m ximo Al menos 2 paneles de yeso tipo X de 12 5 mm 0 49 Tornillos para panel de yeso de 35 mm 1 34 con centros a 250 mm 12 Verificar la construcci n de la pared ADVERTENCIA La construcci...

Страница 9: ...superficies duras y planas en las que no se estanque agua Los paneles a3 CeramicSteel no deben guardarse en pilas de m s de tres Los paneles nunca deben almacenarse verticalmente o de forma tal que la...

Страница 10: ...os Repita con todos los soportes Vista de frente Frameless Flow 2420 Posicionamiento del soporte vertical de pared 1 Determine la l nea central de la instalaci n de Frameless Flow 2 Determine la l nea...

Страница 11: ...ta con todos los soportes Vista de frente Frameless Flow 2420 Posicionamiento del soporte horizontal de pared 1 Determine la l nea central de la instalaci n de Frameless Flow 2 Determine la l nea cent...

Страница 12: ...al rea donde toca la pared Aseg rese de que el perfil est firme al menos en las partes superior intermedia e inferior Verifique que el perfil vertical est introducido completamente en la ranura a todo...

Страница 13: ...cumplimiento de todas las obligaciones de PolyVision con respecto a la calidad de CeramicSteel La garant a es v lida nicamente en condiciones de uso y mantenimiento normales y no cubre defectos result...

Страница 14: ...type X en gypse de 12 5 mm 0 49 po Vis de la cloison s che de 35 mm 1 34 po et d une distance entre axes de 250 mm 12 po V rifier la construction murale AVERTISSEMENT Une construction murale ad quate...

Страница 15: ...ux sur des surfaces dures et planes qui ne sont pas sujettes la pr sence d eau stagnante Ne pas empiler plus de trois panneaux a3 CeramicSteel Les panneaux ne doivent jamais tre entrepos s la vertical...

Страница 16: ...es pour tous les supports Vue de face Tableau sans cadre Flow Positionnement des supports muraux verticaux 2420 1 D terminer la ligne centrale du tableau sans cadre Flow 2 D terminer la ligne centrale...

Страница 17: ...s pour tous les supports Vue de face Tableau sans cadre Flow Positionnement des supports muraux horizontaux 2420 1 D terminer la ligne centrale du tableau sans cadre Flow 2 D terminer la ligne central...

Страница 18: ...e profil vertical et le fixer l endroit o celui ci touche le mur S assurer que le profil est fix au moins dans le haut au milieu et dans le bas S assurer que le profil vertical est compl tement ins r...

Страница 19: ...x cution de toutes les responsabilit s de PolyVision en ce qui a trait la qualit de CeramicSteel La pr sente garantie s applique uniquement l utilisation et l entretien normaux du produit et ne couvre...

Страница 20: ...l and to discontinue any product or material without notice polyvision com 30 10 2019 PolyVision Americas 10700 Abbotts Bridge Road Suite 100 Johns Creek GA 30097 USA T 1 888 325 6351 E info polyvisio...

Отзывы: