


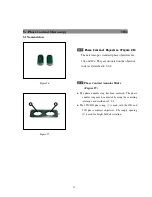


3032
4
Figure 7
Figure 6
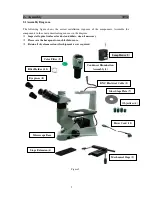
Figure 8
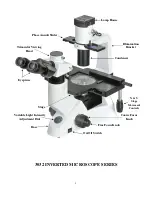
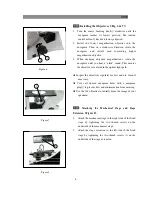
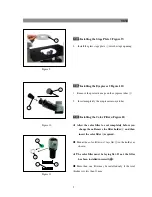
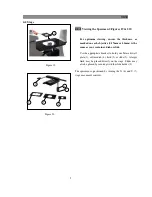
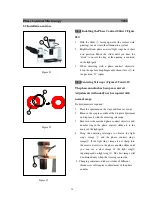
2-2-4 Installing the Objectives
(
(
(
(
Fig. 6 & 7
)
)
)
)
1.
Turn the coarse focusing knob
①
clockwise until the
nosepiece reaches its lowest position. The tension
control collar (2) has been factory adjusted.
2.
Install the lowest magnification objective into the
nosepiece. Then, in a clock-wise direction, rotate the
nosepiece
and
install
each
succeeding
higher
magnification objective.
3.
When changing objective magnifications, rotate the
nosepiece until you hear a “click” sound. This ensures
the objective is centered in the optical light path.
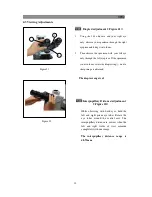
★
Inspect the objectives regularly for dirt and oil; clean if
necessary.
★
Cover all unused nosepiece holes with a nosepiece
plug
③
to prevent dust and contamination from entering.
★
Use the 10x objective to initially focus the image of your
specimen.
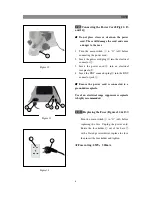
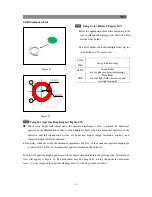
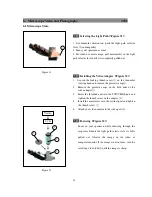
2-2-5 Attaching the Mechanical Stage and Stage
Extension
(
(
(
(
Figure 8
)
)
)
)
1. Attach the mechanical stage to the right side of the fixed
stage by tightening the two thumb screws on the
underside of the mechanical stage.
2. Attach the stage extension to the left side of the fixed
stage by tightening the two thumb screws (1) on the
underside of the stage extension.
1
3
1
2


