background image

Polycom Kirk 5020-5040 User Guide

Ringing Volume

54 

Polycom, Inc. 

Settings

The setting menu offers you the opportunity to customize the handset 
according to your needs. The settings can be changed at any time. The setting 
menu consists of: ringing volume, ringing tone, alerting volume, vibrator, silent 
mode, auto key lock, backlight, auto answer, out of range and advanced 
settings.

Note: 

Advanced settings are described separately in the next chapter.

In the following you will find a description of how to customize the handset. 

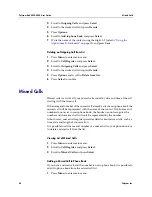
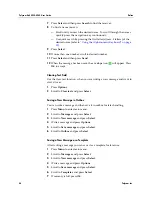
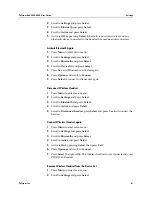
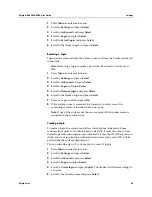
Ringing Volume

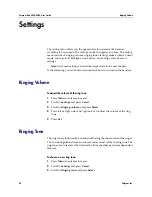
To adjust the volume of the ring tone:

1

Press 

Menu

 to enter main menu.

2

Scroll to 

Settings

 and press 

Select

.

3

Scroll to 

Ringing volume


and press 

Select

.

4

Press left or right side of navigation key to adjust the volume of the ring 
tone. 

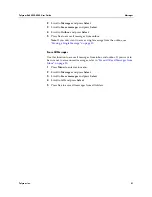
5

Press 

Set

.

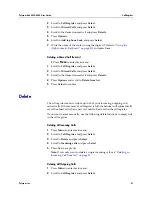
Ringing Tone

The ring tone is followed by a number indicating the chosen tone of the ringer. 

You can distinguish between an internal and external call by the ring tone. The 
ring tone of an internal call is followed by three short beeps (system dependent 
feature).

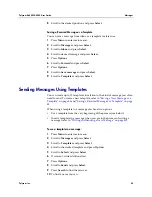
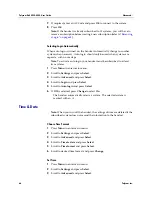
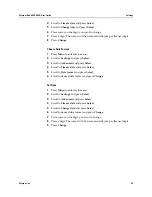
To choose a new ring tone:

1

Press 

Menu

 to enter main menu.

2

Scroll to 

Settings

 and press 

Select

.

3

Scroll to 

Ringing tone

 and press 

Select

.

Содержание KIRK 14158600-HD

Страница 1: ...Version 8 0 April 2011 14158600 HD Ed 8 Polycom KIRK 5020 5040 User Guide...

Страница 2: ...made to ensure that the information in this manual is accurate Polycom Inc is not responsible for printing or clerical errors Information in this document is subject to change without notice ii Tradem...

Страница 3: ...6 Display Backlight 18 Navigating Handset 18 Shortcuts 20 1 Basic Handset Options 22 Turning Handset On Off 22 Adjusting Speaker Volume 22 Locking Keypad 22 1 Making Calls 24 Dial from Call List 25 Di...

Страница 4: ...Call Register 38 Incoming Calls 38 Outgoing Calls 39 Missed Calls 40 Delete 41 1 Messages 43 Sending Messages Using Templates 45 Reading a Message 46 Reading a Long Message 46 Reading a Short Message...

Страница 5: ...oth only KIRK 5040 60 Last Number Redial 63 Advanced 63 Language 63 Any Key Answer 63 Headset 63 Long Key 64 Login 64 Time Date 66 1 General Information 68 Troubleshooting 68 Information 68 Error info...

Страница 6: ...Polycom Kirk 5020 5040 User Guide vi Polycom Inc...

Страница 7: ...s radios televisions or fax machines areas where the handset can be covered its ventilation impaired liquid spilled on the unit or objects inserted into the handset through any openings areas with dus...

Страница 8: ...tery will explode if disposed of in a fire Do not charge batteries unless you use the approved charger and the proper batteries Only use the original lithium battery type 84743424 in the 5020 5040 Han...

Страница 9: ...lide it towards the bottom of the handset 2 Lift off back cover 3 Remove the battery and then remove the green slip from the bottom of the battery Figure 1 1 Battery Protection Strip Installing Batter...

Страница 10: ...y in the direction of the arrow 4 Press back cover back in locked position when you hear a click the back cover is in position Note The product label including the CE logo can be found in the battery...

Страница 11: ...fully charged when handset is removed from charger the charging icon disappears The handset will not vibrate Auto answer is inactive The handset reacts normally for incoming calls It is necessary to r...

Страница 12: ...to Battery on page 53 Battery Disposal Warning Lithium lon batteries must be disposed of properly Do not dispose of the batteries in office or household waste Lithium lon batteries are recyclable You...

Страница 13: ...40 Handset About Your 5020 5040 Handset J J C A B D C D E G H I J F Table 1 2 Handset Elements Headset Connector only 5020 Volume Control Adjusts speaker volume Display Shows call information handset...

Страница 14: ...long three second key press Off hook active Off hook is the term used when handset is in active mode Mutes microphone Right Softkey On hook idle Returns to previous menu Off hook active Turns loadspea...

Страница 15: ...lay shows user ID The types of information shown in Display center when on hook idle display shows standby logo or call information when receiving an incoming call off hook display shows a telephone i...

Страница 16: ...s on page 20 off hook display shows various terms according to the context of the specific function Status Icons The following icons may appear in Status bar or Display center Table 1 4 Handset Icons...

Страница 17: ...eive a message The charging icon will appear when the handset is placed in charger The fully charged icon will appear when the battery is fully charged The key lock icon indicates that the entire keyp...

Страница 18: ...nctions of the handset are grouped into different menus In the following sections you will find a description of how to navigate these menus For more information about the content of the different men...

Страница 19: ...confirm your choices Various terms are being used in the softkey text according to the context of the specific function Navigating Cursor When in the relevant menu press left or right side of navigat...

Страница 20: ...enu press the R key This key will exit menu at once Shortcuts The handset contains two types of shortcuts Personal shortcuts Personal shortcuts consist of functions you have chosen to add to a list of...

Страница 21: ...ed with green arrows Outgoing calls are illustrated with blue arrows Missed calls are illustrated with red arrows Exit menu When in menu press R Find name While on or off hook press top or bottom of n...

Страница 22: ...ormation to the handset Adjusting Speaker Volume Adjusting speaker volume can only be done when handset is off hook The handset will remember the speaker volume until you make a new adjustment During...

Страница 23: ...tions To lock unlock keypad Press Menu followed by to lock keypad Press Unlock followed by to unlock keypad To answer a call when keypad is locked press When you end the call the keypad automatically...

Страница 24: ...rminate the call On Hook Dialling Pre Dial 1 Dial number 2 Press to make a call 3 Press to terminate the call Dial from Phone Book The handset s phone book is familiar to an ordinary phone book Howeve...

Страница 25: ...When you turn off the handset all content of call list is deleted if the subscribed system does not resend the information to the handset Dial from Call Register The call register menu stores up to 4...

Страница 26: ...and press Select 4 Scroll to the desired name or number and press Speed Dial If you have assigned a number to one of the speed dialing keys 0 9 do the following While on hook press digit equivalent to...

Страница 27: ...wer When auto answer is turned on the handset automatically goes off hook when an incoming call arrives If subscribed to a wireless solution the handset automatically goes on hook when calls are termi...

Страница 28: ...u receive a message from an internal voice message center or another telephone on your system This is the message waiting indication To view reply and listen to your messages 1 While on hook press R M...

Страница 29: ...et on a desk or table and leave your hands free To turn loadspeaker on off 1 While on a call press Loud on to turn loudspeaker on 2 To turn loudspeaker off press Loud off Turning Microphone Mute On Of...

Страница 30: ...more information about a specific menu see reference in the end of each description or List of Menu Functions on page 31 which will give you a quick overview of the functions of each menu Phone Book...

Страница 31: ...book for all handsets subscribed to the actual system and all handsets subscribed to the system are listed in the phone book Additional numbers can be added to the phone book by the system administra...

Страница 32: ...ages 1 New message 2 Inbox 3 Outbox 4 Erase messages 5 Templates MSF Function 1 Number Status 1 Silent 2 Headset 3 Auto answer 4 Battery 5 Ringing tone 6 Volume 7 Firmware version Settings 1 Ringing v...

Страница 33: ...are made by using the 0 key Key changes between uppercase and lowercase letters which is indicated on the top left hand corner of the display Pressing left or right side of navigation key will move th...

Страница 34: ...ect 3 Scroll to Find name and press Select 4 To find a name you can Scroll until you reach the desired name To scroll through the names quickly press the navigation key continuously Use quick search b...

Страница 35: ...king a call using speed dial refer to Speed Dial on page 26 1 Press Menu to enter main menu 2 Scroll to Phone Book and press Select 3 Scroll to Find name and press Select 4 To find a name you can Scro...

Страница 36: ...Press Menu to enter main menu 2 Scroll to Phone Book and press Select 3 Scroll to Delete and press Select 4 Scroll to Speed dial number and press Select 5 Scroll to the desired speed dial number and p...

Страница 37: ...nu to enter main menu 2 Scroll to Phone Book and press Select 3 Scroll to Add name number and press Select 4 Write the name of the contact using the digits 0 9 refer to Using the Alphanumeric Keyboard...

Страница 38: ...nd number of incoming call already exits in your phone book the incoming call will be represented with the name of the contact If name and number do not exist in your phone book the handset cannot rec...

Страница 39: ...number of the outgoing call already exits in your phone book the outgoing call will be represented with the name of the contact If name and number do not exist in your phone book the handset can not r...

Страница 40: ...e call starting with the latest call If the name and number of the missed call already exits in your phone book the missed call will be represented with the name of the contact If the name and number...

Страница 41: ...croll to Delete from list 5 Press Select to confirm Delete The call register menu can store up to 40 of your incoming outgoing and missed calls If the memory of call register is full the handset will...

Страница 42: ...Press Menu to enter main menu 2 Scroll to Call Register and press Select 3 Scroll to Delete and press Select 4 Scroll to Missed calls and press Select 5 Press Yes to empty list Note If you only want...

Страница 43: ...text message Inbox and outbox can store up to 20 messages in total A maximum of 72 letters including spaces is allowed for each message If the memory of inbox and outbox is full the handset will auto...

Страница 44: ...function when you are writing a new message and want to start all over 1 Press Options 2 Scroll to Clear text and press Select Saving a New Message in Outbox You can write a message and then save it i...

Страница 45: ...d of message you often need to send To create a new template refer to Saving a New Message as a Template on page 44 and Saving a Received Message as a Template on page 45 When using a template in a me...

Страница 46: ...rator Examples of messages sent from an external application are Long messages Long messages have a maximum length of 72 characters and are saved in inbox in the handset If supported by the subscribed...

Страница 47: ...r in the display when you receive a call back message The display shows text message and contact information alternately To act on the call back message Press to call the call back number in the messa...

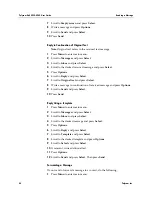
Страница 48: ...al text and press Select 8 Write a message in continuation of received message and press Options 9 Scroll to Send and press Select 10 Press Send Reply Using a Template 1 Press Menu to enter main menu...

Страница 49: ...1 Press Select and then press Send Resending a Message If you want to resend a message to a contact do the following 1 Press Menu to enter main menu 2 Scroll to Messages and press Select 3 Scroll to O...

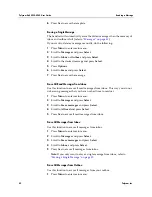
Страница 50: ...erase all read messages from inbox This way you do not risk erasing messages that you have not had time to read yet 1 Press Menu to enter main menu 2 Scroll to Messages and press Select 3 Scroll to Er...

Страница 51: ...ingle message from the outbox see Erasing a Single Message on page 50 Erase All Messages Use this function to erase all messages from inbox and outbox If you want to be sure not to erase unread messag...

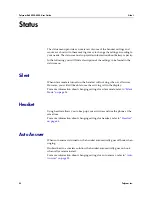
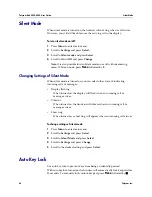
Страница 52: ...n a call arrives However you will still be able to see the arriving call in the display For more information about changing settings for silent mode refer to Silent Mode on page 56 Headset Using heads...

Страница 53: ...ing tone is followed by a number indicating the chosen tone of the ringer You can distinguish between an internal and external call by the ring tone The ring tone of an internal call is followed by th...

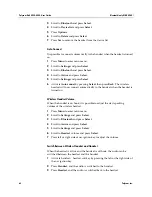
Страница 54: ...how to customize the handset Ringing Volume To adjust the volume of the ring tone 1 Press Menu to enter main menu 2 Scroll to Settings and press Select 3 Scroll to Ringing volume and press Select 4 Pr...

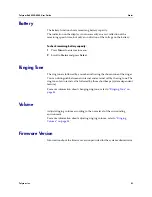
Страница 55: ...e battery capacity is low You create a login To adjust alerting volume 1 Press Menu to enter main menu 2 Scroll to Settings and press Select 3 Scroll to Alerting volume and press Select 4 Press the le...

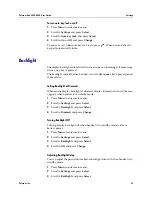
Страница 56: ...select other ways of indicating incoming calls or messages Display flashing When turned on the display will flash when an incoming call or message arrives Vibrator When turned on the handset will vib...

Страница 57: ...ight at Dimmed When setting display backlight at dimmed display information can still be seen vaguely when handset is in standby mode 1 Press Menu to enter main menu 2 Scroll to Settings and press Sel...

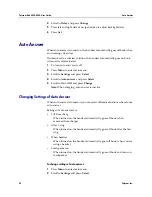
Страница 58: ...s Select 5 Scroll to On or Off and press Change Note When charging auto answer is inactive Changing Settings of Auto Answer When auto answer is turned on you can select different situations where to u...

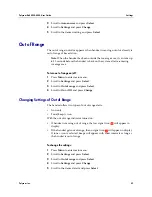
Страница 59: ...o Settings and press Select 3 Scroll to Out of range and press Select 4 Scroll to On or Off and press Change Changing Settings of Out of Range The handset offers two types of out of range alerts Icon...

Страница 60: ...ess Select 4 Scroll to Active and press Select 5 Scroll to On and press Select The Bluetooth function is now activated Pair Wireless Headset with the Handset When setting up a bluetooth connection you...

Страница 61: ...ress Select to connect to the headset again Disconnect Wirelees Headset 1 Press Menu to enter main menu 2 Scroll to Settings and press Select 3 Scroll to Bluetooth and press Select 4 Scroll to Active...

Страница 62: ...ally to the handset when the headset is turned on Wireless Headset Volume When the handset is on hook it is possible to adjust the start speaking volume of the wireless headset 1 Press Menu to enter m...

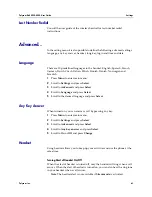
Страница 63: ...and press Select 4 Scroll to Language and press Select 5 Scroll to the desired language and press Select Any Key Answer When turned on you can answer a call by pressing any key 1 Press Menu to enter...

Страница 64: ...press to digits between 0 9 The long key press can be defined as speed dials refer to Speed Dial on page 26 or as MSF messages MSF messages are system dependent If supported by the subscribed system...

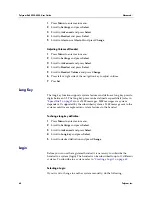
Страница 65: ...word and press Ok 8 If the system in use is removed it is necessary to select one of the remaining systems or to subscribe to a new one Note If one of the systems not chosen is removed the handset rem...

Страница 66: ...in menu 2 Scroll to Settings and press Select 3 Scroll to Advanced and press Select 4 Scroll to Login and press Select 5 Scroll to Auto login and press Select 6 If Off is selected press Change to sele...

Страница 67: ...Select 3 Scroll to Advanced and press Select 4 Scroll to Time date and press Select 5 Scroll to Date format and press Select 6 Scroll to desired date format and press Change Set Date 1 Press Menu to e...

Страница 68: ...he handset cannot subscribe even if system ID has been found Check if Authentication Code is necessary Not possible to turn on the handset Check if battery is connected If yes charge the battery The h...

Страница 69: ...all warnings and instructions including those marked on the product 3 Unplug this product before cleaning Do not use liquid cleaners or aerosol cleaners Use damp cloth for cleaning 4 Do not install th...

Страница 70: ...e to the base or handset 1 The charger must be placed on a hard flat surface and connected to a functional 120 volt AC power source depending on the country of use 2 This telephone will not operate in...

Страница 71: ...he problem has been corrected or they may discontinue your service temporarily If possible they will notify you in advance But if advance notice is not practical you should be notified as soon as poss...

Страница 72: ...Handset and Charger have been marked with the CE mark This mark indicates compliance with EEC Directives 2006 95 EC 2004 108 EC and 1999 5 EC A full copy of the Declaration of conformity can be obtai...

Страница 73: ...tilskipun 1999 5 EC Latviski Latvian Ar o Polycom UK Ltd deklare ka KIRK 5020 5040 Handset atbilst Direktivas 1999 5 EK butiskajam prasibam un citiem ar to saistitajiem noteikumiem Lietuviu Lithuanian...

Страница 74: ...99 5 EG Table 1 8 Explosive Device Proximity Warning Warning Do not operate your wireless network device near unshielded blasting caps or in an explosive environment unless the device has been modifie...

Страница 75: ...etter eller i et eksplosivt milj med mindre enheten er modifisert slik at den t ler slik bruk Aviso N o opere o dispositivo de rede sem fios perto de c psulas explosivas n o protegidas ou num ambiente...

Страница 76: ...t reassemble can cause electrical shock when the appliance is subsequently used If the product need repair consult your dealer 10 Refer servicing to qualified service personnel 11 Avoid using telephon...

Страница 77: ...ries heat up This is normal and not dangerous 5 Lithium cell installation Caution Danger of Explosion if Battery is incorrectly replaced Replace only with the same or equivalent type recommended by th...

Страница 78: ...ates uses and can radiate radio frequency energy and if not installed and used in accordance with the instructions may cause harmful interference to radio communications However there is no guarantee...

Страница 79: ...s susceptible de produire des interf rences nuisibles Si cet quipement provoque des interf rences lors de la r ception des radiofr quences ou des fr quences de t l vision ce qui peut tre v rifi en met...

Страница 80: ...der this limited warranty if its testing and examination disclose that the alleged defect or malfunction in the product does not exist or results from Failure to follow Polycom s installation operatio...

Страница 81: ...above limitations and exclusions may be limited in their application to you When the implied warranties are not allowed to be excluded in their entirety they will be limited to the duration of the app...

Страница 82: ...e extent that such activity is expressly permitted by applicable law notwithstanding this limitation The SOFTWARE PRODUCT is licensed as a single product Its component parts may not be separated for u...

Страница 83: ...RVICES POLYCOM may provide you with support services related to the SOFTWARE PRODUCT SUPPORT SERVICES Use of SUPPORT SERVICES is governed by the POLYCOM policies and programs described in the POLYCOM...

Страница 84: ...Warranties Exclusive IF THIS SOFTWARE PRODUCT DOES NOT OPERATE AS WARRANTED ABOVE YOUR SOLE REMEDY FOR BREACH OF THAT WARRANTY SHALL BE REPAIR REPLACEMENT OR REFUND OF THE PURCHASE PRICE PAID AT POLYC...

Страница 85: ...h Korea Yugoslavia Iran Syria Republic of Serbia or any other country to which the U S has embargoed goods or ii to anyone on the U S Treasury Department s list of Specially Designated Nationals or th...

Страница 86: ...production release performance display or disclosure of the SOFTWARE PRODUCT programs and or documentation by the U S Government or any of its agencies shall be governed solely by the terms of this Ag...

Страница 87: ...pecifications subject to change without notice Polycom Headquarters 4750 Willow Road Pleasanton CA 94588 T Polycom Denmark Langmarksvej 34 DK 8700 Horsens Tel 45 7560 2850 Fax 45 7560 2851 emeadk poly...

Страница 88: ......
Отзывы: