Page 17
I
I
I
Remove cylinder
- Lift cylinder straight up on studs. Rock cylin-
der to loosen as required - DO NOT pry between cylinder and
cases. When cylinder nears top frame rail, angle cylinder rearward
to match angle of top frame rail. Using care not to scratch inside
of cylinder on studs, slide cylinder forward about 1 inch, then
remove cylinder from right side. The front studs will pass through
the center opening of the lower cylinder walls.
If unable to remove cylinder, remove front studs by threading
two nuts onto end of stud, tightening the two nuts against each
other, and then removing the stud by turning the lower nut with a
wrench. Using a clean rag, immediately wrap rag around bottom
of connecting rod and cover top of crankshaft area to prevent dirt,
circlips, or other parts from falling into motor and necessitating
engine removal and disassembly!
Remove piston
- Hold piston in one hand, then use a pair of
needlenose pliers to squeeze ends of piston circlip together and
remove circlip. Do not squeeze ends more than required to remove
circlip. Make sure not to drop circlips into motor! While support-
ing piston, push piston pin away from remaining circlip and out of
piston and set aside. Remove piston by lifting straight up. Remove
rod bearing from end of connecting rod.
Inspection
Clean all parts thoroughly, then carefully examine all parts for
wear, cracking or signs of leakage. Look for signs of blow by on
piston skirt. A good, thorough inspection will prevent unsolved
problems from causing the motorcycle to fail. Order any parts
needed right away to prevent delays. Inspect the cylinder bore for
scratches or other damage. The aluminum alloy cylinder is coated,
it can not be over-bored and must be replaced if oversize or badly
damaged.
Inspect piston closely inside and out for scratches, cracks or
other damage. Excessive scorching below ring is cause for
replacement. Examine piston pin for wear, then check fit of pin in
piston. There should be no noticeable slop. Put rod bearing in end
of rod, and fit piston pin through bearing. Lift straight up on pin
to check for any play. Replace bearing and pin when installing
new piston kit.
Pull straight up on connecting rod. If any play is detected, use a
dial indicator to check amount of play. Check side clearance of
crankshaft using a feeler gage between bottom of rod and side of
crankshaft weight. A feeler gage larger than .030˝ should not fit.
Have crankshaft rebuilt or replaced as needed.
Fit new ring into top of cylinder bore about
1
⁄
2
˝. Insert piston
from top upside down just enough to make ring square in bore,
then remove piston. Check gap between ends of piston ring using
feeler gages. A problem exists with the ring or the cylinder if the gap is less than .004˝ or more than .012˝. Resolve before proceed-
ing.
Examine head, combustion chamber and cylinder for signs of coolant or combustion leakage. Replacing o-rings is recommended
every time engine is disassembled, especially the highly stressed combustion chamber o-ring. If motor overheats and coolant over-
flows, suspect a failure of the combustion chamber o-ring.
Check flatness of cylinder head and combustion chamber sealing surfaces using a sheet of glass, surface plate, or other very flat
surface. Replace or machine as required. If reusing piston, remove any carbon deposits on top of piston dome using solvent and a
brass or plastic scraper. Use end of old piston ring to clean ring groove(s). Be careful not to scratch or damage piston. Remove any
carbon deposits from exhaust port using solvents and a soft scraper.
If the rings are changed regularly, and the piston, piston pin and rod bearing are changed whenever any wear is evident, the air fil-
ter is scrupulously maintained to prevent dirt from entering the motor, and a high quality premix oil is used at a 40:1 ratio, then thor-
ough visual inspection and part replacement will be all the service that is needed for quite some time.
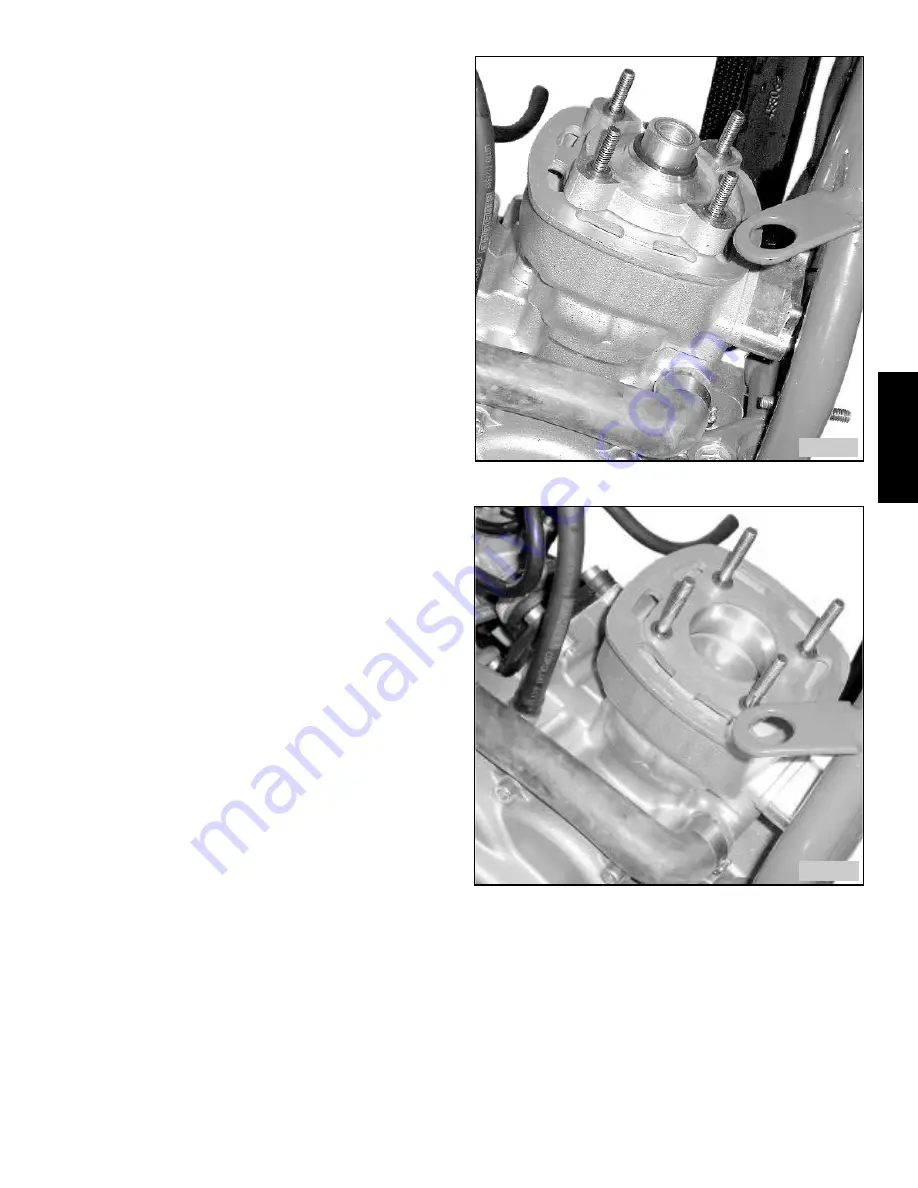
Photo of combustion chamber. Note o-rings on spark plug boss
and cylinder studs.
Photo of cylinder and piston dome. Note o-rings on studs.
III
III
.17
.17
III
III
.16
.16
III
III
.17
.17


