background image

-6-

7.

SETTING THE DIALLING AND RECALL MODE

The settings must be carried out BEFORE connecting the telephone to the telephone
socket. Please note that batteries are not supplied with the unit.

Remove the battery compartment cover on the underside of the base by removing
the screw and sliding back the cover. N.B. The telephone must be disconnected from
the line before removing the battery cover. Fit 2 size M (or equivalent) leakproof
alkaline batteries observing correct polarities. The batteries support information in the
memories should the telephone be disconnected from the line.

Two preset switches will be found situated underneath the memory card inlay. These
are the DIAL MODE SELECTOR SWITCH and RECALL MODE SELECTOR SWITCH
and should be set as follows:

7.1 THE DIAL MODE SELECTOR SWITCH
BT are replacing all local exchanges with new ‘TONE' dialling digital systems. They
will give improved clarity and reliability and with ‘Touch Tone’ signalling telephones,
instant connection of calls over digital exchanges and a host of advanced features.
However some telephone exchanges in the U.K. still operate on the PULSE dialling
system.

Your NR203HPUK series telephone allows you to operate on either system and the
DIAL MODE SELECTOR SWITCH should be set to the dialling mode required by your
exchange. Set the switch to the PULSE position for pulse dialling or to the TONE
position for tone dialling. If in doubt about the correct dialling mode used by your
exchange, please consult your Network Operator.

7.2 THE RECALL MODE SELECTOR SWITCH
If you are connected to a TONE dialling exchange, set the switch to the TBR (Timed
Break Recall) position to enable you access certain Network Services.

If you are connected to a PULSE dialling exchange, set the switch to the ELR(Earth
Loop) position as recall has no function on direct lines connected to such exchanges.
(This will avoid the possibility of cutting off your call should the recall button be
pressed accidentally.)

If you are connected to a PABX, set the switch according to the requirements of your
particular PABX. If in doubt, consult your PABX Instructions or your PABX maintainer.

Having installed the batteries and set the switches, refit the battery compartment
cover ensuring that it is screwed fully into place.

NR203HPUK User Guide  5/6/03  11:13 am  Page 8

Содержание Executive NR203HPUK

Страница 1: ...USER GUIDE INTERNATIONAL FEATUREPHONE NR203HPUK Executive ...

Страница 2: ...9 12 4 HEADSET OPERATION 10 12 5 MEMORY OPERATION 10 12 6 STORING NUMBERS WHILST ON A CALL 11 12 7 PROGRAMMING CODES FOR CENTREX AND NETWORK SERVICES 11 12 8 CHANGING A NUMBER IN A MEMORY LOCATION 11 12 9 DIALLING NUMBERS FROM MEMORY 11 12 10 PAUSE FACILITY 11 12 11 MIXED MODE OPERATION STORING MIXED DIAL MODE NUMBERS 12 12 12 RECALL BUTTON 13 12 13 AUTO CALL TIMER 13 12 14 AND Button 13 12 15 HAN...

Страница 3: ...details of the problems are enclosed together with a copy of your purchase invoice and that goods are returned in their full original packaging with instructions enclosed Goods are returned to the manufacturer at the customers own risk and expense 2 CONDITIONS OF USE Your Executive NR203HPUK Featurephone is approved for use on business or private direct exchange lines and on compatible PBX extensi...

Страница 4: ...t push to mute facility or optional push to speak in handset mode only Base unit latchable mute with LED indication Wall or Desk mountable Full ON HOOK operation with volume control and LED indication Ringer OFF LO HI control Ringer pitch control Pause entry in dialling sequence 10 digit LCD showing real and call elapsed time and dialled telephone number Call timer Message waiting Any other usage ...

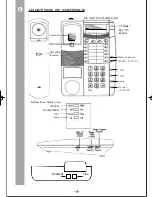
Страница 5: ...ne Set Time Redial On Hook with indicator Headset with indicator Tone Headset Tone Mode Store Off Pulse On Wall mount off hook handset reset Hook Switch Wall Mount Mute button in handset LCD display Ring MW indicator Switches below Notation Panel Signalling Message Waiting Line Headset ...

Страница 6: ...imed Break TBR Recall Pulse Tone Sets signalling dialling to Loop Disconnect LD or DTMF MF Store On Off Allows you to protect numbers stored in memory location Message Waiting Sets the message waiting to 4 or 6 line configuration Headset Volume Control Allows you to set the headset volume Visual Indicators Ring This indicates an incoming call by lighting up Message Waiting Operates where PABX mess...

Страница 7: ...nced features However some telephone exchanges in the U K still operate on the PULSE dialling system Your NR203HPUK series telephone allows you to operate on either system and the DIAL MODE SELECTOR SWITCH should be set to the dialling mode required by your exchange Set the switch to the PULSE position for pulse dialling or to the TONE position for tone dialling If in doubt about the correct diall...

Страница 8: ... contact your local BT office Your NR203HPUK telephone provides tone signalling when the Dial Mode selector switch is set to the TONE position and the Recall Mode selector switch is in the TBR position If your system requires PULSE dialling you can change to TONE dialling once the call has been established by pressing the TONE button This enables you to access special services such as Banking etc ...

Страница 9: ...ed to give a quiet or loud ring The Ringer may also be switched OFF by setting the switch to the OFF position Outgoing calls may still be made with the switch set to the OFF position RINGER PITCH switch Set the switch to the Hl MED or LO position to adjust the pitch of the ringer 11 WALL MOUNTING You may wish to mount the Executive NR203HPUK Featurephone on a wall To do this Slide the plastic wall...

Страница 10: ... of the call replace handset in cradle 12 2 ON HOOK OPERATION When the telephone rings press the On Hook button to hear the calling party To make a call press the ON HOOK button await dial tone and dial the required telephone number On connection of the call pick up the handset to speak To change from ON HOOK mode to HANDSET MODE pick up the handset Replacing the handset in the cradle will clear d...

Страница 11: ...ft the handset then press headset The LED on the headset button will illuminate The handset can now be placed back in its original position 12 5 MEMORY OPTION Up to 20 telephone numbers each consisting of a maximum 16 digits including pauses or change of dial mode instruction Alternatively you may store 8 telephone numbers plus 8 access codes for Network Services which your service provider has en...

Страница 12: ...many Centrex services along with special memory inlay cards for ease of use are available from your supplier or by contacting Pocket UK 12 8 CHANGING A NUMBER IN A MEMORY LOCATION If you wish to change a number in a memory location simply follow the instructions for storing a number Entering the new number will automatically erase the previous number 12 9 DIALLING NUMBERS FROM MEMORY To dial a num...

Страница 13: ...cation M1 you would proceed as follows 1 Lift up the Handset or press ON HOOK button to seize the line 2 Press STORE button once 3 Key in 123 4 Press TONE button this changes the dialling mode to tone 5 Press PAUSE button to introduce a pause Note that it may be necessity to introduce a second pause but do not enter more than 2 or incorrect operation may result 6 Key in 4567890 7 Press M1 button 8...

Страница 14: ...e Call Timer will automatically indicate elapsed time during a call up to 59 minutes and 59 seconds To stop the call timer either hang up or terminate headset operation The display will revert to current time 12 14 AND BUTTONS These are used with the new services provided by digital exchanges as well as accessing features on some PABX s They have no dialling function in pulse dialling mode 12 15 H...

Страница 15: ...established which you require select either ELR Earth Recall or TBR Timed Line Break Recall using the ELR TBR switch NB Like the mute key the Recall key is a hard switches not a soft press key This means that it will only depress slightly and will remain depressed until released 13 2 PABX PAUSE FACILITY On PABX systems which provide secondary proceed indication you must wait for the secondary proc...

Страница 16: ...rtment Wait for 5 minutes refit the batteries reset the clock and re connect the telephone NOTE It will be necessary to re programme the memories after the batteries have been refitted If having done this the problem still exists carry out the following Unplug all extensions on the Exchange Line Plug the telephone into the Master socket If the telephone operates correctly it is not faulty and a br...

Страница 17: ...ishes as these can affect the internal circuits DO NOT use abrasive cleaners as these will dull the high gloss finish DO NOT let the coiled cord become knotted or twisted Do not expose the unit to high temperatures by siting near radiators etc Keep the unit dry and do not install or operate in outdoor conditions The handset and base should be cleaned with a soft cloth Do not apply polishes or stro...

Страница 18: ...s are manufactured to comply with CE standards Distributed by Pocket UK International Ltd Incom House Waterside Trafford Park Manchester M17 1WD Tel 0161 935 1000 Fax 0161 935 1001 Email sales pocketuk com Pocket UK International Ltd 2003 ...

Отзывы: