16
6.
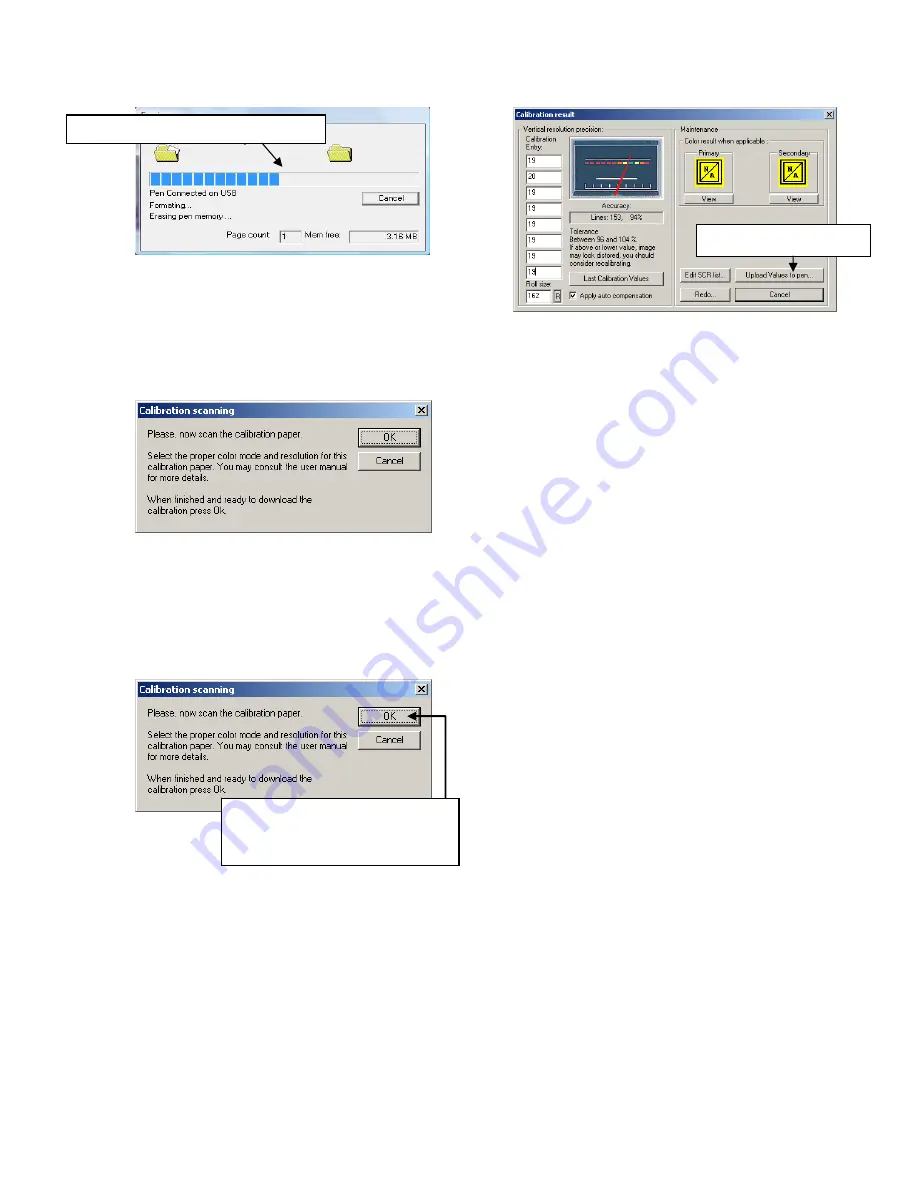
After
the
memory
has
been
formatted,
the
Calibration
scanning
dialog
window
will
appear.
Please
disconnect
the
DocuPen
from
the
USB
cable
and
position
it
on
top
of
the
Roller
Calibration
sheet.
Please
scan
the
sheet
in
the
B&W
mode
and
high
resolution
(600
DPI).
7.
The
DocuPen
will
now
save
the
Calibration
Image
into
memory.
After
the
image
is
saved,
please
re
‐
attach
the
DocuPen
to
the
USB
cable.
Now
press
the
Power
ON
button
within
the
DocuPen
and
click
the
OK
button
within
the
Calibration
scanning
dialog
window.
8.
The
Calibration
result
dialog
window
will
appear.
You
should
see
the
roller
calibration
values
to
the
left.
If
the
accuracy
is
within
96
‐
104%,
you
have
successfully
calibrated
the
rollers!
9.
Finally
click
Upload
Values
to
pen
button
in
the
Calibration
result
dialog
window
to
send
the
calibration
result
to
the
DocuPen
Xseries
scanner.
You
will
be
prompted
to
turn
the
DocuPen
Xseries
ON.
Press
the
Power
ON
button
on
the
DocuPen
Xseries
scanner
and
click
OK
in
the
dialog
window
–
this
will
store
the
new
values.
You
have
successfully
recalibrated
your
DocuPen
Xseries
scanner!
Memory
will
be
automatically
formatted
Wait
for
Roller
calibration
sheet
to
be
saved,
re
‐
connect
the
USB
connection
and
turn
the
power
ON,
then
click
OK.
Click
Upload
Values
to
pen
Содержание DocuPen XSERIES
Страница 1: ...1 DocuPen XSERIES Scanner ...
Страница 28: ...28 ...


