background image

User’s Manual of IGS-2x00T  Serial Device Server  Series 


61 


4.7.3 Firmware Update 

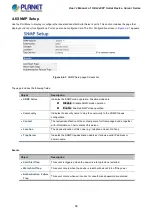
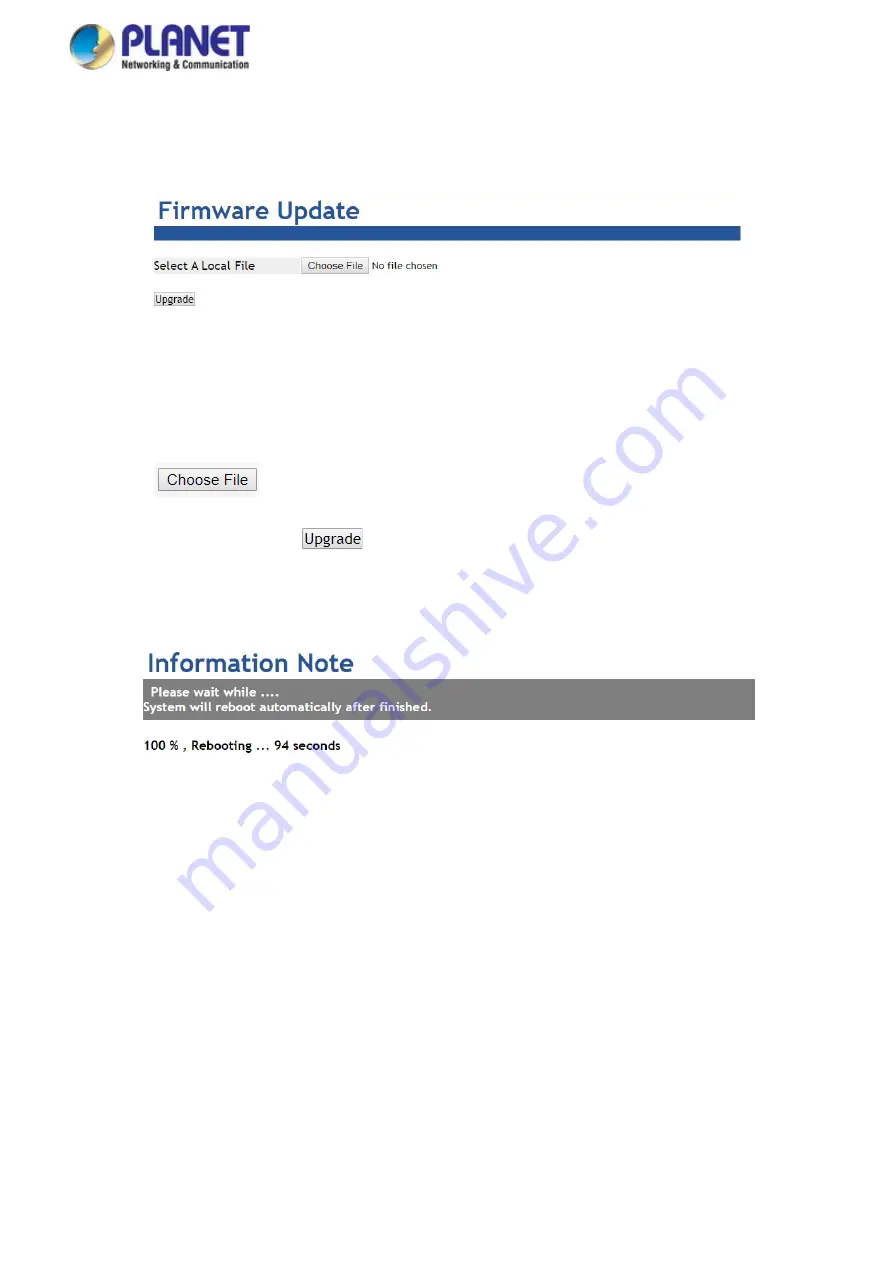
This page facilitates an update of the firmware controlling the switch. The Firmware Update screen in 

Figure 4-7-3

 appears. 


Figure 4-7-3:

 Firmware Update Page Screenshot 


To open 

Firmware Update

 screen, perform the following: 

1.  Click 

Maintence

 -> 

Firmware Update

2.  The Firmware Update screen is displayed as in 

Figure 4-7-3

3.  Click the “

“button of the Main page; the file selection menu pops up for you to choose firmware. 

4.  Select on the firmware, then click “

”; the 

Software Upload Progress

 would show the file with upload status. 

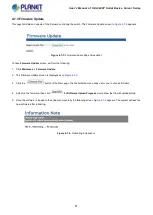
5.  Once the software is loaded to the system successfully, the following screen 

Figure 4-7-4 

appears. The system will load the 

new software after rebooting. 


Figure 4-7-4:

 Rebooting Screenshot 


Содержание ICS-2200T

Страница 1: ...User s Manual of IGS 2x00T Serial Device Server Series 1 Industrial RS232 RS422 RS485 Serial Device Server Series ICS 2200T ICS 2400T ...

Страница 2: ...nt to Part 15 of the FCC Rules These limits are designed to provide reasonable protection against harmful interference when the equipment is operated in a commercial environment This equipment generates uses and can radiate radio frequency energy and if not installed and used in accordance with the Instruction manual may cause harmful interference to radio communications Operation of this equipmen...

Страница 3: ...nputs 18 2 1 5 Serial Port Pin Define 19 2 2 Installing the Industrial Serial Server 20 2 2 1 Installation Steps 20 2 2 2 DIN Rail Mounting 21 2 2 3 Wall Mount Plate Mounting 23 3 INDUSTRIAL SERIAL SERVER MANAGEMENT 24 3 1 Requirements 24 3 2 Web Management 25 3 2 1 Logging in to the Industrial Serial Server 25 3 3 Remote Management 27 3 4 PLANET Smart Discovery Utility 28 4 WEB CONFIGURATION 30 4...

Страница 4: ...er Slave mode 44 4 5 2 3 RF2217 mode 46 4 5 2 4 Serial Telnet mode 47 4 5 2 5 TCP Server mode 49 4 5 2 5 TCP Client mode 52 4 5 2 6 UDP mode 54 4 5 2 7 Virtual COM mode 56 4 6 SNMP Setup 59 4 7 Maintenance 60 4 7 1 Change Password 60 4 7 2 Load Default 60 4 7 3 Firmware Update 61 4 8 Save and Restart 62 5 SOFTWARE VCOM UTILITY 63 5 1 Installing the VCOM Utility 63 5 2 Search Devices 65 5 3 Virtual...

Страница 5: ...rial Device Server Industrial Serial Server mentioned in this Guide refers to the ICS 2200T ICS 2400T 1 1 Packet Contents Open the box of the Industrial Serial Server and carefully unpack it The box should contain the following items The Industrial Serial Server x 1 Quick Installation Guide x 1 Wall Mounting Kit x 1 Dust Cap x 2 If any of these are missing or damaged please contact your dealer imm...

Страница 6: ...ective solution for users and system integrators to quickly transform their serial devices into the Ethernet network with no need of replacing the existing serial devices and software system Remote Management As the ICS 2x00T series provides an easy serial to Ethernet connectivity and connection to a TCP IP network the remote network system can thus be managed efficiently via its Web Telnet and VC...

Страница 7: ... or wall mounting for efficient use of cabinet space The ICS 2x00T series also provides an integrated power supply source with a wide range of voltages 12 to 48V DC ideally suitable for worldwide operation with high availability applications requiring dual or backup power inputs Dual Power Input for High Availability Network System The ICS 2x00T series features a strong dual power input system wit...

Страница 8: ...ries provides event alert function to help to diagnose the abnormal device owing to whether or not there is a break of the network connection or the rebooting response Digital Input and Digital Output for External Alarm With digital input and digital output on its front panel an external alarm can help users via the digital input to detect and log external device status such as door intrusion dete...

Страница 9: ...ins the functions of the ICS 2X00T and how to physically install the ICS 2X00T Section 3 INDUSTRIAL SERIAL SERVER MANAGEMENT The chapter explains how to manage the ICS 2X00T in different ways Section 4 WEB CONFIGURATION It describes how to configure by web interface Section 5 SOFTWARE VCOM UTILITY It describes how to use software VCOM in the Virtual COM mode ...

Страница 10: ...Time Protocol and DNS management Standard TCP IP interface and versatile operation modes Software Protocol supports ARP ICMP TCP IP UDP HTTP server DHCP client Telnet server client Serial Operation mode selected via management interface Pair Connection mode for connecting two serial devices over a network Allows a maximum of 4 hosts to be accessed in TCP client mode Firmware upgrade via HTTP proto...

Страница 11: ... Free fall shock proof and vibration proof for industries Supports extensive LED indicators for network diagnosis Reset button for resetting to factory default Digital Input and Digital Output ICS 2400T only 2 digital inputs DI 2 digital outputs DO Integrate sensors into auto alarm system Transfer alarm to IP network via email and SNMP trap ...

Страница 12: ... Tx Tx Rx Rx GND 4 wire RS485 Tx Tx Rx Rx GND 2 wire RS485 Data A Data B GND Pin Assignment Serial Line Protection 2KV isolation protection 1KV level 2 surge protection 15KV ESD protection Ethernet Interface Ethernet Ports 2 x RJ45 2 x RJ45 Standard 10 100BASE TX Distance 100m Switch Architecture Store and Forward Address Table 1K ESD Protection 6KV Surge Protection 2KV Hardware Installation DIN r...

Страница 13: ...uts Open collector to 24V DC 100mA max Alarm Provides one relay output for power failure Alarm relay current carry ability 1A DC 24V Reset Button 5 sec System reboot 5 sec Factory default Management Management Interfaces Web management Telnet Console management Windows based VCOM Utility management PLANET Smart Discovery Utility IP Version IPv4 and IPv6 Operation Mode TCP Server TCP Client UDP Vir...

Страница 14: ...802 3u 100BASE TX IEEE 802 3x flow control and back pressure RFC 768 UDP RFC 793 TFTP RFC 791 IP RFC 792 ICMP RFC 854 Telnet RFC 958 NTP RFC 1591 DNS client only RFC 1908 SNMPv2c RFC 2068 HTTP RFC 2131 DHCP Client RFC 2732 Format for Literal IPv6 Addresses in URL s RFC 3315 DHCPv6 Client RFC 3513 IPv6 Addressing Architecture RFC 3596 DNSv6 RFC 4443 ICMPv6 EIA TIA RS232 422 485 Regulatory Approval ...

Страница 15: ... Serial Servers familiarize yourself with its display indicators and ports Front panel illustrations in this chapter display the LED indicators Before connecting any network device to the Industrial Serial Servers please read this chapter completely 2 1 Hardware Description 2 1 1 Front Panel The front panels of the Industrial Serial Servers are shown in Figure 2 1 1 Front Panel ICS 2200T ICS 2400T...

Страница 16: ...l the reset button is designed for rebooting the system and stopping the buzzer The following is the summary table of the reset button functions Reset Button Reset Button Pressed and Released Function System Reset 5 sec System reboot Reboot the Industrial Serial Server 5 sec Factory default Reset the Industrial Serial Server to Factory Default configuration The Industrial Serial Server will then r...

Страница 17: ...ted PWR 2 Green Lights Power 2 is activated Fault Red Lights Indicates either Power 1 or Power 2 has no power SYS Green Blinks System is booting Lights System is ready I O Red Blinks Digital I O event is triggered 10 100BASE TX Port LED Color Function LNK ACT Green Lights Indicates that the port is linked up Blinks Indicates that the switch is actively sending or receiving data over that port Seri...

Страница 18: ...ert the power wire 1 Insert positive negative DC power wires into Contacts 1 and 2 for Power 1 or Contacts 5 and 6 for Power 2 Figure 2 1 3 and 2 1 4 show PWR1 and PWR2 of the Industrial Serial Server ICS 2200T 12 48V DC Figure 2 1 3 ICS 2200T Upper Panel ICS 2400T 12 48V DC Figure 2 1 4 ICS 2400T Upper Panel 2 Tighten the wire clamp screws for preventing the wires from loosening 1 2 3 4 5 6 V1 V1...

Страница 19: ...User s Manual of IGS 2x00T Serial Device Server Series 19 The wire gauge for the terminal block should be in the range from 12 to 24 AWG 2 1 5 Serial Port Pin Define ...

Страница 20: ...ation 3 To hang the Industrial Serial Server on the DIN rail track or wall 4 Power on the Industrial Serial Server Please refer to the Wiring the Power Inputs section for knowing the information about how to wire the power The power LED on the Industrial Serial Server will light up Please refer to the LED Indicators section for indication of LED lights 5 Prepare the twisted pair straight through C...

Страница 21: ...ds to install the Industrial Serial Server DIN rail mounting and wall mount plate mounting Please read the following section and perform the procedure in the order being presented Follow all the DIN rail installation steps as shown in the example Step 1 Screw the DIN rail bracket on the Industrial Serial Server Step 2 Lightly slide the DIN rail bracket into the track ...

Страница 22: ...al Device Server Series 22 Step 3 Check whether the DIN rail bracket is tightly on the track Please refer to the following procedure to remove the Industrial Serial Server from the track Step 4 Lightly remove the unit from the track ...

Страница 23: ... rail bracket from the Industrial Serial Server Use the screwdriver to loosen the screws to remove the DIN rail bracket Step 2 Place the wall mount plate on the rear panel of the Industrial Serial Server Step 3 Use the screwdriver to screw the wall mount plate on the Industrial Serial Server Step 4 Use the hook holes at the corners of the wall mount plate to hang the Industrial Serial Server on th...

Страница 24: ...s Workstations running Windows 2000 XP 2003 Vista 7 8 10 2008 MAC OS9 or later or Linux UNIX or other platforms compatible with TCP IP protocols Workstation is installed with Ethernet NIC Network Interface Card Ethernet Port connect Network cables Use standard network UTP cables with RJ45 connectors The above workstation is installed with Web Browser and JAVA runtime environment plug in It is reco...

Страница 25: ... and the default subnet mask is 255 255 255 0 Figure 3 2 1 Web Management You can then use your Web browser to list and manage the Industrial Serial Server configuration parameters from one central location just as if you were directly connected to the Industrial Serial Server s console port Web Management requires either Microsoft Internet Explorer 7 0 or later Safari or Mozilla Firefox 1 5 or la...

Страница 26: ...n the middle of the Web page lets you access all the functions and statuses It appears as shown in Figure 3 2 4 Figure 3 2 4 Main menu Now you can use the Web management interface to continue the Serial Server management Please refer to the user manual for more 1 For security reason please change and memorize the new password after this first setup 2 Only accept command in lowercase letter under w...

Страница 27: ...er asks for user name and password for remote login when using Telnet please use the following default IP address username and password for the first time login Default IP Address 192 168 0 100 Default Username admin Default Password admin You will be presented with a text menu displaying the Industrial Serial Server s general settings which you will be able to view and modify It appears as shown ...

Страница 28: ...this utility as the following screen appears Figure 3 4 1 Planet Smart Discovery Utility Screen If there are two LAN cards or above in the same administrator PC choose a different LAN card by using the Select Adapter tool 3 Press the Refresh button for the currently connected devices in the discovery list as shown in Figure 3 4 2 Figure 3 4 2 Planet Smart Discovery Utility Screen 1 This utility sh...

Страница 29: ...rent setting on multi devices Update All Use current setting on whole devices in the list The same functions mentioned above also can be found in Option tools bar 3 To click the Control Packet Force Broadcast function it allows you to assign a new setting value to the Web Smart Switch under a different IP subnet address 4 Press the Connect to Device button and the Web login screen appears as shown...

Страница 30: ...on does not allow Java Applets to open sockets The user has to explicitly modify the browser setting to enable Java Applets to use network ports The Industrial Serial Server can be configured through an Ethernet connection making sure the manager PC must be set to the same IP subnet address with the Industrial Serial Server For example the default IP address of the Industrial Serial Server is 192 ...

Страница 31: ...d admin 2 When the following login screen appears please enter the default username admin with password admin or the username password you have changed via console to log in the main screen of Industrial Industrial Serial Server The login screen in Figure 4 1 2 appears Figure 4 1 2 Login Screen 3 After a successful login the main screen appears as shown in Figure 4 1 3 below Figure 4 1 3 Web Main ...

Страница 32: ...e listed in the Main Function The screen in Figure 4 1 5 appears Figure 4 1 5 Industrial Serial Server Main Functions Menu Object Description Basic The essential device information of Industrial Serial Server Accessiable IP To configure IP addresses lists to prevent unauthorized access Network To configure IP address information of Industrial Serial Server Port Config To configure serial port valu...

Страница 33: ...figure management methods on this page Fault Alarm Configure fault alarm on this page Digital Input Output Configure digital input and output on this page 4 2 1 System The System page provides basic information for the current device System page helps an administrator to identify software version system uptime and IP address information The screen in Figure 4 2 1 appears Figure 4 2 1 System Status...

Страница 34: ... DNS The current first DNS server of the device Second DNS The current second DNS server of the device MAC Address Specifies the device MAC address IPv6 Configuration Object Description IP Configuration The status of IPv6 configuration IP Address The current IPv6 address of the device Prefix The IPv6 network mask in number of bits prefix length Gateway The current gateway for the IPv6 interface Pr...

Страница 35: ...f industrial serial server Baud Rate The rate of data transmission to and from the attached serial device Stop Bits The stop bit follows the data and parity bits in serial communication It indicates the end of transmission The default is 1 Data Bits Indicates the number of the bits in a transmitted data package The default is 8 Parity Checks for the parity type The default value is none Interface ...

Страница 36: ...rver it s required to save changed configuration and reboot system Therefore the new configuration will be applied after rebooting 4 2 4 Time This page provides configuration of NTP server and Time modification The screen in Figure 4 2 4 appears Figure 4 2 4 Time Setup Page Screenshot The page includes the following fields Object Description NTP Time Server To configure NTP server for time synchro...

Страница 37: ...ether the reset button is working or not The default is No 4 2 6 Fault Alarm This page provides configuration for fault alarm The screen in Figure 4 2 6 appears Figure 4 2 6 Fault Alarm Control Page Screenshot The page includes the following fields Object Description Buzzer To check whether Buzzer is enabled on this switch Record To check whether Record is sending System log or SNMP Trap or both E...

Страница 38: ... This means a signal received by system is from High to Low or from Low to High It will trigger an action that logs a customized message or issue the message from the switch Event Description Allows user to set a customized message for Digital Input function alarm Action Allows user to record alarm message to System log or issues out via SNMP trap As default SNMP trap is disabled please enable the...

Страница 39: ...creen in Figure 4 3 1 appears Figure 4 3 1 Accessible IP Setup Page Screenshot The page includes the following fields Object Description Active Configure the accessible IP list Possible modes are Disabled Disable accessible IP lists Enabled Enable accessible IP lists Activate NO Enable or disable activated IP groups Start IP Address Enter the IP address for starting End IP Address N Enter the IP a...

Страница 40: ... 0 100 Subnet Mask The current IP subnet mask of the device The default value is 255 255 255 0 Gateway The default gateway for the IP interface The default value is 192 168 0 254 Primary DNS Configure the first DNS server Second DNS Configure the second DNS server IPv6 Object Description IP Configuration Configure static SLAAC DHCP and disable for IPv6 address The default value is disable Static S...

Страница 41: ...llowing figure shows port settings Note that these settings need to match the parameters on serial port of the serial device Each parameter is described in details in the following section The port configuration screen in Figure 4 5 1 appears Figure 4 5 1 Port Setup Page Screenshot ...

Страница 42: ...a and parity bits in serial communication It indicates the end of transmission The default is 1 Data Bits Indicates the number of the bits in a transmitted data package The allowed value is 5 6 7 8 and default value is 8 Parity This parameter controls the error checking mode It support five modes and default value is none Even Odd None Space Mark Interface The industrial device server supports thr...

Страница 43: ...rial Telnet TCP Server TCP Client UDP and Virtual COM The operation mode screen in Figure 4 5 3 appears Figure 4 5 3 Operation Mode Screenshot 4 5 2 1 Disable mode When selecting disabled operation mode the device port can be disabled The disable mode screen in Figure 4 5 4 appears Figure 4 5 4 Disable Mode Screenshot Object Description Apply to all serial ports To apply this configuration to all ...

Страница 44: ...ovides tunnel like functionality over the network Only one Remote Pair Slave can be connected to a remote pairing host The remote pair master slave topology in Figure 4 5 5 appears Figure 4 5 5 Remote Pair Master Slave Topology The remote pair master mode screenshot in Figure 4 5 6 appears Figure 4 5 6 Remote Pair Master Mode Screenshot The page includes the following fields Object Description TCP...

Страница 45: ...ange of value is from 1 to 65535 The default is 5004 for port 1 5005 for port 2 5006 for port 3 and 5007 for port 4 Using Remote Pair Connection mode for two RS 232 services for distance extension the DB9 RS 232 cables are very important in this application There are many different kinds of RS 232 cables such as straight cable standard and Null Modem cable Please make sure the DB9 RS 232 cables ma...

Страница 46: ...e data will be packed and transmitted by the network This parameter is 0 to indicate that the data will not be packed until the buffer is full The range of value is from 0 to 1024 The default is 0 Separator If the Separator is enabled the serial receive character port will be discarded until the start separator is detected on the serial port When the end separator is received the buffered characte...

Страница 47: ...shot Object Description TCP Keep alive Interval TCP keep alive interval shows how many seconds the unit waits during an inactive connection before checking its status If the unit does not receive a response it will drop that connection The default is 0 minute Quiescent Time When the network connection is determined to be idle the duration of the control network inactivity will cause the connection...

Страница 48: ...ase we use PuTTY to connect GS 5220 24P4XV managed switch via ICS 2400T Figure 4 5 11 Serial Telnet Mode Application ICS 2400T 1 Set Port Configuration as shown below Figure 4 5 12 Port Configuration 2 Set operation mode as Serial Telnet mode 3 Run the Telnet software like PuTTY and set parameters as shown below Figure 4 5 13 Putty Configuration 4 Then it can connect to switch successfully Figure ...

Страница 49: ...onds the unit waits during an inactive connection before checking its status If the unit does not receive a response it will drop that connection The default is 0 minute Quiescent Time When the network connection is determined to be idle the duration of the control network inactivity will cause the connection to be forcfully closed The range of value is from 1 to 65535 ms The default is 0 ms Max c...

Страница 50: ... user when configuring the serial serve This parameter describes how to control characters received on a serial port are sent across the network The default is Do nothing Do nothing it will pack the accumulated data including Separators Strip Separator it controls striping of Separator from the received characters before the received characters are sent to the network Separator Time Out Separator ...

Страница 51: ...ode Figure 4 5 19 TCP Server Mode Configuration 3 Run the modbus master application e g Modbus Poll and set parameters as shown below Figure 4 5 20 Modbus application Configuration 4 Modbus master application e g Modbus Poll reads data from modbus sensor susecssfully Figure 4 5 21 Modbus Connection ...

Страница 52: ...Description TCP Keep alive Interval TCP keep alive interval shows how many seconds the unit waits during an inactive connection before checking its status If the unit does not receive a response it will drop that connection The default is 0 minute Quiescent Time When the network connection is determined to be idle the duration of the control network inactivity will cause the connection to be force...

Страница 53: ...including Separators Strip Separator it controls striping of Separator from the received characters before the received characters are sent to the network Separator Time Out Separator timeout controls the maximum amount of time that can be used to buffer characters before the characters are sent to the network A smaller values will increase the number of network packets but reduce the amount of ti...

Страница 54: ...the unit waits during an inactive connection before checking its status If the unit does not receive a response it will drop that connection The default is 0 minute Local listen port The range of value is from 1 to 65535 The default is 5004 for port 1 5005 for port 2 5006 for port 3 and 5007 for port 4 Frame Length This parameter can be used to control the data packet When the device port is in th...

Страница 55: ...um amount of time that can be used to buffer characters before the characters are sent to the network A smaller values will increase the number of network packets but reduce the amount of time to receive characters on the contrary Larger values reduce the number of network packets but increase the amount of time to receive characters The range of value is from 0 to 65535 ms The default is 0 ms Con...

Страница 56: ...efault is 0 minute Max connection This parameter set the TCP port number on which it will listen for the connection and set the maximum up to two acceptable number of connections The range of value is from 1 to 4 The default is 1 Frame Length This parameter can be used to control the data packet When the device port is in the buffer until the specified data is accumulated the data will be packed a...

Страница 57: ...e characters are sent to the network A smaller values will increase the number of network packets but reduce the amount of time to receive characters on the contrary Larger values reduce the number of network packets but increase the amount of time to receive characters The range of value is from 0 to 65535 The default is 0 ms Example connect to Modbus sensor via Virtual COM mode Figure 4 5 28 Vir...

Страница 58: ...s related to COM4 port Figure 4 5 31 VCOM Software 4 Run the modbus master application e g Modbus Poll and set parameters as shown below Figure 4 5 32 Modbus application Configuration 5 Modbus master application e g Modbus Poll reads data from modbus sensor susecssfully Figure 4 5 33 Modbus Poll Connection ...

Страница 59: ... Enable SNMP mode operation Community Indicates the security name to map the community to the SNMP Groups configuration Contact The textual identification of the contact person for this managed node together with information on how to contact this person Location The physical location of this node e g telephone closet 3rd floor Trap Server Indicates the SNMP trap destination address It allows a va...

Страница 60: ...rd page The Change Password screen in Figure 4 7 1 appears Figure 4 7 1 Change Password Page Screenshot The page includes the following fields Object Description New Password A new password It allows strings like A Z a z _ 0 9 Confirm Password Please enter the user s new password here again to confirm 4 7 2 Load Default A user can reset the configuration of the industrial serial server on this pag...

Страница 61: ... following 1 Click Maintence Firmware Update 2 The Firmware Update screen is displayed as in Figure 4 7 3 3 Click the button of the Main page the file selection menu pops up for you to choose firmware 4 Select on the firmware then click the Software Upload Progress would show the file with upload status 5 Once the software is loaded to the system successfully the following screen Figure 4 7 4 appe...

Страница 62: ...n changes of industrial serial server it s required to save changed configuration and reboot system Therefore the new configuration will be applied after rebooting The Save and Restart screen in Figure 4 8 1 appears Figure 4 8 1 Save and Restart Page Screenshot Buttons Click to save changes and restart ststem ...

Страница 63: ...arch ICS 2200T and ICS 2400T devices it will show information of the device And user can use VCOM function to create virtual COM port for users Users can send data via virtual COM port and virtual COM port will transfer data to Ethernet by windows socket When VCOM gets data from Ethernet data will be transferred to virtual COM port by virtual COM component 5 1 Installing the VCOM Utility 1 When yo...

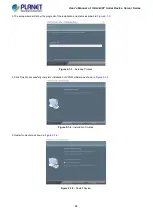
Страница 64: ...gress of the installation and status as shown in Figure 5 1 3 Figure 5 1 3 Installing Process 4 Click Finish to successfully complete installation of VCOM software as shown in Figure 5 1 4 Figure 5 1 4 Installation Finished 5 Restart computer as shown in Figure 5 1 5 Figure 5 1 5 Restart System ...

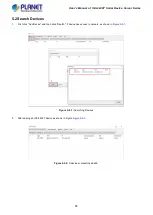
Страница 65: ... 2 Search Devices 1 First click Add Device and then click Search if device has access to network as shown in Figure 5 2 1 Figure 5 2 1 Searching Devices 2 After adding an ICS 2400T device as shown in Figure Figure 5 2 2 Figure 5 2 2 A device successfully added ...

Страница 66: ...ts for com port mapping as shown in Figure 5 3 1 Figure 5 3 1 VCOM software Add Virtual COM port 1 Click Search to search the network for industrial device servers 2 Once a server has been found select it to add it to the COM mapping list and Click OK to take effect as shown in Figure 5 3 3 Figure 5 3 2 VCOM software 3 Virtual com ports are generated as shown in Figure 5 3 3 Figure 5 3 3 Virtual C...

Страница 67: ...User s Manual of IGS 2x00T Serial Device Server Series 67 4 From the Windows Device Manager four COM Ports are added to the device list as shown in Figure 5 3 4 Figure 5 3 4 Virtual COM Ports ...

Отзывы: