8
u
Connecting the Display
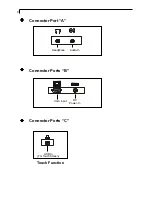
(Figure 9.1)
To setup this display, please refer to the following figure and procedures.
1. Be sure all equipment are off.
2. Connect the DC power cord to the power connector (The arrow sign
must face down); plug one end of the AC power cord into the power
adapter, and then the other end into an electrical outlet(
).
3. For the PC with Analog output: Connect the VGA signal cable from
display VGA input connector to the 15-pin connector of your host com
puter and tighten the screws(
).
4. Connect the Audio-In cable from audio input port of your display to the
Audio-out port of your computer(
).
5. Connect your headphone to Headphone port(
).
6. Connect the USB cable from USB input port of your display to the USB
port of your computer(
).
7. Turn on your computer, display and video source.
Start Your Installation
Notice:
To ensure the LCD display can work well with your computer, please
configure the display mode of your graphic card to make it less than or
equal to 1280 x 1024 resolution and make sure timing of the display
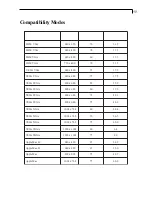
mode is compatible with the LCD display. We have listed the
Compatibility Modes of this LCD display in appendices for your
reference.
Содержание PT170MU
Страница 1: ...PLANAR LCD MONITOR PT170MUMANUAL www planar com...
Страница 10: ...9 C A B Figure 9 1 VGA Cable Power Adapter Power Cord Audio In Cable USB cable Headphone...
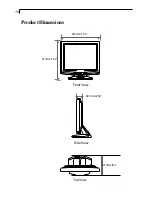
Страница 19: ...18 ProductDimensions 414mm 16 3 210mm 8 3 Front View Top View 412mm 16 2 Side View 64 6mm 2 54...
Страница 22: ...3 2003 03 03 M F 8am 9pm Eastern Time...


