PDP-436SXE
125
5
6
7
8
5
6
7
8
C
D
F
A
B
E
-1
-1
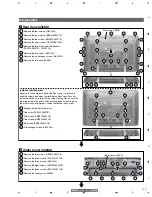
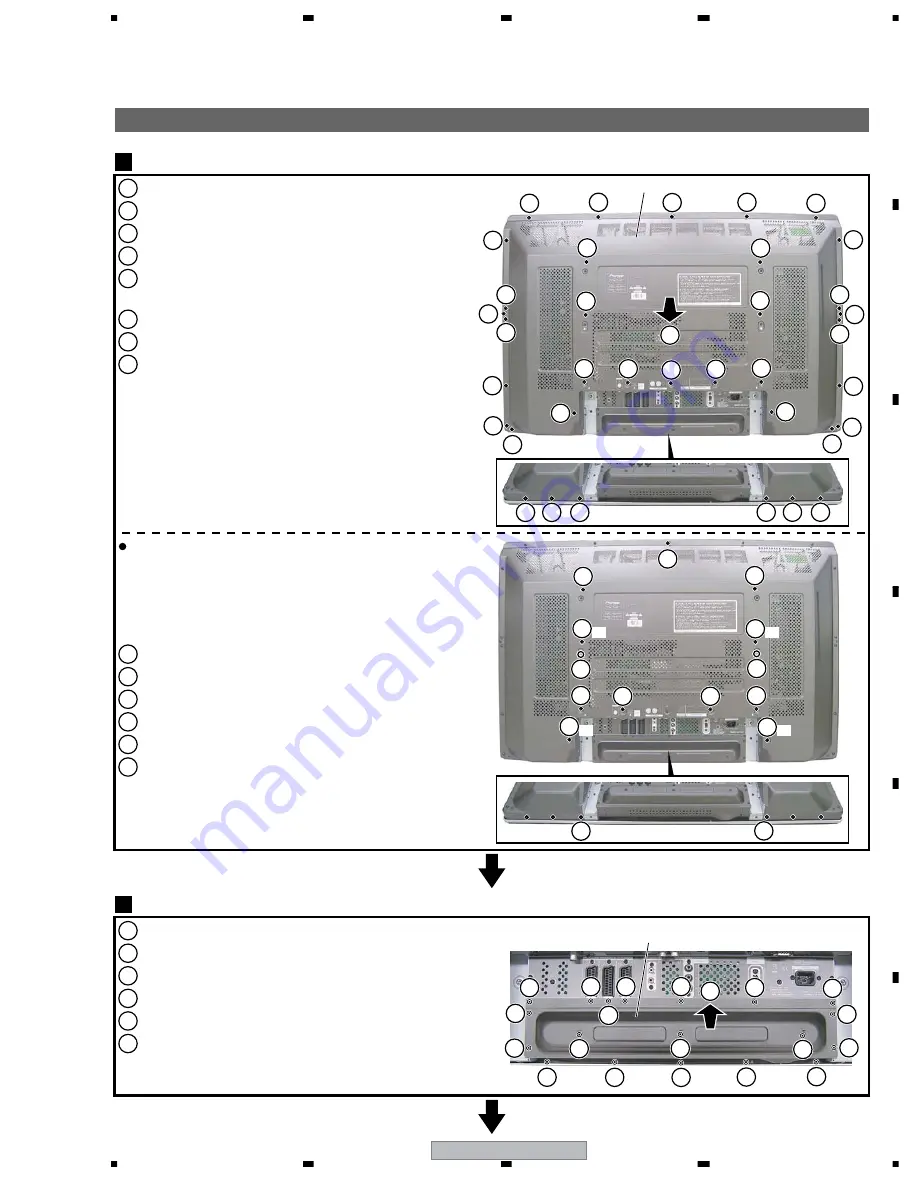
Disassembly
Rear Case (436SX)
1
1
2
2
4
4
4
4
5
4
2
3
3
3
3
3
3
6
3
3
3
2
1
1
7
1
8
6
3
2
3
1
5
5
5
5
5
5
-1
4
1
1
2
2
2
3
3
3
4
5
5
5
4
4
4
4
4
4
4
-2
-2
4
-2
3
4
5
4
4
4
1
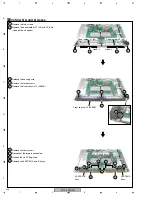
Remove the four screws. (ABA1332)
1
Engage the two Positioning Pins.
2
One screw (TBZ40P080FTB)
3
Two screws (AMZ30P060FTB)
4
Two screws (AMZ30P060FTB)
5
Six screws (AMZ30P060FTB)
6
Two hexagon screws (ABA1345)
2
Remove the four screws. (BBZ40P180FTB)
3
Remove the ten screws. (AMZ30P060FTB)
4
Remove the nine screws. (TBZ40P080FTB)
5
Remove the two screws and two washers.
(TBZ40P WC40FTB)
6
Remove the one screw. (ABA1341)
7
Remove the six hexagon screws. (ABA1345)
8
Remove the rear case (436SX).
Under Cover (436SX)
2
1
Remove the two screws. (ABZ30P080FTB)
2
Remove the three screws. (APZ30P100FTB)
3
Remove the three screws. (ABA1340)
4
Remove the eight screws. (AMZ30P060FTB)
5
Remove the three screws. (BPZ30P080FTB)
6
Remove the under cover (436SX).
Rear case (436SX)
Under cover (436SX)
About reattachment
Because of the complex shape of the Rear case, it is difficult to
align the screw holes when reattaching the Rear case. For easy
reattachment, be sure to install the screws for the Rear case in the
order indicated in the photo. After securing those screws in place,
the other screws and washers can be reattached in any order.
7
7
7
7
7
6
6
1
Содержание PDP-436RXE
Страница 9: ...PDP 436SXE 9 5 6 7 8 5 6 7 8 C D F A B E ...
Страница 25: ...PDP 436SXE 25 5 6 7 8 5 6 7 8 C D F A B E SXE Only SXE Only ...
Страница 27: ...PDP 436SXE 27 5 6 7 8 5 6 7 8 C D F A B E SXE Only SXE Only SXE Only ...
Страница 145: ...PDP 436SXE 145 5 6 7 8 5 6 7 8 C D F A B E Block Diagram R2S11002AFT OBE MAIN ASSY IC4804 AV SW ...
Страница 146: ...PDP 436SXE 146 1 2 3 4 1 2 3 4 C D F A B E Block Diagram R2S11001FT OBE MAIN ASSY IC4806 Component SW IC ...

