30
Initial Setup
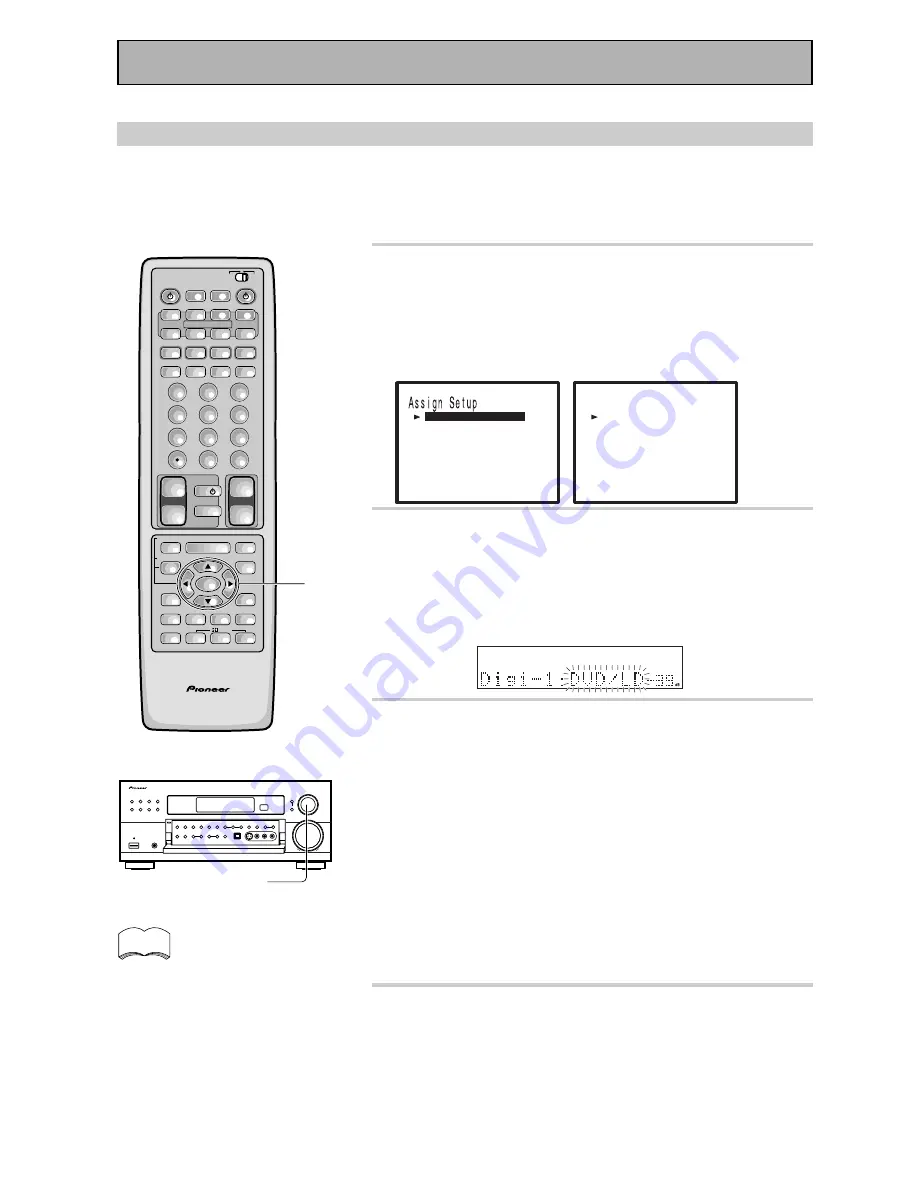
1 "Digital In" should be selected (if it isn't use
the
5¥∞
buttons, or the MULTI JOG dial, to
select it).
See “Setting Up for Surround Sound“ on p. 28 if you need
more information.
Press the ENTER button.
[
[
D i g i t a l - I n Se l e c t
S e l e c t
]
n n e l
n
I
]
Mu l t i
C omp o
a
Ch
[
- I n
]
e
n n t
Mu l t i
[
m
-
]
Ro o
[
]
EX I T
[
D i g i t a l - i
DVD / LD
D i g i t a l - i
D i g i t a l - 1
n S e l e c t
]
[
D i g i t a l - i
CD
CD
D i g i t a l - 2
]
[
D i g i t a l - i
- R
D i g i t a l - 3
]
[
D i g i t a l - i
TV / SAT
D i g i t a l - 4
]
[
]
EX I T
2 The "Digital-1" ("Digi-1" on the front panel)
should be selected. To change the digital
input press ENTER and it will start to flash
on the receiver's display.
If you want leave it as is use the
5¥∞
buttons (or the MULTI
JOG dial) to move on to "Digi- 2" or another Digital In.
3 Use the
5
/
∞
buttons (or the MULTI JOG
dial) to choose the input function that
matches the component hooked up to that
digital terminal. Press ENTER when you've
matched the two.
The possible choices include: DVD/LD, TV/SAT, CD, CD-R (MD/
TAPE 1), VCR 1(DVR), VCR 2. You cannot assign digital inputs to
the TUNER, VIDEO and TAPE 2 MONITOR functions.
If you assign a function (for example DVD/LD) that was previ-
ously assigned to a different Digital In the first Digital In will
automatically revert to an OFF setting. This is because one
function cannot be assigned twice.
Pressing ENTER moves you to the next Digital In. Repeat steps
2 & 3 until all the Digital Ins are set.
4 When you've finished assigning digital ins
select EXIT ("Dig-In End" on the front panel)
with the
5¥∞
buttons (or the MULTI JOG
dial) and press ENTER to go to "Multi In
Set".
If you want to change a setting before proceeding use the
arrow buttons to go back.
ASSIGN SETUP MENU
Digital In Select
In order to be able to use your digital equipment properly you need to assign digital inputs for each of the digital
components you connected. Match the Digital 1-4 settings with the digital jacks 1-4 in accordance with what is
connected to each digital jack. Check the digital jack numbers on the back of the receiver to make certain what
component is in which jack (if necessary, see p. 13 for more on digital connections). If continuing from the last
page go to step 1. If starting fresh, complete steps 1-3 in “Setting Up for Surround Sound“ (p. 28) first.
MULTI JOG
(Turn to select / Push to enter)
AV PRE-PROGRAMMED AND LEARNING
REMOTE CONTROL UNIT
S0URCE
DVD/LD
TV/SAT
VCR2
CD
TV VOL
TV FUNC
MENU
ENTER
STEREO/
DIRECT
DSP
THX
LIGHT
/DTS
MUTE
TV
VOLUME
VCR 1/
DVR
CD-R/
TAPE 1
TUNER
TV CONT
RECEIVER
USE
SETUP
MULTI
OPERATION
CLASS
DTV ON/OFF DTV MENU
MPX
DIRECT ACCESS
CHANNEL
STATION
TUNING
DISC
+10
EXIT
GUIDE
TV CONTROL
FUNCTION
REMOTE SETUP
SYSTEM SETUP
INPUT
ATT
ADVANCED
MIDNIGHT
MULTI CH
INPUT
STANDARD
DIGITAL
NR
EFFECT/
CH SEL
SIGNAL
SELECT
BAND
SYSTEM
OFF
1
2
3
4
5
6
7
8
9
0
ENTER
Î
8
7
3
1
¡
4
¢
+
-
+
-
+
-
MULTI CONTROL
+
+
–
–
+
–
1-4
memo
The video jacks on the front panel
are fixed to the DIGITAL 5 input.
The default settings for the
DIGITAL INs are printed next to
them in parentheses on the back
of the receiver.
Содержание Elite VSX-35TX
Страница 1: ...VSX 35TX Operating Instructions AUDIO VIDEO MULTI CHANNEL RECEIVER ...
Страница 94: ...94 Techno Tidbits Problem solving ...
Страница 95: ...95 Techno Tidbits Problem solving ...


