background image

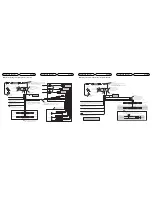
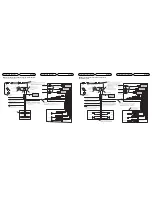
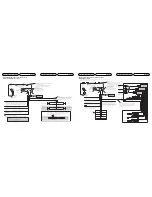
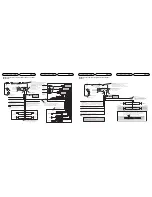
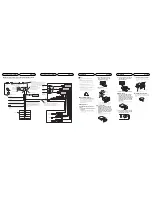
Connecting the unit

English

Connecting the unit

English

When using a subwoofer without using the optional amplifier

Connecting the unit

English

Connecting the unit

English

When not connecting a rear speaker lead to a subwoofer

20 cm
(7-7/8 in.)

Pioneer CD-U150E USB cable 
(sold separately)

iPod

Dock connector

Interface cable

50 cm (20 in.)

USB port 2
Use a USB cable to connect the USB storage 
device to the USB port 2.
Pioneer CD-U150E USB cable is also available. 
For details, consult your dealer.

Yellow/black
If you use an equipment with Mute function, 
wire this lead to the Audio Mute lead on that 
equipment. If not, keep the Audio Mute lead 
free of any connections.

Power amp 
(sold separately)

Yellow 
Connect to the constant 12 V supply terminal.

Red 
Connect to terminal controlled by 
ignition switch (12 V DC).

Orange/white 
Connect to lighting switch terminal.

Connect with RCA cables 
(sold separately)

Perform these connections 
when using the optional 
amplifier.

Black (chassis ground) 
Connect to a clean, paint-free metal location.

This product

Front output

Antenna jack

Subwoofer output

Fuse (10 A)

System remote control

Left

Right

Blue/white
Connect to system control terminal of the power 
amp or auto-antenna relay control terminal (max. 
300 mA 12 V DC).

With a 2 speaker system, do not 
connect anything to the speaker leads 
that are not connected to speakers.

Front speaker

Front speaker

Rear speaker

Rear speaker

White

Gray

Gray/black

White/black

Green

Violet

Green/black

Violet/black

Power amp 
(sold separately)

Rear output

Front speaker

Power amp 
(sold separately)

To subwoofer 
output

To front output

To rear output

Front speaker

Rear speaker

Rear speaker

Subwoofer

Subwoofer

IP-BUS input (Blue)

IP-BUS cable

Multi-CD player
(sold separately)

Wired remote input 
Hard-wired remote control 
adaptor can be connected 
(sold separately).

This product

Front output

Antenna jack

Subwoofer output

Fuse (10 A)

Rear output

IP-BUS input (Blue)

IP-BUS cable

Multi-CD player
(sold separately)

Wired remote input 
Hard-wired remote control 
adaptor can be connected 
(sold separately).

iPod

Dock connector

Interface cable

20 cm
(7-7/8 in.)

Pioneer CD-U150E USB cable 
(sold separately)

50 cm (20 in.)

USB port 2
Use a USB cable to connect the USB storage 
device to the USB port 2.
Pioneer CD-U150E USB cable is also available. 
For details, consult your dealer.

Left

Right

Front speaker

Front speaker

White

Gray

Gray/black

White/black

Green

Violet

Green/black

Violet/black

Green

Violet

Green/black

Violet/black

Subwoofer (4 

)

Subwoofer (4 

)

When using a subwoofer of 70 W (2 

), be sure to connect 

with Violet and Violet/black leads of this unit. 
Do not connect anything with Green and Green/black leads. 

Subwoofer 
(4 

 2

Not used.

Note

Change the initial setting of this unit. 
The subwoofer output of this unit is monaural.

Yellow 
Connect to the constant 12 V supply terminal.

Red 
Connect to terminal controlled by ignition switch (12 V DC).

Orange/white 
Connect to lighting switch terminal.

Black (chassis ground) 
Connect to a clean, paint-free metal location.

Blue/white
Connect to system control 
terminal of the power amp or 
auto-antenna relay control 
terminal (max. 300 mA 12 V DC).

Yellow/black
If you use an equipment with Mute function, wire this lead to the Audio 
Mute lead on that equipment. If not, keep the Audio Mute lead free of 
any connections.

Содержание DEH-P510UB - Premier Radio / CD

Страница 1: ...née Ne connectez jamais le câble négatif des enceintes directement à la masse N attachez jamais ensemble plusieurs câbles négatifs de plusieurs enceintes Le signal de commande est sorti par le câble bleu blanc quand cet appareil est sous tension Connectez le à la télécommande d un système d amplification extérieur ou à la prise de commande du contrôle de relais de l antenne automatique max 300 mA ...

Страница 2: ... separately To subwoofer output To front output To rear output Front speaker Rear speaker Rear speaker Subwoofer Subwoofer IP BUS input Blue IP BUS cable Multi CD player sold separately Wired remote input Hard wired remote control adaptor can be connected sold separately This product Front output Antenna jack Subwoofer output Fuse 10 A Rear output IP BUS input Blue IP BUS cable Multi CD player sol...

Страница 3: ...lisez un câble USB pour connecter le périphérique à mémoire à la prise USB 2 Le câble Pioneer CD U150E USB peut aussi être utilisé Pour en savoir plus consultez votre revendeur À la sortie arrière À la sortie du caisson de grave À la sortie avant Raccordez avec des câbles Cinch RCA vendus séparément Amplificateur de puissance vendu séparément Amplificateur de puissance vendu séparément Amplificate...

Страница 4: ...e 4 Ω 2 Non utilisé Vert Violet Vert noir Violet noir Connexions des appareils Français Quand vous raccordez les enceintes sans utiliser l amplificateur interne Si vous utilisez ce système nous vous conseillons de mettre hors service l amplificateur interne de cet appareil Pour les détails reportez vous au mode d emploi Connexions des appareils Français 20 cm iPod Connecteur de Dock Câble d interf...

Страница 5: ...uerto USB 2 Utilice un cabo USB para conectar el dispositivo de almacenamiento USB al puerto USB 2 El cable USB CD U150E Pioneer también está disponible Para los detalles consulte su revendedor Cable USB CD U150E Pioneer vendido separadamente 50 cm Puerto USB 2 Utilice un cabo USB para conectar el dispositivo de almacenamiento USB al puerto USB 2 El cable USB CD U150E Pioneer también está disponib...

Страница 6: ...nt panel is released Trim ring 2 Determine the appropriate position where the holes on the bracket and the side of the unit match 3 Tighten two screws on each side Use either truss screws 5 mm 8 mm or flush surface screws 5 mm 9 mm depending on the shape of screw holes in the bracket Factory radio mounting bracket Screw Dashboard or Console Fastening the front panel If you do not plan to detach th...

Страница 7: ...les dans le commerce lors de l installation Vis M4 8 Vis Attache en métal Écrou Pare feu ou support métallique Assurez vous que l appareil est bien fixé Une installation instable peut entraîner un fonctionnement incorrect de l unité des interruptions au niveau du son par exemple Installation Français Retrait de l appareil 1 Étendez la partie supérieure et inférieure de la garniture vers l extérieu...

Страница 8: ...porte de metal Asegúrese de que la unidad esté firmemente instalada en su lugar Una instalación inestable puede causar un mal funcionamiento de la unidad por ejemplo que salte el sonido Extracción de la unidad 1 Extienda las partes superior e inferior del anillo de compensación hacia fuera para extraer el anillo de compensación Cuando reinstale el anillo de compensación empuje el anillo de compens...

Отзывы: