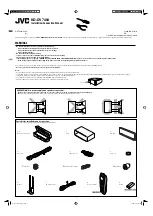
Connecting the power cord (1)
ISO connector
*1
*3
*2
*4
Speaker leads
White:
Front left
White/black: Front left
Grey:
Front right
Grey/black:
Front right
Green:
Rear left
or Subwoofer
(*5)
Green/black: Rear left
or Subwoofer
(*5)
Violet:
Rear right
or Subwoofer
(*5)
Violet/black: Rear right
or Subwoofer
(*5)
Depending on the types of vehicles, the
function of *2 and *4 may be different. In this
case, be sure to connect *1 to *4 and *3 to *2
as shown in the figure.
Connect leads of the
same colour to each other.
Yellow
(*2)
Back-up
(or accessory)
Red
(*4)
Accessory
(or back-up)
Yellow
(*1)
To terminal supplied with
power regardless of ignition
switch position.
Red
(*3)
To electric terminal controlled by
ignition switch (12 V DC) ON/OFF.
Orange/white
To lighting switch terminal.
Black (earth)
To vehicle (metal) body.
Note
Notes
·
When a subwoofer (*5) is connected to this
navigation system instead of a rear speaker, change
the rear output setting in the initial setting. (Refer to
Operation Manual.) The subwoofer output of this
navigation system is monaural.
·
When using a subwoofer of 70 W (2
Ω
), be sure to
connect with violet and violet/black leads of this
navigation system. Do not connect anything with
green and green/black leads.
In some vehicles, the ISO connector may be divided
into two. In this case, be sure to connect to both
connectors.
Note
Engb
10
Section
02
Connecting the system
Содержание AVIC-F40BT
Страница 7: ...Engb 7 English Section 02 Connecting the system ...
Страница 35: ...Fr 35 Section Français 02 Branchement du système ...
Страница 56: ...Réglage de l angle du microphone L angle du microphone peut être ajusté Fr 56 Section 03 Installation ...
Страница 63: ...It 63 Sezione Italiano 02 Collegamento del sistema ...
Страница 84: ...Regolazione dell angolazione del microfono L angolo del microfono è regolabile It 84 Sezione 03 Installazione ...
Страница 91: ...Es 91 Sección Español 02 Conexión del sistema ...
Страница 112: ...Ajuste del ángulo del micrófono Se puede ajustar el ángulo del micrófono Es 112 Sección 03 Instalación ...
Страница 140: ...Anpassen des Mikrofonwinkels Der Mikrofonwinkel kann eingestellt werden De 140 Abschnitt 03 Einbau ...
Страница 147: ...Nl 147 Hoofdstuk Nederlands 02 Systeemcomponenten aansluiten ...
Страница 168: ...De hoek van de microfoon aanpassen De hoek van de microfoon kan worden inge steld Nl 168 Hoofdstuk 03 Inbouwen ...
Страница 169: ...Nl 169 Nederlands ...
Страница 170: ...Nl 170 ...
Страница 171: ...Nl 171 Nederlands ...


