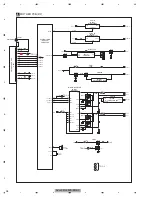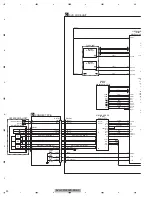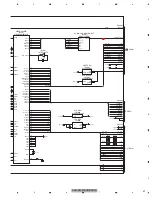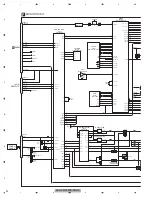
AVH-P3100DVD/XN/UC
19
5
6
7
8
5
6
7
8
C
D
F
A
B
E
Connecting and installing the optical cable connection bo
x
W
ARNING
•
Avoid installing the optical cable connection
bo
x in locations wher
e the operation of safety
devices such as airbags is pr
evented by this
unit. Otherwise, ther
e is a danger of a fatal
accident.
•
Avoid installing the optical cable connection
bo
x in locations wher
e the operation of the
brak
e may be pr
evented. Otherwise, it may
result in a traffic accident.
•
F
ix the optical cable connection bo
x secur
ely
with the hook and loop fastener or lock tie. If
the unit is loose, it disturbs driving stability
,
which may r
esult in a traffic accident.
CA
UTION
•
Install this unit using only the parts supplied with
this unit. If other parts are used, this unit may be
damaged or could dismount itself
, which leads to
an accident or other problems.
•
Do not install this unit near the doors where
rainwater is likely to be spilled on the unit.
Incursion of water into the unit may cause smoke
or fire.
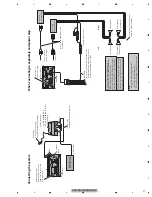
Connecting the optical cable
1.
Connect the optical cable and gr
ound
lead to the main unit.
Connect the optical cable so that it does not
protrude from the main unit, as shown in the
illustration
.
F
asten the ground lead to the
protrusion on the back of the main unit.
2.
Connect the optical cable to the
optical cable connection bo
x.
Installing the optical cable
connection bo
x
•
When installing the optical cable
connection bo
x with the hook and
loop fastener
.
Install the optical cable connection box
using the hook and loop fastener in the
ample space of the console box.
•
When installing the optical cable
connection bo
x with the lock tie.
W
rap the optical cable and connection box
with the protection tape and fasten with the
power code using the lock tie.
Screw
Optical cable
Hook fastener
Loop fastener
W
rap with the protection tape
F
asten with the lock tie
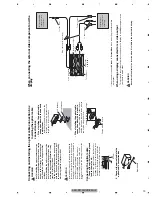
When connecting the e
xter
nal video component and the
display
External video
component (sold
separately)
Audio input
(
L IN
,
R IN
)
Display with RCA
input jacks (sold
separately)
T
o video input
T
o video output
T
o audio outputs
This product
RCA cables (sold separately)
V
ideo input (
V IN
)
R
ear monitor output
(
V OUT
)
•
It is necessar
y to change
A
V Input
in
System Menu
when connecting the external video
component.
When using a display connected to r
ear video output
This pr
oduct’
s
rear video output is for connection of a display to enable passengers in the
rear seats to watch video.
W
ARNING
Never install the display in a location wher
e it is visible to the driver while driving.
Содержание AVH-P3150DVD
Страница 29: ...AVH P3100DVD XN UC 29 5 6 7 8 5 6 7 8 C D F A B E ...
Страница 56: ...AVH P3100DVD XN UC 56 1 2 3 4 1 2 3 4 C D F A B E Side A COMPOSITE GNDV Fig 11 3 VIDEO signal check point ...
Страница 59: ...AVH P3100DVD XN UC 59 5 6 7 8 5 6 7 8 C D F A B E Side A DGND1 IC1501 50pin Fig 13 3 48 MHz check point ...
Страница 61: ...AVH P3100DVD XN UC 61 5 6 7 8 5 6 7 8 C D F A B E Side A SCLOCK SDATA D CP_ RESET D DGND2 ...
Страница 67: ...AVH P3100DVD XN UC 67 5 6 7 8 5 6 7 8 C D F A B E ...
Страница 114: ...AVH P3100DVD XN UC 114 1 2 3 4 1 2 3 4 C D F A B E 9 1 PACKING ...
Страница 116: ...AVH P3100DVD XN UC 116 1 2 3 4 1 2 3 4 C D F A B E 9 2 EXTERIOR 1 A A A B ...
Страница 118: ...AVH P3100DVD XN UC 118 1 2 3 4 1 2 3 4 C D F A B E 9 3 EXTERIOR 2 A A E F 2 1 ...
Страница 122: ...AVH P3100DVD XN UC 122 1 2 3 4 1 2 3 4 C D F A B E A GEM1045 B GEM1038 C GEM1024 A C C A A C C C C C A A ...
Страница 123: ...AVH P3100DVD XN UC 123 5 6 7 8 5 6 7 8 C D F A B E ...
Страница 127: ...AVH P3100DVD XN UC 127 5 6 7 8 5 6 7 8 C D F A B E ...
Страница 145: ...AVH P3100DVD XN UC 145 5 6 7 8 5 6 7 8 C D F A B E ...

