


4 Control elements
4.1 status LEDs
The S5/S7-TimeServer has multiple different status LEDs on the front
side of the device.
The first green LED is located on the bottom left corner next to the power
connector and lights when the device is powered.
For a simple diagnostic of the RJ45 interfaces every connector has its
own green LED. This LED lights when a link state is detected and blinks
on data transfer.
Furthermore there are some more LEDs on the bottom right corner for a
diagnostic of the mobile connection. The five green LEDs below the bars
are showing up the signal strength. This means the more LEDs are light
up the better the signal is. The LED directly below the mobile symbol is a
multi color LED and gives more information about the current general
mobile connection:
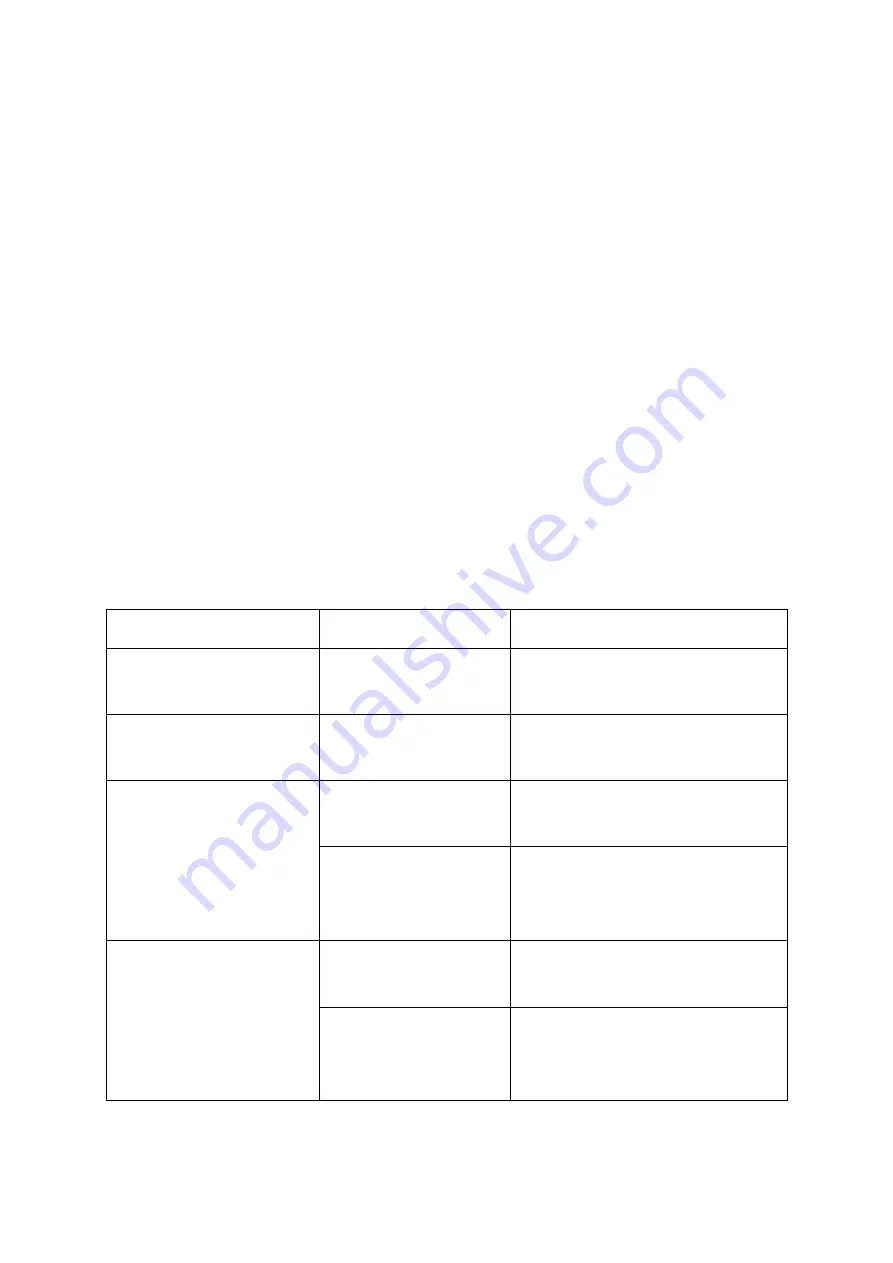
colors
behavior
meaning
green + red
blinks alternatively
every 500ms
no SIM card detected or bad
pin code
green + red + orange blinks alternatively
every 500ms
GSM connection gets
established
red
blinks every 1s
GSM connection without
data connection
lights / blinks
GSM connection with data
connection
(blinks on data transfer)
orange
blinks every 1s
UMTS connection without
data connection
lights / blinks
UMTS connection with data
connection
(blinks on data transfer)
page
9
manual S5/S7-TimeServer V1.00


