background image

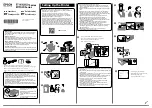
DISPOSAL 
INSTRUCTIONS

Do not throw this electronic device into the was-
te when discarding. To minimise pollution and 
ensure protection of the environment, please
recycle or return to Photocentric for recycling.

SAFETY
GUIDELINES

-  Keep the printer and resins out of the reach of 

children.

-  Printer requires two people to lift it from the 

packaging.

-  The resin is an irritant to skin and eyes. Always 

wear gloves when coming into contact with 
the liquid resin. Always use in a well ventilated 
room.

-  Resins are classified as irritants, not harmful, 

but in exceptional circumstances people can 
be sensitive to the resin and develop a skin 
irritation or rash. Avoid this possibility by 
always wearing gloves and avoid breathing 
fumes.

-  The printer should be operated on a stable 

and level surface, preferably away from direct 
ambient light.

Please note that the latest instructions will always 
be available from:

www.photocentricgroup.com/support

Read the instructions carefully. Keep this docu-
ment for future reference. Follow all warnings and 
instructions marked on the product. 

-  Operate on a table or flat, stable surface, ensu-

ring that the machine cannot fall and is level.

-  Do not operate outdoors.
-  Do not allow resin or any liquids to get inside 

the chassis, wipe up any liquid spills immedia-
tely.

-  Do not use solvents to clean the printer as they 

may damage the screen. Use a little detergent 
and warm water to clean any resin spills.

-  Disconnect the printer from the power before 

storage or when not used for a long period of 
time. This 3D printer is connected to the elec-
trical network with an input of 110 or 240 V AC, 
50/60 Hz.

-  Do not allow anything to rest on the power 

cord. Do not locate this product where people 
will walk on the cord.

-  If an extension cord is used with this product, 

make sure that the total ampere rating of the 
equipment plugged into the extension cord 
does not exceed the extension cord ampere 
rating. Also, make sure that the total rating of 
all products plugged into the wall outlet does 
not exceed the fuse rating.

-  Do not overload a power outlet, strip or recep-

tacle by plugging in too many devices.

-  Use the product only with the supplied power 

cable. If you need to replace the power cable, 
make sure that the new power cable meets the 

following requirements: detachable type, UL 
listed/CSA certified, VDE approved or its equi-
valent, 4.5 meters (15 feet) maximum.

-  In case of malfunction, disconnect the printer 

immediately from the power.

-  Do not attempt to fix this product by yourself, 

as opening or removing covers may expose 
you to dangerous voltage points or other risks. 
Refer all repairs to qualified service personnel. 
Please send an email to your national supplier 
or contact technical service at:


[email protected]

Unplug this product from the wall outlet and refer 
servicing to a qualified service personnel if:

-  The power cord or plug is damaged, cut or fra-

yed.

-  Liquid has been spilled in the machine.
-  The machine was exposed to rain or water.
-  The machine has been dropped or the case has 

been damaged.

-  The machine does not operate normally after 

following the operating instructions.

SAFETY
INFORMATION

3

4

IRRITANT

Содержание Liquid Crystal Pro

Страница 1: ...www photocentricgroup com UK USA DISPOSAL INSTRUCTIONS Do not throw this electronic device into the waste when dis carding To minimize pollution and ensure utmost protection of the global environment...

Страница 2: ...nter CW 1 2 1 Connecting the printer Photocentric Studio 2 Slicing your print CW 2 1 Slicing your print Photocentric Studio 3 Setting up a print CW 3 1 Setting up a print Photocentric Studio 4 Removin...

Страница 3: ...w type of 3D printer using Daylight Polymer Printing DPP technology This is a patent applied for method of image crea tion that hardens liquid with the normal visible light emitted from an LCD screen...

Страница 4: ...torage or when not used for a long period of time This 3D printer is connected to the elec trical network with an input of 110 or 240 V AC 50 60 Hz Do not allow anything to rest on the power cord Do n...

Страница 5: ...m around the printer 3 Remove the 5kg bottle of resin from the crate 4 Unscrew the platform remove and put it to one side Lift the ancillary box out of the printer To unscrew the bolts lift them up to...

Страница 6: ...have the power saving mode enabled If you forget to do this your computer may shut down mid process and the printer will switch off Note You will need to connect to the internet within 30 days of usi...

Страница 7: ...r license number provided into the field as shown 1 1 2 SOFTWARE INSTALLATION PHOTOCENTRIC STUDIO MINIMUM COMPUTER REQUIREMENTS Dual Core processor or above Windows Software NOT compatible with MAC an...

Страница 8: ...re button in the Machine Connection frame Choose a different COM port from the drop down menu if available Press OK then press Apply Changes Connect the machine again and try moving the drive remember...

Страница 9: ...hat you wish to print Adjust scale position rotation etc using the controls provided on the right hand tool bar in Creation Workshop Your printed item s should be positioned centrally within the build...

Страница 10: ...at against the screen Once the platform is homed and your first print is good there is no need to touch the L bracket hex head bolts again These bolts should be tightened firmly 3 SETTING UP A PRINT C...

Страница 11: ...etailed parts Alternatively use a large utrasonic cleaner 5 Using a scraper detach the supports at the base to remove the part from the platform Handle it gently as it won t achieve full strength unti...

Страница 12: ...one corner of the vat Pour at a steady rate and be careful not to over fill the funnel Resin will flow over the flange of the vat this is not a problem Use a plastic card to push resin down the vat fi...

Страница 13: ...cking paper supplied with the replacement film can be placed under the vat bottom film frame This will help protect the film from damage during the rest of the assembly procedure 7 Carry out the same...

Страница 14: ...body has been significantly distorted by the compression around each nut they are too tight 17 Also inspect the vat film where it is stretched over the wall of the vat There should be no holes creases...

Отзывы: