1. Check the first slice of your print on the printer’s
screen using the button below, in the ‘Slice View’
tab. (Use the push button on the front of the
printer to turn the screen on and off.)
2. Return the screen to black by pressing the ‘Show
Blank’ button in the ‘Control’ tab.
3. The vat should be inside the printer, empty and
clean. Use just the 2 front bolts to locate the vat
on the screen but do not tighten. The vat needs
to be free to move up and down. They should not
apply downward pressure to the vat. They are
only there to prevent the vat moving horizontally
or tipping.
4. Check that the drive carriages are at least 100mm
above the bottom of the rails. Slide the print plate
assembly into place in the printer. Push it back
against the stops. Tighten the two star knobs
that secure the print plate to the drive carriages.
5. On the print plate assembly, loosen the hex-head
bolts that secure the L brackets. They should be
loose enough to slide easily in the slots but not
more. A hex key is provided in the accessory
box.
6. Press the ‘Home’ button on creation workshop
(the door must be closed).
7. Wait for the printer to reach the home position.
If the print plate started in a very high position, it
may stop before reaching home. If so, press the
‘Home’ button again. Press down evenly on the
print plate with one hand and tighten the hex-
head bolts that secure the L brackets. Make sure
that all 4 corners touch the screen. If you press
the corners you should see white spots on the
screen. This is good and means that the platform
is flat against the screen. Once the platform is
homed and your first print is good, there is no
need to touch the L bracket hex head bolts
again. These bolts should be tightened firmly.
3. SETTING UP
A PRINT CW
15
16
8. Close the door and move the print platform up
10mm.
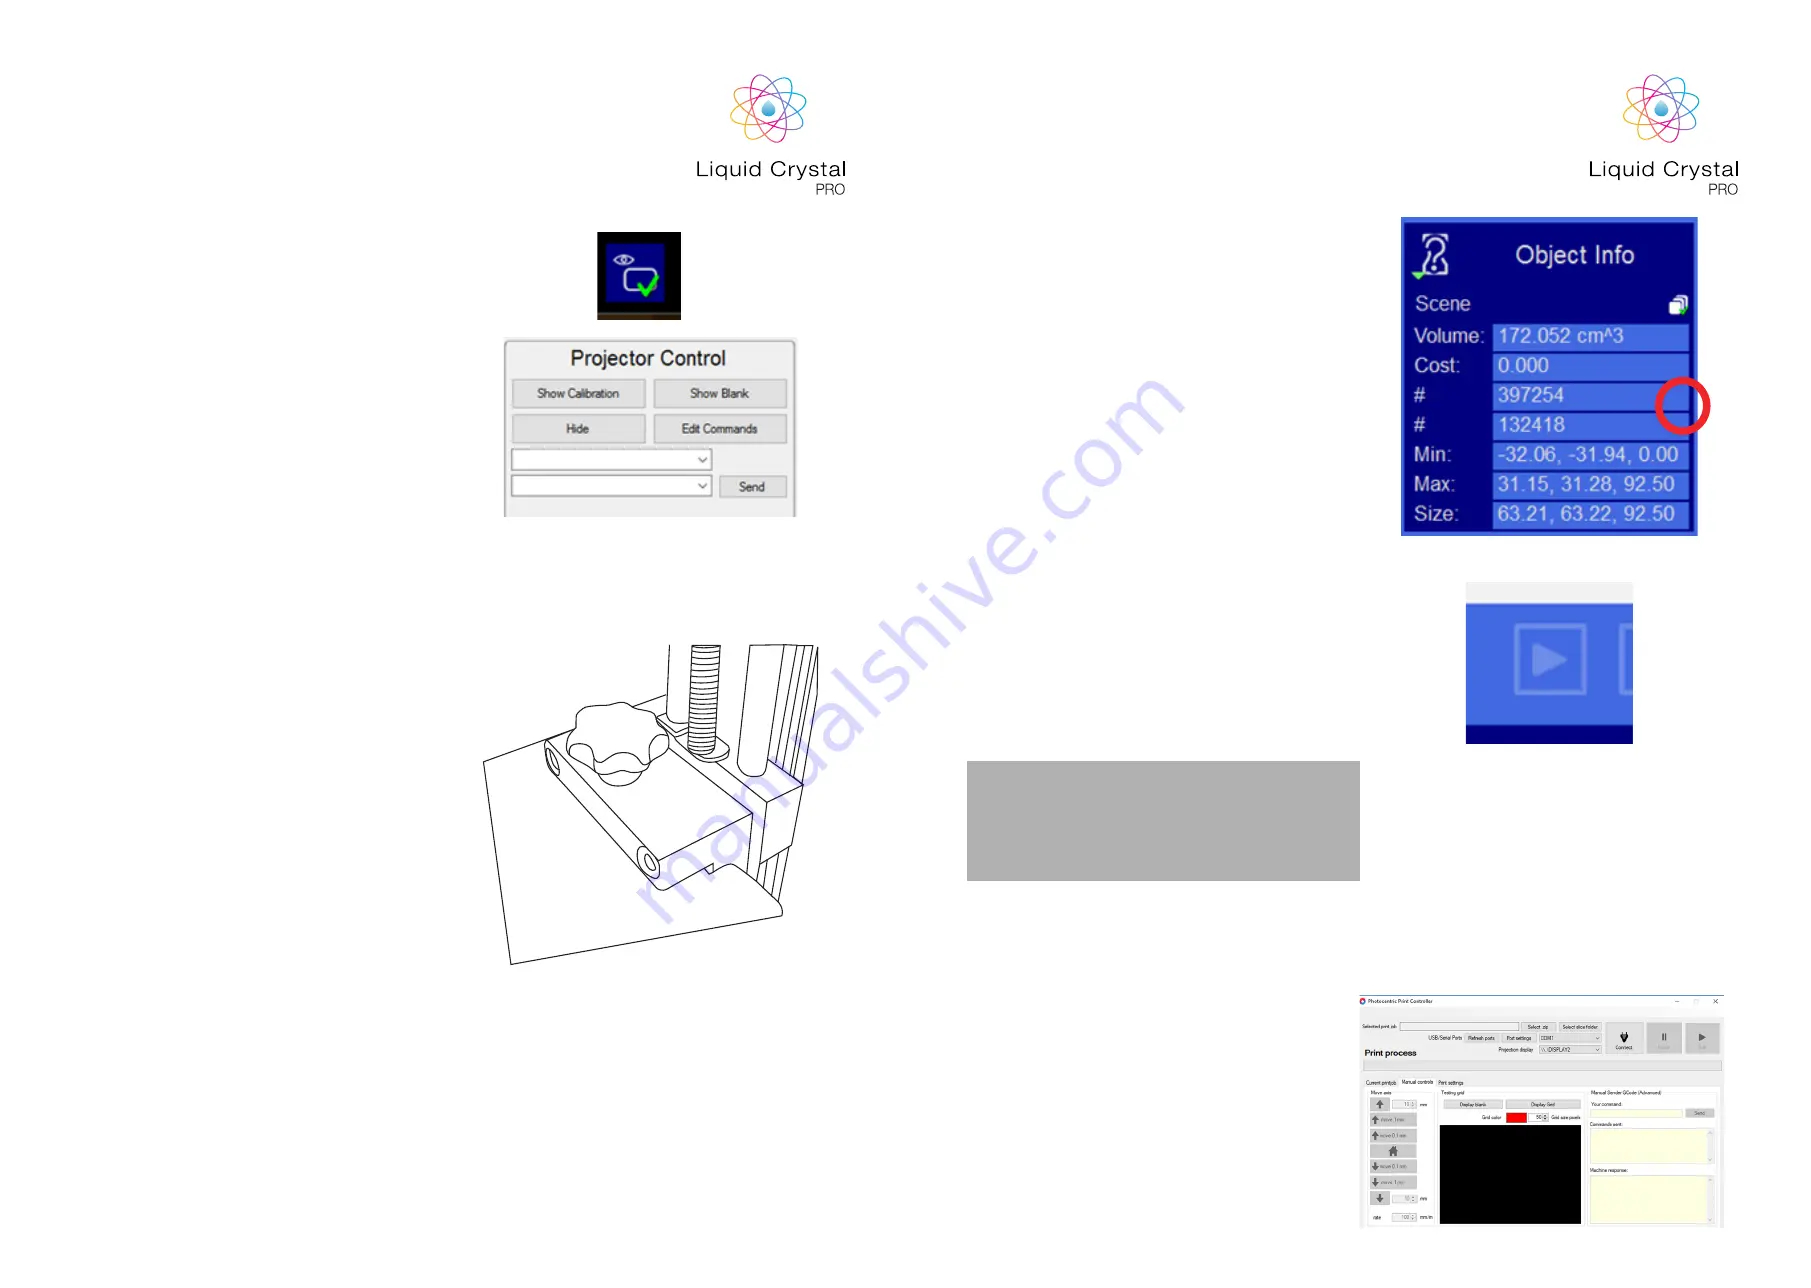
9. Check the volume of resin required in Creation
Workshop. Make sure the circled icon has the
green check mark to give the total volume. This
will include all items and any supports. Add 700
cm3 to this figure to allow for a full covering of
resin in the bottom of the vat during the final
layers of the print. You will need at least 1kg of
resin to cover the base and make your print.
10. Wear protective gloves and measure out the
resin. Be careful not to expose it to bright light
for more than a few seconds. Excessive resin will
make emptying the vat more difficult, insufficient
resin will prevent the print from completing
successfully. The maximum recommended
volume of resin in the standard LC Pro vat is
5000 cm3 (5 litres).
11. Carefully add the resin to the vat. Pour in the
centre of the print plate and it will drain through
the holes. Close the door and drive the print
plate down 10mm. Wait a few seconds for the
resin to settle. Press the ‘Print’ button in Creation
Workshop to begin printing.
Ref
Section 5.
The print time given in CW is not currently
accurate. On average Pro will print 1cm every
3 hours with firm resin or every 2hours 20 mins
with flexible resin.
3.1 SETTING UP A PRINT
PHOTOCENTRIC STUDIO
1. Open the print controller by clicking on the far
right icon of the top menu.
2. Press ‘Home Button’
3. Press Up arrow 10mm
4. Pour the resin into the vat. Refer to steps 10 and
11 above under section 3.
5. Press the downward arrow 10mm
6. Press Play button.


