6
Installation
5
Installation
5.1
Installing the WebCam software
The software supplied only works on PCs with
the operating systems Microsoft
®
Windows
®
XP
(SP2) and Vista. Also refer to 1 ‘Things you
should know’ - ‘System requirements’.
Notes
•
Unplug all your USB devices (except USB
keyboard and USB mouse) before you start.
•
Do not plug in your WebCam yet.
Run the Installation CD-ROM first.
•
Have your Windows
®
CD-ROM at hand.
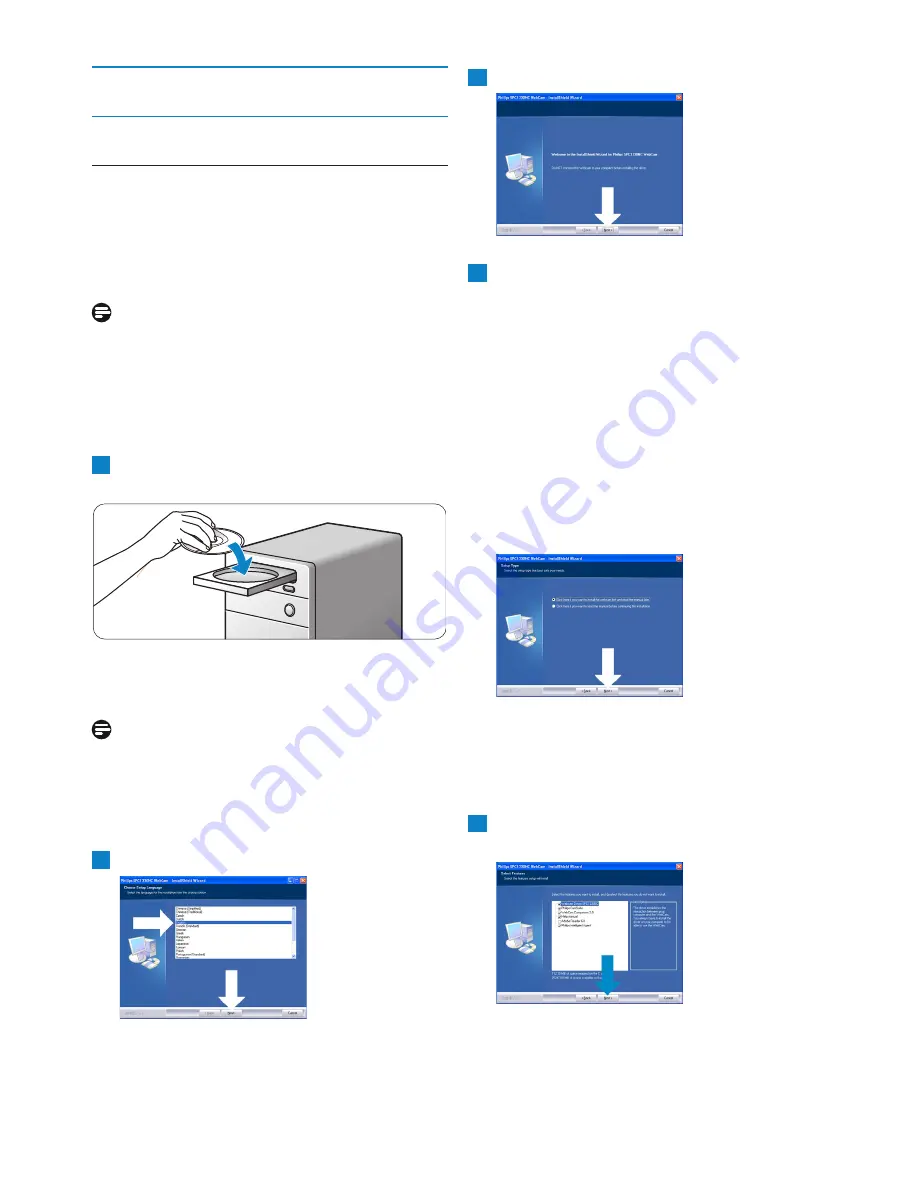
Place the installation CD-ROM in your PC’s /
laptop’s CD-ROM / DVD drive.
• After a couple of seconds the ‘Language
selection’ screen appears.
Note
If the ‘Language selection’ screen does not
appear automatically, open ‘Computer’ or
‘My computer’, double click on the CD,
then double click on the 'Setup.exe' icon.
Select your language.
• Installation continues automatically.
• The ‘Welcome’ screen appears.
2
1
Click ‘Next’ to continue.
• The ‘Manual’ screen appears.
Select the first option if you wish to
continue installation and read the manual
later.
Or:
Select the second option if you wish to read
the user manual before continuing
installation.
You can print out the manual so you will
have it at hand during the rest of the
installation process
Click ‘Next’ to continue.
• The ‘Installation’ screen appears. The items
that can be installed are shown on the left side
of the screen. An explanation of each item is
given on the right side. All required items are
selected by default.
Click the 'Next' button if you wish to install
all items.
5
4
3


