19
D
Note:
The red light is not the laser, but only a light
that indicates that you have good skin contact.
•
On areas on which full skin contact is
harder to achieve, such as the bony part
of the forehead, try different ways of
holding the device and try vertical and
horizontal movements to find the best
way to establish proper skin contact and
the right speed.
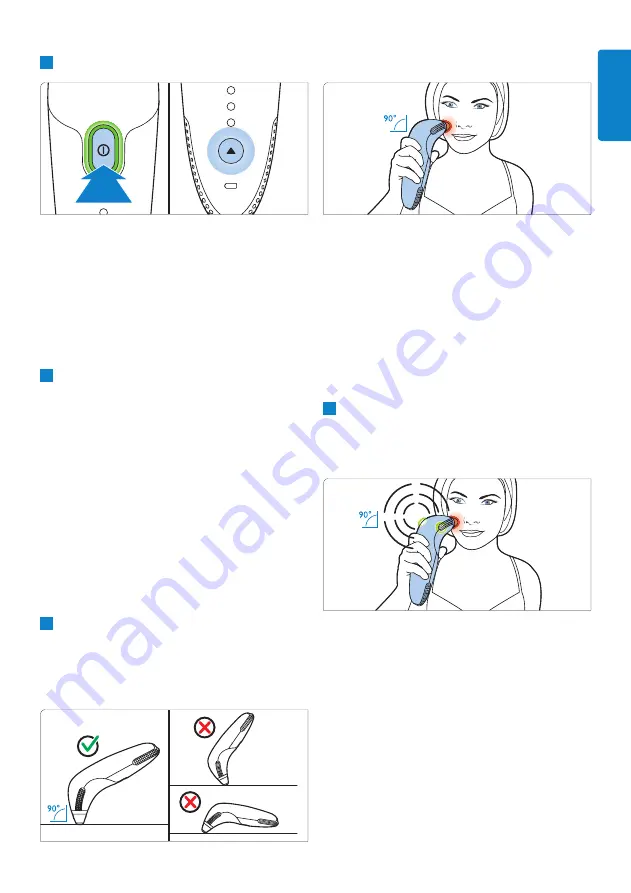
2
When you move the device over your skin,
the laser treats the skin. The treatment lights
turn green, you hear the laser hum and feel
the laser on your skin.
•
Do not move the device sideways.
Move it in long horizontal or vertical
strokes over your skin.
•
Always make sure to position your
next stroke as close as possible to your
previous one.
90°
90°
2
Press the on/off button to switch on the device.
• The status indicator lights up green
continuously.
• The intensity selection button lights up white.
D
Note:
The device does not work without the
application tip. If the application tip is not attached,
the status indicator lights up orange continuously.
3
Press the intensity selection button to select
the intensity setting. The intensity lights light up
one after the other.
•
Try intensity setting 2 and 3 to establish
which feels most comfortable on a particular
zone. If setting 2 causes too much discomfort,
go back to setting 1. Try to increase the
intensity again as soon as possible, for setting
1 is only meant for practising and does not
deliver effectiveness. To get the best results,
you should use the highest intensity setting.
If setting 1 continues to be painful, contact
the Philips skincare expert team.
5.1.3 Treat
1
Place the application tip onto your skin at a
90-degree angle. Make sure there is full skin
contact. The application tip will light up red
when the contact pins are in good contact
with your skin.
Engl
IS
h


