6
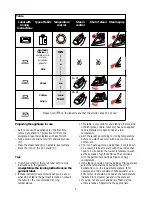
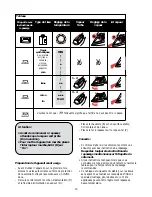
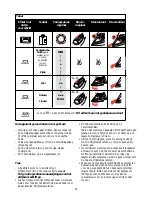
temperature by ironing a piece of material that will
not be visible when you wear or use the article.
Start ironing at a relatively low temperature and
gradually increase it until the desired result is
achieved.
• When steam-ironing woollen fabrics, shiny patches
may occur.You can prevent this by using a dry
pressing cloth or by turning the article inside out
and ironing the reverse side.
• Velvet and other fabrics that tend to acquire shiny
patches should be ironed in one direction only
(along with the nap) while applying very little
pressure.
• Make sure you keep the appliance moving
continuously while ironing.
• It is not advisable to use steam when you are
ironing coloured silk: this could cause stains.
Steam-ironing
Filling the tank before ironing
- Make sure that the on/off switch (D) has been set
to ‘off’, that the appliance has cooled down and
remove the plug from the wall socket.
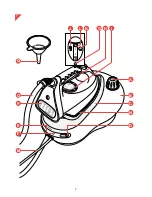
- Slowly unscrew cap (A) of the steam tank (fig. 2).
• It is possible that there is a vacuum in the cold tank,
which may cause a sound when you remove the cap.
This is absolutely normal.
- Pour max. 1 litre of water into the water tank.
- Make sure the tank is full when you start ironing.
• You can use tap water if it is not too hard (less than
10° DH). If the water in your area is very hard, you
may use distilled water, which you can obtain from
your local supermarket or chemist.
Do not put perfume, vinegar, starch or
descaling agents in the water tank. Do not
use water from a water softener either.
- If some water remains behind in the filling opening,
gently move the tank to and fro until the water is
gone.
- Firmly fasten the cap.
Heating up
- Put the plug in the wall socket and let the
appliance heat up by setting the on/off switch (D)
to ‘on’ (fig. 3).
• The steam tank as well as the soleplate are now
being heated up. Heating of the soleplate takes
approx. 2 minutes; heating of the steam tank takes
approx. 8 minutes.
• As soon as the steam tank is hot enough for
steaming, pilot light (E) will go out. You may now
start ironing.
Steam-ironing
• Steam-ironing is only possible at high ironing
temperatures.
For moderate steam: set the steam control (L)
to position 1 or 2.
For a lot of steam: set the steam control (L) to
position 3 or 4 and set the temperature control (I)
to position
3
or MAX.
- Keep the steam activator button (H) pressed in
while you are steam-ironing (fig. 4).
• During steam-ironing, pilot lights (E) and (G) will
come on from time to time to indicate that the
steam tank and the iron are being heated up to the
right temperature and pressure respectively.When
this happens, you can simply continue ironing.
• When you have not used the steaming facility for
some time, the steam still present in the supply hose
will condense into water.The next time you steam-
iron, this may cause some spluttering in the
appliance and a few droplets of water may escape
from the soleplate.
Tip: to prevent this, hold the iron over an old cloth and
press the steam activator button (H) until the steam
production has normalised before you start steam-
ironing.
Fast refill
When the steam tank is empty, pilot light (F) will go on
(fig. 5).
Follow the instructions below:
- First set the on/off switch (D) to ‘off’.
- Press the steam activator button until you no longer
hear any steam escaping from the appliance.
- Keep the steam activator pressed in and slowly
unscrew the cap of the steam tank by turning it anti-
clockwise.The steam tank is now depressurised
- Remove the plug from the wall socket.
- Fill the water tank as described in section ‘filling the
tank before ironing’ and let the appliance heat up
again.
Note: it is essential that you always carry out these
steps in the order mentioned above to avoid the
unexpected release of hot steam!
Содержание Provapor excel pro GC 6007
Страница 1: ...GC6007 6006 ...
Страница 3: ...3 1 1 2 3 4 J G L K H B C A Q D P O M I N E F ...
Страница 43: ...43 3 1 3 2 3 1 10 1 6 4 500 ml 1 0 6 0 3 ...
Страница 50: ...50 2 3 ...
Страница 51: ...51 ...
Страница 52: ...4222 001 92215 N Cod 236083 u ...


