background image

177

 - analyse des traitements et des activités du patient

 - détermination d’un traitement individuel et adaptation 

des paramètres de l’appareil grâce à l’application 

Wireless TENS Pro PC (PR3094 uniquement)

L’application PC Wireless TENS Pro ne doit être 

utilisée que par un professionnel de la santé 

avec l’appareil Wireless TENS Pro (PR3094). 

Celle-ci lui permet de proposer des séances de 

neurostimulation transcutanée plus spécifiques et de 

suivre et d’analyser les modes d’activité du malade 

avec l’utilisation de l’appareil.

L’appareil est destiné à être utilisé par et sur une 

personne adulte unique. Il doit toujours être utilisé 

conformément aux instructions d’utilisation et 

aux consignes de sécurité incluses dans ce mode 

d’emploi et aux fins pour lesquelles il a été conçu.

neurostimulation transcutanée et gestion 

de la douleur

La neurostimulation transcutanée est une méthode de 

soulagement de la douleur non invasive pour laquelle il 

existe une preuve clinique de diminution de la douleur. 

L’appareil de neurostimulation transcutanée est utilisé 

quotidiennement par des kinésithérapeutes et autres 

professionnels de la santé. Lors du traitement avec 

cet appareil, des impulsions électriques sont envoyées 

sur la surface de la peau pour activer les nerfs juste 

en dessous. Des données cliniques indiquent que cet 

appareil produit un soulagement de la douleur similaire 

aux mécanismes de soulagement de la douleur du 

système nerveux, comme le massage d’une zone 

douloureuse par exemple.

Les impulsions sont générées par des unités de 

neurostimulation transcutanée alimentées par batterie, 

qui doivent être connectées aux électrodes à hydrogel 

auto-adhésives. Vous pouvez choisir parmi un ensemble 

FRançais

177

Содержание PR3093

Страница 1: ...User manual PR3094 PR3093 ...

Страница 2: ...1 ...

Страница 3: ...PR3094 PR3093 English 4 Deutsch 57 Italiano 118 Français 176 ...

Страница 4: ...u need further information or have questions please visit www philips com pain management or contact the Philips Consumer Care Centre in your country Intended use The WirelessTENS PR3093 and the Wireless TENS Pro PR3094 are intended to be used by adult consumers experiencing mild to moderate chronic musculoskeletal pain The devices are intended to be used for transcutaneous electrical nerve stimul...

Страница 5: ...d TENS and pain management Transcutaneous electrical nerve stimulation TENS is a non invasive pain relief method for which clinical proof exists that it can help relieve pain TENS is used daily by physiotherapists and other healthcare professionals DuringTENS treatment electrical pulses are passed across the intact surface of the skin to activate the underlying nerves Clinical evidence suggests th...

Страница 6: ...ou keep track of how well you pace your activities over the day The remote control of the WirelessTENS device has a built in activity monitor that records your activity when you wear it attached to your belt or waistband or when you carry it around in the pocket of your trousers or skirt It can record and store the activity data of 60 days In this way you cannot only check your activity pattern ov...

Страница 7: ...s and to track and analyse patients activity patterns on a PC in relation to the use of the device and the patient s pain experience The WirelessTENS Pro PC Application is not included in the package but can be downloaded on request Please go to www philips com tens download and leave your contact details You will receive a link from where you can download the WirelessTENS Pro PC Application Via t...

Страница 8: ... these cases could cause electric shock burns electrical interference or even death you have a heart disease you have epilepsy you are pregnant as the safety of electric stimulation during pregnancy has not yet been established you have a cognitive impairment Adverse reactions You should stop using the device and consult your doctor if you experience adverse reactions from the device Possible adve...

Страница 9: ...ion on your neck as this could cause severe muscle spasms that could close your airway and result in breathing difficulties and that may also have an adverse effect on your heart rhythm or blood pressure Do not apply stimulation across your chest because electric current entering into the chest may cause heart rhythm disturbances which could be lethal Since the effects of stimulation of the brain ...

Страница 10: ...ity in which electrical stimulation can put you at risk of injury Do not apply stimulation while sleeping If the device is used at bedtime set the timer to make it switch off automatically Do not use the device and electrodes internally Do not apply stimulation near electronic monitoring equipment e g cardiac monitors ECG alarms as this equipment may not operate properly when the device is in use ...

Страница 11: ...lf life Please check the packaging for the use by date prior to use Do not use electrodes whose use by date has expired For ordering replacement electrodes see chapter Ordering accessories Make sure that you end the treatment by switching off theTENS units or by setting the intensity to 0 mA on the remote control before you remove theTENS units the extension cable if used PR3094 only or the electr...

Страница 12: ...low ConventionalTENS programs ConventionalTENS is a commonTENS program with high frequency stimulation It is based on the Gate ControlTheory that states that this type of stimulation will cause the transmission of pain signals in the nervous system to be blocked It is comparable to rubbing the pain away Most people use ConventionalTENS for 30 minutes per session but you can use it as often and as ...

Страница 13: ...tive body parts No limit Deep stimulus 5 May give you a deeper stimulating sensation No limit Radiating pulse 6 May give you a more radiating stimulation sensation No limit BurstTENS programs BurstTENS offers a high frequency stimulation that comes in trains of pulses This type of stimulation is known to trigger endorphin release Endorphins are pain killers produced by the body You can use Burst T...

Страница 14: ...trol PR3093 Program no on remote control PR3094 Program description Sug gested treat ment time Con tinu ous Burst 4 7 May give you a pulsing burst stimulation to release endor phins in your body 30 min Slow knead ing 5 8 May give you a slower and massaging burst stimulation to release endorphins 30 min Mild knead ing 6 9 May give you a milder burst stimulation to release endor phins in your body 3...

Страница 15: ...control PR3094 Program description Sug gested treat ment time Mixed frequency 7 12 May give you a flowing stimulation sensation 30 min Pulsing massage 8 13 May give you a more puls ing stimulation sensation 30 min Deep massage 14 May give you a slower and deeper flowing sensation 30 min Gentle massage 15 May give you a mild flow ing stimulation sensation 30 min optionally multiple times a day Prog...

Страница 16: ...activity 3 3 Con ven tional 100 Hz 150µs contin uous Soft stimulus 4 Con ven tional 80 Hz 60µs contin uous Deep stimulus 5 Con ven tional 80 Hz 150µs contin uous Radiating Pulse 6 Con ven tional 60 Hz 150µs contin uous Continu ous Burst 4 7 Burst 100 Hz 2 Hz 250µs 30 min Slow kneading 5 8 Burst 80 Hz 1 Hz 200µs 30 min Mild kneading 6 9 Burst 80 Hz 3 Hz 200µs 30 min Deep kneading 10 Burst 80 Hz 2 H...

Страница 17: ...80 Hz 180µs 30 min Gentle massage 15 Freq Mod 8 80 Hz 150µs 30 min Note With theWirelessTENS Pro PR3094 healthcare professionals can use theWirelessTENS Pro PC application to create and install additional programs tailored to their patient s needs as part of a pain management regimen Product overview Fig 1 1 Remote control 2 Display A Home screen symbol B Program screen symbol C Timer screen symbo...

Страница 18: ...R3094 only 12 On off button ofTENS units 13 TENS units 14 Removable corner piece PR3094 only 15 Battery status indicator ofTENS units 16 Treatment status indicator ofTENS units 17 Adapter 18 Charger 19 Self adhesive hydrogel electrode Note You find the related picture on the inside of the front cover Preparing for use Charging theTENS units To be able to use the device you first have to charge the...

Страница 19: ...e charger in a wall socket 2 Place the TENS unit with the rechargeable battery the one without the on off button and the indicators in the charger The battery status indicator on the other TENS unit flashes green during charging The battery status indicator stops flashing and is solid green when the battery is fully charged 3 Remove the TENS unit from the charger when the battery is fully charged ...

Страница 20: ...ring for treatment 1 Remove the detachable corner from the TENS units to make the socket for the extension cable accessible Note Store the detachable corner for later use Caution Store the detachable corner out of the reach of children 2 Insert the plug of the extension cable into the socket Preparing the remote control Inserting the batteries in the remote control 1 Remove the belt clip from the ...

Страница 21: ...mote control 5 If you want to wear the remote control attached to your belt or waistband reattach the belt clip to the remote control You can also use the remote control without the belt clip Locking and unlocking the remote control The control panel of the remote control locks automatically after some time of inactivity to prevent accidental operation 1 When you press a key on the remote control ...

Страница 22: ...een may also appear due to other causes see Error signals on the remote control in chapter Signals on the device 4 If you want to lock the remote control hold down the OK button for 2 seconds Note There is nothing on the display when the remote control is locked Tip Lock the remote control when you have started the treatment This allows you to wear the remote control attached to your belt or waist...

Страница 23: ...re than 24 hours after the batteries ran out Select the settings screen symbol to change the date and time in all other cases 2 Press the OK button to be able to change the date setting The day field is highlighted 3 Use the up or down arrow to choose the day and press the right arrow to go to the month field The month field is highlighted 4 Use the up or down arrow to choose the month and press t...

Страница 24: ...ss the right arrow to go to the minutes field The minutes field is highlighted 9 Use the up or down arrow to choose the minutes and press the OK button to confirm the time 10 Use the down arrow to go to the time format field 11 Press the OK button to be able to change the time format 12 Use the up or down arrow to toggle between the 24 hour clock and the 12 hour clock Press the OK button to confir...

Страница 25: ...l of the electrodes This has an adverse effect on the adhesive power of the electrodes 3 Take the electrodes from the plastic bag and check them for damage and signs of wear Caution Do not use electrodes whose use by date has expired The use by date is shown on the resealable plastic bag Note Replace the electrodes when they are damaged or dirty when they have lost their adhesive power or when the...

Страница 26: ...ear a click Note You can wear the electrodes with theTENS units attached to them under your clothes also during treatment Note During many treatment programs you can perform all activities allowed as intended use and not warned against in chapter Important when you wear theTENS units on your body You can also continue to wear theTENS units on your body in between treatments Note If you want to tre...

Страница 27: ...suggestions regarding placement of the electrodes see the placement guide at the end of this manual Please note that you may need assistance to place the electrodes on certain spots on your body As a rule the electrodes should be placed on or near the painful area Stimulation may result in visible muscle contraction in the stimulation area This is not harmful but if you find these contractions unc...

Страница 28: ...for use for details on setting the date and time Note The menu bar on the home screen and other screens disappears after a while but reappears as soon as you push a button Selecting a program 1 When you want to select another program than the default program on the home screen use the left or right arrow to highlight P for program on the menu bar 2 Press the OK button to confirm that you want to c...

Страница 29: ...ton to confirm that you want to change the duration On the timer screen the default preset duration is highlighted 3 Use the up or down arrow to choose the duration you prefer and press the OK button to confirm You can set the treatment duration in minutes You can also set the treatment duration to continuous the screen shows the continuous symbol on the display instead of the treatment duration i...

Страница 30: ...en you feel you have found the right level of stimulation Note For ConventionalTENS and Frequency modulated TENS you should clearly feel the stimulation but this should not be an unpleasant sensation and should not be painful Note For BurstTENS you should feel the stimulation strongly which generally gives a sharper sensation and can feel somewhat unpleasant It is also advised to adjust the intens...

Страница 31: ...e side of the intensity button for 3 seconds to make the intensity drop to 0 mA When the intensity level is 0 mA no pulse is emitted by theTENS units Note You can also end the treatment by pressing the on off button on theTENS units In that case treatment on both channels stops immediately Starting and stopping a treatment PR3094 To start a treatment you first have to switch on the TENS units with...

Страница 32: ... shown by the intensity level bar on the right side of the screen 2 To end the treatment of one or both channels before the set treatment time has elapsed or if you set the treatment duration to continuous hold down the side of the intensity button for 3 seconds to make the intensity drop to 0 mA When the intensity level is 0 mA no pulse is emitted by the TENS units Note Because you can operate th...

Страница 33: ... it around in the pocket of your trousers or skirt Reading the results 1 Press the right arrow to highlight the activity icon on the menu bar 2 The first screen to open is the day view Use the up or down arrow to scroll from one screen to the next The day view shows your activity level over the last 24 hours The height of the bars shows how many minutes you have been active The horizontal line A s...

Страница 34: ...are managing your pain with the Wireless TENS Pro in consultation with a healthcare professional who uses the WirelessTENS Pro PC Application PR3094 the activity monitor will give your healthcare professional more insight into your activity and treatment patterns The PC application also allows your healthcare professional to set an activity target If a target has been set the horizontal line will ...

Страница 35: ...etting the intensity to 0 mA on the remote control before you remove the TENS units the extension cable if used PR3094 only or the electrodes If you do not end the treatment you may experience an unpleasant sensation in your fingers This sensation is not harmful but can be unpleasant 1 Switch off the TENS units by pressing the on off button 2 Detach the TENS units from the electrodes by pulling th...

Страница 36: ...on the liner 2 Slide the liner with the electrodes back into the bag 3 Reseal the bag for dustfree storage Note To keep the electrodes in good condition and prevent the hydrogel layer from drying out always store them in the resealable bag when they are not attached to your body for treatment Seal the resealable bag to guarantee dustfree storage Note If you want to store electrodes for more than a...

Страница 37: ...n the ones mentioned above as these cleaning agents could damage the material e g cause loss of gloss 2 If the electrodes are dirty put a drop of water on your finger and gently rub the dirt off the surface Note Do not use soap or alcohol to clean the electrodes Troubleshooting This chapter summarises the most common problems you could encounter with the Wireless TENS and the WirelessTENS Pro If y...

Страница 38: ...l may be broken Contact the Philips Consumer Care Centre The battery status indicator on theTENS units flashed orange and the device switched off The battery of theTENS units is empty Charge theTENS units see chapter Preparing for use The battery status indicator on theTENS units is solid orange The battery of theTENS units is low The battery icon on the remote control flashes This means that the ...

Страница 39: ...TENS units see chapter Preparing for use TheTENS units overheated inside If this is the case the treatment status indicator flashes red Detach theTENS units and let them cool down As soon as they have cooled down sufficiently you can reattach them to the electrodes and press the on off button on the TENS units to resume treatment The TENS units may become warm on the outside during treatment but t...

Страница 40: ...sappears when you increase the intensity The channel interrupted symbol may indicate that theTENS unit or units are not placed on the electrodes properly Check if theTENS units are placed on the electrodes correctly WirelessTENS Pro PR3094 only If the channel interrupted symbol is above the left intensity button check if theTENS units are connected properly If the cross is above the right intensit...

Страница 41: ...tatus indicator on theTENS units is solid orange You can continue treatment as long as the treatment feels the same as usual When you press the on off button of theTENS units to stop treatment replace the batteries The treatment status indicator on theTENS units flashes red and the treatment has stopped TheTENS units overheated inside If theTENS units overheat inside remove them from the electrode...

Страница 42: ...ation feels different or less pleasant than usual The intensity is too high or too low Press the or side of the intensity button to increase or decrease the intensity The electrodes are not in the right place Switch off theTENS units and detach them from the electrodes Remove the electrodes from the skin and move them to a slightly different place The electrodes are not properly attached Switch of...

Страница 43: ...s is empty the connection is lost and the no connection symbol appears on the left Error signals on the remote control Battery low The battery symbol at the bottom of the display of the remote control flashes when the batteries of the remote control are low When the batteries run out completely the remote control switches off The battery symbol at the bottom of the display of the remote control al...

Страница 44: ...interrupted The channel interrupted symbol the cross on the screen indicates that the corresponding channel is interrupted If a channel is interrupted this may have the following causes 1 There is no contact between theTENS units and the electrodes 2 The electrodes are not attached to the skin properly When you have made sure the electrodes are properly attached to the skin and theTENS units are p...

Страница 45: ...hen the batteries of the remote control are low 2 The battery status indicator is solid green when the rechargeable battery is fully charged Treatment status indicator The treatment status indicator on theTENS units flashes 1 The treatment status indicator flashes green when theTENS units are switched on and in standby 2 The treatment status indicator flashes yellow during treatment to indicate th...

Страница 46: ... lost their adhesive power Never use plaster or tape to attach them to your skin stimulation feels less strong when the stimulation is uncomfortable i e when you experience an unpleasant stinging or biting sensation Note Always replace the electrodes with electrodes recommended for this device by the manufacturer New electrodes can be ordered at www philips com tens electrodes Batteries of the rem...

Страница 47: ...ible care to guarantee an expected service life of 5 years If you need service or information or if you have a problem please visit our website at www philips com support You can also contact the Philips Consumer Care Centre in your country Its telephone number is Germany 0800 0007522 free of charge for calls within Germany Austria 0800 880932 free of charge for landline calls within Austria costs...

Страница 48: ...of the product with normal household waste Correct disposal of your product helps prevent potentially negative consequences for the environment and human health This symbol indicates that batteries contain substances that may be harmful to human health and the environment Never dispose of batteries with normal household waste Follow the local rules for separate collection of batteries Correct disp...

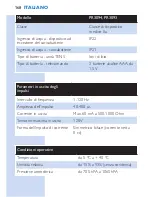
Страница 49: ...tput adapter 5V 500 mA Class Medical device Class IIa Ingress of water device except charger IP22 Ingress of water charger IP21 Battery type TENS units Li Ion Battery type remote control 2 AAA 1 5V alkaline batteries Pulse output parameters Frequency range 1 120 Hz Pulse width 40 400 µs Current output Max 60mA at 500 1000 Ohm Maximum output voltage 120V English 49 ...

Страница 50: ...s Temperature electrodes from 0 C to 40 C Temperature device from 10 C to 50 C Relative humidity less than 93 non condensing Atmospheric pressure from 700hPa to 1060hPa Note If you want to store the electrodes for more than a month keep them at temperatures between 5 C and 27 C Note Do not store the electrodes in the freezer or refrigerator Do not leave them in extreme heat nor immerse them in wat...

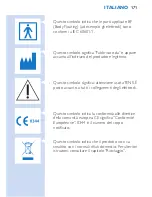
Страница 51: ...e number is followed by the letters RC On the type plate of theTENS units the type number is followed by the lettersTU This is the symbol for serial number This symbol is followed by the manufacturer s serial number This symbol means alternating current This symbol means direct current This symbol on the remote control theTENS units and the extension cable if provided means protected against acces...

Страница 52: ...es and systems that include RF transmitters or that intentionally apply RF electromagnetic energy must be labelled with this symbol This symbol means Type BF Body Floating applied part i e electrode complying with IEC 60601 1 This symbol means Manufactured by and appears next to the address of the legal manufacturer This symbol means cautionTENS output It is placed near all electrode connections E...

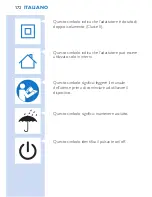
Страница 53: ... symbol means Do not throw away with the normal household waste For further instructions see chapter Recycling This symbol indicates that the adapter is double insulated Class II This symbol indicates that the adapter may only be used indoors This symbol means Read the user manual before you start using the device English 53 ...

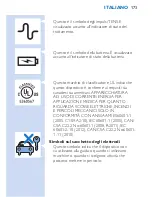
Страница 54: ...ext to the battery status indicator This UL classification mark indicates that this device complies with both Canadian and US requirements MEDICAL APPLIED CURRENT ENERGY EQUIPMENT ASTO ELECTRICAL SHOCK FIRE AND MECHANICAL HAZARDS ONLY IN ACCORDANCE WITH ANSI AAMI ES60601 1 2005 C1 09 A2 10 IEC 60601 1 2005 CAN CSA C22 2 No 60601 1 2008 R 2011 IEC 60601 2 10 2012 CAN CSA C22 2 No 60601 1 11 2010 En...

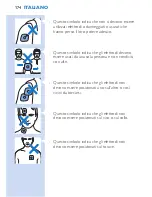
Страница 55: ...ot use damaged or worn electrodes or electrodes that have lost their adhesive power This symbol indicates that the electrodes should be used by one person and not shared with others This symbol means Do not place the electrodes on top of each other or so close to each other that they touch each other This symbol means Do not place electrodes on your face or neck English 55 ...

Страница 56: ...odes if they are stored for more than a month This is the symbol for use by It indicates after which date the electrodes must not be used anymore Electromagnetic emissions and immunity Electromagnetic Compatibility EMC The WirelessTENS PR3093 and the Wireless TENS Pro PR3094 are approved according to EMC safety standard EN 60601 1 2 They are designed to be used in typical domestic or clinical envi...

Страница 57: ...ser Bedienungsanleitung verwenden Wenn Sie weitere Informationen benötigen oder Fragen haben besuchen Sie uns auf www philips com pain management oder wenden Sie sich an ein Philips Service Center in Ihrem Land Verwendungszweck Das kabelloseTENS Gerät PR3093 und das kabelloseTENS Gerät Pro PR3094 wurden zurVerwendung für Erwachsene mit leichten bis mittleren chronischen Schmerzen des Bewegungsappa...

Страница 58: ...endet und bedient werden Es sollte ausschließlich gemäß den Sicherheitshinweisen und den Anweisungen in dieser Bedienungsanleitung sowie für den Zweck für den es entwickelt wurde verwendet werden TENS und Schmerztherapie Die transkutane elektrische Nervenstimulation TENS ist eine nicht invasive Methode zur Schmerzlinderung die laut klinischenTests die Schmerzlinderung unterstützen kann TENS wird t...

Страница 59: ...mmt Ihre Fitness ab und Sie können nicht mehr alle Dinge tun die Ihnen Spaß machen Die Erhaltung der Beweglichkeit ist wichtig ohne es zu übertreiben um nicht in einem kontinuierlichen Schmerzzyklus gefangen zu bleiben Der Schlüssel zur eigenen Schmerztherapie ist die richtige Einteilung Verteilen Sie die Aktivitäts und Ruheperioden so über denTag wie es für Sie am angenehmsten ist Das wichtigste ...

Страница 60: ... kabellose GerätTENS Pro PR3094 kann in Kombination mit der dazugehörenden PC Anwendung verwendet werden Diese wurde zur Anwendung durch medizinische Fachkräfte entwickelt die für die richtige Anwendung des TENS Geräts gemäß der Bedienungsanleitung verantwortlich sind und folgende Kompetenzen aufweisen Analyse der Aktivitätsmuster des Patienten in Bezug auf Behandlungsmuster des Patienten mithilfe...

Страница 61: ...erwendet werden wenn die Fernbedienung über ein Mini USB Kabel an Ihren PC angeschlossen ist Es gibt zwei Möglichkeiten dieses standardmäßige Mini USB Kabel zu beziehen 1 Sie können Ihre Kontaktdaten auf www philips com tens download hinterlassen und angeben dass Sie ein Mini USB Kabel erhalten möchten Nach Erhalt Ihrer Daten senden wir Ihnen ein Mini USB Kabel auf dem Postweg zu 2 Wenn Sie von un...

Страница 62: ...sie Sie sind schwanger da die Sicherheit der elektrischen Stimulation während der Schwangerschaft noch nicht nachgewiesen wurde Sie haben eine kognitive Behinderung Unerwünschte Reaktionen Sie sollten das Gerät nicht mehr verwenden und Ihren Arzt konsultieren wenn unerwünschte Reaktionen durch das Gerät auftreten Zu den unerwünschten Reaktionen zählen u a Hautirritationen unter den Elektroden obwo...

Страница 63: ...genau kennen konsultieren Sie Ihren Arzt Wenn Sie bereits von einem Arzt betreut werden konsultieren Sie ihn bevor Sie das Gerät verwenden Verwenden Sie das Gerät nicht am Hals da die Stimulation schwere Muskelkrämpfe verursachen könnte die Ihre Luftröhre verschließen und zu Atemnot führen könnten was wiederum Auswirkungen auf Ihren Herzrhythmus oder Blutdruck haben könnte Wenden Sie die Stimulati...

Страница 64: ...ion nur auf normaler unversehrter sauberer und gesunder Haut an Der Gebrauch der elektrischen Stimulation und der leitfähigen Elektroden kann zu Hautirritationen oder zu Überempfindlichkeit der Haut führen Wenden Sie die Stimulation nicht an während Sie ein Fahrzeug führen eine Maschine bedienen oder eine andere Aktivität ausführen bei der durch die elektrische Stimulation einVerletzungsrisiko bes...

Страница 65: ...Gerät nicht in feuchter Umgebung und schützen Sie es vor Nässe Das Gerät kann im Haus oder im Außenbereich verwendet werden es hält jedoch nicht allen Witterungen stand Das Gerät verträgt keine hohen und niedrigenTemperaturen Bitte prüfen Sie die Betriebsbedingungen in Kapitel Technische Daten Der USB Anschluss darf nur von einem Gesundheitsexperten inVerbindung mit der von Philips bereitgestellte...

Страница 66: ...wie in dieser Bedienungsanleitung beschrieben funktioniert stellen Sie den Gebrauch ein und wenden Sie sich an ein Service Center Die Kontaktdaten finden Sie in Kapitel Garantie und Support Normerfüllung Das Gerät erfüllt die geltenden Normen für elektromedizinische Geräte der Klasse IIa und für Geräte zur elektrischen Stimulation für den Heimgebrauch Dieses Philips Gerät erfüllt sämtliche Normen ...

Страница 67: ...h am besten während der Stimulation wahrnehmen Nach der Stimulation lässt dieWirkung im Allgemeinen ziemlich schnell nach Sie sollten die Intensität des Programms so einstellen dass Sie die Stimulation deutlich spüren Eine Stimulation sollte keine unangenehmen oder schmerzhaften Empfindungen auslösen Name des konven tionellen TENS Pro gramms Pro gramm nr auf Fernbe dienung PR3093 Pro gramm nr auf ...

Страница 68: ...NS Programme Burst TENS bietet eine Hochfrequenzstimulation in getakteten Impulsfolgen Diese Art der Stimulation ist ein bekannter Auslöser für die Endorphin Ausschüttung Endorphine werden vom Körper zur Schmerzlinderung produziert Sie können Burst TENS mehrmals täglich etwa 30 Minuten lang anwenden z B 3 Mal amTag Stellen Sie die Intensität des Burst Programms so ein dass Sie die Stimulation deut...

Страница 69: ...o grammnr auf Fernbe dienung PR3094 Programmbeschrei bung Vorge schla gene Behand lungs dauer Kontinu ierliche Impuls folge 4 7 Bewirkt eine pulsieren de Impulsstimulation um Endorphine in Ihrem Körper auszuschütten 30 Minu ten Langsames Kneten 5 8 Bewirkt eine langsamere und massierende Impuls stimulation um Endor phine auszuschütten 30 Minu ten Mildes Kneten 6 9 Bewirkt eine mildere Impulsstimul...

Страница 70: ...echseln den Impuls zwischen hoch und niedrig Dies kann teilweise angenehmer bzw effektiver als die anderen Programme sein Sie können die frequenz moduliertenTENS Programme mehrmals täglich etwa 30 Minuten lang anwenden z B 3 Mal amTag Fre quenz mod Programm name Pro gramm nr auf Fernbe dienung PR3093 Pro gramm nr auf Fernbe dienung PR3094 Programmbeschrei bung Vorge schla gene Behand lungs dauer M...

Страница 71: ...empfindung 30 Minu ten optional mehrmals amTag Technische Programmdaten In derTabelle unten werden Informationen über die Frequenz die Impulsbreite und die voreingestellte Zeit jedes Programms angegeben Der Stromimpuls in allen Programmen verläuft in einer symmetrischen Zweiphasenwelle Pro gramm name Pro grammnr PR3093 Pro gramm nr PR3094 Pro gramm typ Fre quenz Impuls breite Vor einge stellte Zei...

Страница 72: ...z 5 Konven tionell 80 Hz 150 µs stu fenlos Aus strah lender Impuls 6 Konven tionell 60 Hz 150 µs stu fenlos Konti nuier liche Impuls folge 4 7 Impuls folge 100 Hz 2 Hz 250 µs 30 Mi nuten Lang sames Kneten 5 8 Impuls folge 80 Hz 1 Hz 200 µs 30 Mi nuten Mildes Kneten 6 9 Impuls folge 80 Hz 3 Hz 200 µs 30 Mi nuten Tiefes Kneten 10 Impuls folge 80 Hz 2 Hz 150 µs 30 Mi nuten Diffuse Impuls folge 11 Imp...

Страница 73: ...n GerätTENS Pro PR3094 können Gesundheitsexperten die dazugehörige PC Anwendung im Rahmen einer Schmerztherapie nutzen um zusätzliche Programme zu erstellen und zu installieren die speziell auf die Bedürfnisse ihres Patienten abgestimmt sind Produktübersicht Abb 1 1 Fernbedienung 2 Anzeige A Symbol für Startbildschirm B Symbol für Programmbildschirm C Symbol fürTimerbildschirm D Akkusymbol E Symbo...

Страница 74: ...n 13 TENS Komponenten 14 Abnehmbares Eckstück nur PR3094 15 Akkustandanzeige derTENS Komponenten 16 Behandlungsstatusanzeige derTENS Komponenten 17 Adapter 18 Ladegerät 19 Selbsthaftende Hydrogel Elektrode Hinweis Das entsprechende Bild finden Sie auf der Innenseite der Frontabdeckung Für den Gebrauch vorbereiten DieTENS Komponenten aufladen Um das Gerät verwenden zu können müssen Sie zuerst dieTE...

Страница 75: ...den Adapter des Ladegeräts in eine Steckdose 2 Setzen Sie die TENS Komponente mit dem Akku diejenige ohne Ein Ausschalter und Anzeigen in das Ladegerät Die Akkustandanzeige der anderen TENS Komponente blinkt während des Aufladens grün Die Akkustandanzeige hört auf zu blinken und leuchtet dauerhaft grün wenn der Akku vollständig aufgeladen ist 3 Nehmen Sie die TENS Komponente vom Ladegerät wenn der...

Страница 76: ...ung 1 Nehmen Sie das abnehmbare Eckstück von den TENS Komponenten ab sodass der Anschluss für das Erweiterungskabel zugänglich ist Hinweis Bewahren Sie das abnehmbare Eckstück für den späteren Gebrauch auf Achtung Bewahren Sie das abnehmbare Eckstück außerhalb der Reichweite von Kindern auf 2 Stecken Sie den Stecker des Erweiterungskabels in den Anschluss Fernbedienung vorbereiten Akkus in die Fer...

Страница 77: ...Wenn Sie die Fernbedienung an Ihrem Gürtel oder am Bund tragen möchten befestigen Sie den Gürtel Clip wieder an der Fernbedienung Sie können die Fernbedienung auch ohne den Gürtel Clip verwenden Fernbedienung sperren und entsperren Das Bedienfeld der Fernbedienung wird automatisch gesperrt wenn es eine gewisse Zeit lang inaktiv war um eine versehentliche Bedienung zu verhindern 1 Wenn Sie eine Tas...

Страница 78: ...bindung Bildschirm kann auch aus anderen Gründen angezeigt werden siehe Fehlersignale auf der Fernbedienung in Kapitel Signale auf dem Gerät 4 Wenn Sie die Fernbedienung sperren möchten halten Sie die OK Taste 2 Sekunden lang gedrückt Hinweis Wenn die Fernbedienung gesperrt ist wird auf dem Display nichts angezeigt Tipp Sperren Sie die Fernbedienung nachdem Sie die Behandlung begonnen haben Dies e...

Страница 79: ...ien mehr als 24 Stunden nachdem der Energievorrat vollständig erschöpft ist ersetzen Wählen Sie in allen anderen Situationen das Einstellungssymbol aus um das Datum und die Uhrzeit zu ändern 2 Drücken Sie die OK Taste um die Datumseinstellung zu ändern Das Tagesfeld ist hervorgehoben 3 Wählen Sie den Tag mithilfe der Nach oben und Nach unten Pfeile aus und drücken Sie den Nach rechts Pfeil um zum ...

Страница 80: ...ach oben und Nach unten Pfeile aus und drücken Sie den Nach rechts Pfeil um zum Minutenfeld zu wechseln Das Minutenfeld ist hervorgehoben 9 Wählen Sie die Minuten mithilfe der Nach oben und Nach unten Pfeile aus und drücken Sie die OK Taste um die Zeit zu bestätigen 10 Verwenden Sie den Nach unten Pfeil um zum Feld für das Zeitformat zu wechseln 11 Drücken Sie die OK Taste um das Zeitformat zu änd...

Страница 81: ... von Creme oder Körperlotion sein Hinweis Schmutz Fett oder Partikel die sich noch auf der Haut befinden können in die Hydrogel Elektroden eindringen Dies wirkt sich negativ auf die Haftfähigkeit der Elektroden aus 3 Nehmen Sie die Elektroden aus der Kunststofftasche und überprüfen Sie sie auf Schäden und Anzeichen vonVerschleiß Achtung Verwenden Sie keine Elektroden mit abgelaufenem Haltbarkeitsd...

Страница 82: ...ktroden nicht übereinander bzw so nahe aneinander dass sie sich berühren 6 Befestigen Sie dieTENS Komponenten an den Elektroden DieTENS Komponenten weisen in der Mitte Magnete auf um eine einfacheVerbindung zu den Metallanschlüssen der Elektroden sicherzustellen Wenn dieTENS Komponenten und die Elektroden ordnungsgemäß verbunden sind hören Sie ein Klicken Hinweis Sie können die Elektroden mit den ...

Страница 83: ...ausgeschaltet Wenn dies geschieht müssen Sie zum Starten einer Behandlung zuerst erneut den Ein Ausschalter drücken Positionieren der Elektroden Um optimale Ergebnisse durch die Stimulation zu erhalten ist die ordnungsgemäße Positionierung der Elektroden wichtig Vergewissern Sie sich stets dass die Haut im Behandlungsbereich gesund ist bevor Sie die Elektroden befestigen Die ideale Stelle kann sic...

Страница 84: ...gen Behandlung beginnen und beenden Dies ist der Startbildschirm Darauf sehen Sie das ausgewählte Programm die ausgewählte Behandlungsdauer und die ausgewählte Intensität In der Menüleiste unten am Bildschirm sehen Sie von links nach rechts Das Symbol für den Startbildschirm Dieses Symbol ist hervorgehoben wenn der Startbildschirm angezeigt wird Das Symbol für den Programmbildschirm Wählen Sie die...

Страница 85: ...chten verwenden Sie den Nach links oder Nach rechts Pfeil um P für Programm in der Menüleiste hervorzuheben 2 Drücken Sie die OK Taste um zu bestätigen dass Sie das ausgewählte Programm ändern möchten Der Programmbildschirm wird angezeigt wobei das zuvor ausgewählte Programm hervorgehoben ist 3 Wählen Sie mithilfe des Nach oben oder Nach unten Pfeils ein Programm aus und drücken Sie zur Bestätigun...

Страница 86: ...r voreingestellte Standardwert für die Dauer hervorgehoben angezeigt 3 Wählen Sie die gewünschte Dauer mithilfe der Nach oben und Nach unten Pfeile aus und drücken Sie zur Bestätigung die OK Taste Sie können die Behandlungsdauer in Minuten einstellen Sie können die Behandlungsdauer auch auf Kontinuierlich einstellen Auf dem Bildschirm wird dann das entsprechende Symbol anstelle der Behandlungsdaue...

Страница 87: ...tätstaste gedrückt um die Intensität konstant und langsam zu erhöhen Lassen Sie die Intensitätstaste los wenn Sie die richtige Intensität der Stimulation erreicht haben Hinweis Bei konventionellen und frequenz modulierten TENS Programmen sollten Sie die Stimulation deutlich spüren es sollte aber nicht unangenehm oder schmerzhaft sein Hinweis Bei Burst TENS Programmen sollten Sie die Stimulation st...

Страница 88: ...tstaste um die Intensität kontinuierlich und langsam zu verringern Hinweis Da sich Ihr Körper anfangs auf die Intensität der Stimulation einstellt müssen Sie möglicherweise die Intensitätseinstellung nach einiger Zeit anpassen um eine ideale Stimulation sicherzustellen 2 Um die Behandlung vor Ablauf der festgelegten Behandlungsdauer zu beenden oder wenn Sie die Behandlungsdauer auf Kontinuierlich ...

Страница 89: ...nals zu erhöhen Dadurch wird der Impuls zwischen den ersten zwei Elektroden gestartet Die Intensitätseinstellung wird in Zahlen über der linken Intensitätstaste angezeigt Die Intensitätseinstellung wird auch durch den Intensitätsbalken auf der linken Seite des Bildschirms verdeutlicht Halten Sie die Plus Seite der Intensitätstaste auf der rechten Seite der Fernbedienung gedrückt um die Intensität ...

Страница 90: ...tsetzen Hinweis Sie können die Behandlung auch durch Drücken des Ein Ausschalters auf denTENS Komponenten beenden In diesem Fall wird die Behandlung auf beiden Kanälen sofort beendet Aktivitätsüberwachung Diese zusätzliche Funktion auf der Fernbedienung ermöglicht Ihnen Ihr Aktivitätsmuster über einen Tag eine Woche oder einen Monat zu überprüfen Da Aktivität und Zeiteinteilung wichtige Elemente i...

Страница 91: ... wie viele Minuten Sie aktiv waren Die horizontale Linie A stellt Ihre durchschnittliche Aktivität dar und unterstützt Sie bei der Ermittlung ob Ihre Aktivität imVerlauf des Tages über oder unter dem Durchschnittswert liegt Die Wochenansicht zeigt Ihre Aktivität am heutigen Tag und imVerlauf der letzten 7 Tage Die Buchstaben unter dem Diagramm geben die Tage der Woche an Die Höhe der Balken gibt a...

Страница 92: ...terdurchschnittlich war Aktivitätsziel PR3094 Wenn Sie Ihren Schmerz mit dem kabellosen GerätTENS Pro unter Absprache mit einem Gesundheitsexperten behandeln der die PC Anwendung für das kabellose GerätTENS Pro PR3094 verwendet übermittelt der Aktivitätsmonitor Ihrem Gesundheitsexperten weitere Informationen zu Ihrer Aktivität und Ihrem Behandlungsmuster Mit der PC Anwendung kann Ihr Gesundheitsex...

Страница 93: ...mitteln ob die Aktivität im vergangenen Monat die Zielvorgabe erreicht hat und an welchen Tagen Ihre Aktivität höher oder niedriger als das Ziel war Nach dem Gebrauch Achtung Vergewissern Sie sich dass Sie die Behandlung durch Ausschalten der TENS Komponenten oder durch Einstellen der Intensität auf 0 mA auf der Fernbedienung beenden bevor Sie dieTENS Komponenten dasVerlängerungskabel falls verwen...

Страница 94: ... Ziehen an der Kante von der Haut ab Hinweis Lassen Sie die Elektroden nicht über Nacht auf der Haut Wenn Hautirritationen auftreten versuchen Sie die Elektroden an einer anderen Stelle zu befestigen Vergewissern Sie sich dass Sie die Elektroden regelmäßig an eine andere Stelle setzen damit die Stimulation nicht jedenTag am gleichen Fleck durchgeführt wird Elektroden aufbewahren 1 Legen Sie die El...

Страница 95: ...Bewahren Sie die Elektroden nicht im Gefrier oder Kühlschrank auf Vermeiden Sie extreme Hitze und direkte Sonneneinstrahlung Pflege Tauchen Sie die Fernbedienung und die TENS Komponenten nicht in Wasser spülen Sie sie auch nicht unter fließendem Wasser ab Tauchen Sie die Elektroden nicht in Wasser 1 Reinigen Sie die Fernbedienung das Ladegerät die TENS Komponenten und das Erweiterungskabel nur PR3...

Страница 96: ...icht beheben können besuchen Sie unsere Website www philips com support auf der Sie eine Liste mit häufig gestellten Fragen finden Wenden Sie sich andernfalls an ein Service Center in Ihrem Land Problem Mögliche Ursache Lösung Die Fern bedienung lässt sich nicht ein schalten Die Batterien der Fernbedie nung sind leer Ersetzen Sie die Batterien siehe Kapitel Für den Gebrauch vorbereiten Die Batteri...

Страница 97: ...g blinkt Dies bedeutet dass die Kapazität des Akkus bei 30 liegt Laden Sie dieTENS Komponenten sobald wie möglich auf siehe Kapitel Für den Gebrauch vorbereiten Auf dem Bildschirm wird das Symbol für die fehlende Verbindung angezeigt siehe Kapi tel Signale auf dem Gerät Es besteht keineVerbin dung weil die TENS Kom ponenten ausgeschaltet sind Prüfen Sie ob dieTENS Komponenten eingeschaltet sind Di...

Страница 98: ...e ausreichend abgekühlt sind können Sie sie wieder an den Elektroden befestigen und den Ein Ausschalter auf denTENS Komponenten drücken um die Behandlung fortzusetzen Die TENS Komponenten können während der Behandlung außen warm werden dieTemperatur wird jedoch nie so hoch dass ein Schadens oderVerlet zungsrisiko besteht Die Fernbe dienung ist zu weit von den TENS Kom ponenten entfernt Führen Sie ...

Страница 99: ...t erhöht wird Das Kanal unterbro chen Symbol kann bedeu ten dass die TENS Kompo nenten nicht ordnungsge mäß an die Elektroden angeschlossen sind Prüfen Sie ob dieTENS Komponenten richtig an die Elektroden angeschlossen sind Gilt nur für das kabellose Gerät TENS Pro PR3094 Wenn sich das Kanal unterbrochen Symbol über der linken Intensitätstaste befindet sollten Sie prüfen ob dieTENS Komponenten ord...

Страница 100: ...ersetzen Bitte beachten Sie dass das Kanal unterbrochen Symbol erst ausgeblendet wird wenn die Intensität erhöht wird Das Akkusym bol in der Menüleiste der Fern bedienung blinkt Dies bedeutet dass die Batte rien der Fern bedienung fast leer sind Die Akkustandan zeige auf den TENS Kompo nenten leuch tet dauerhaft orange Sie können die Behandlung so lange fortsetzen wie sie sich normal anfühlt Nachd...

Страница 101: ...en DieTENS Komponenten können während der Behandlung au ßen warm werden dieTemperatur wird jedoch nie so hoch dass ein Schadens oderVerletzungsrisiko besteht Es hat sich unange nehm angefühlt als ich die Anschlüs se der TENS Kom ponenten bzw der Elektroden berührt habe Sie haben zum Beenden der Behandlung und zum Ab nehmen der TENS Kom ponenten die Intensität nicht auf 0 gestellt Stellen Sie die I...

Страница 102: ...iehen Sie sie von den Elek troden ab Entfernen Sie die Elektroden von der Haut und legen Sie sie an einer etwas anderen Stelle wieder an Die Elektro den sind nicht ordnungsge mäß angelegt Schalten Sie dieTENS Komponenten aus und ziehen Sie sie von den Elektro den ab Prüfen Sie ob die Elektroden ordnungsgemäß auf der Haut angelegt sind Die Elektro den sind zu schmutzig Sie können versuchen die Elek...

Страница 103: ...nzeigen Voll Zwei Drittel voll Ein Drittel voll und Leer 2 Wenn der Akku in den TENS Komponenten leer ist wird dieVerbindung unterbrochen und das KeineVerbindung Symbol wird auf der linken Seite angezeigt Fehlersignale auf der Fernbedienung Akku fast leer Das Akkusymbol unten im Display der Fernbedienung blinkt wenn die Batterien der Fernbedienung fast leer sind Wenn die Batterien vollständig leer...

Страница 104: ...zutrifft sind dieTENS Komponenten defekt Kanal unterbrochen Das auf dem Bildschirm angezeigte Kanal unterbrochen Symbol das Kreuz gibt an dass der entsprechende Kanal unterbrochen wurde Wenn ein Kanal unterbrochen wurde kann dies folgende Ursachen haben 1 Es gibt keinen Kontakt zwischen denTENS Komponenten und den Elektroden 2 Die Elektroden sind nicht ordnungsgemäß auf der Haut angelegt Wenn Sie ...

Страница 105: ...nbedienung fast leer sind 2 Die Akkustandanzeige leuchtet dauerhaft grün wenn der Akku vollständig aufgeladen ist Behandlungsstatusanzeige Die Behandlungsstatusanzeige auf denTENS Komponenten blinkt 1 Die Behandlungsstatusanzeige blinkt grün wenn dieTENS Komponenten eingeschaltet und im Standby Modus sind 2 Die Behandlungsstatusanzeige blinkt gelb wenn derzeit eine Behandlung durchgeführt wird 3 D...

Страница 106: ...nTasche angegeben ist Sie haben ihre Haftfähigkeit verloren Verwenden Sie kein Pflaster oder Klebeband um sie auf der Haut zu befestigen Die Stimulation fühlt sich weniger stark an Wenn die Stimulation unangenehm ist d h wenn Sie ein unangenehmes Stechen empfinden oder ein beißendes Gefühl auftritt Hinweis Ersetzen Sie die Elektroden immer mit Elektroden die für dieses Gerät vom Hersteller empfohl...

Страница 107: ...rößtmöglichen Sorgfalt entwickelt um eine voraussichtliche Nutzungsdauer von 5 Jahren zu garantieren Wenn Sie weitere Informationen benötigen oder Probleme auftreten besuchen Sie bitte unsere Website unter www philips com support Sie können auch ein Philips Service Center in Ihrem Land kontaktieren DieTelefonnummer lautet Deutschland 0800 0007522 kostenlos für Anrufe innerhalb Deutschlands Österre...

Страница 108: ...ropäische Richtlinie 2012 19 EU Bitte informieren Sie sich über die örtlichen Bestimmungen zur getrennten Entsorgung von elektrischen und elektronischen Produkten Entsorgen Sie Ihr Gerät niemals über den normalen Hausmüll Durch die korrekte Entsorgung Ihrer Altgeräte werden Umwelt und Menschen vor möglichen negativen Folgen geschützt Dieses Symbol zeigt an dass in den Batterien Stoffe enthalten si...

Страница 109: ...093 Nennspannung V Adapter 100 240 150 mA Nennfrequenz Hz Adapter 50 60 Nennausgabe Adapter 5V 500 mA Klasse Medizinische Geräteklasse IIa Eintreten von Wasser Gerät außer Ladegerät IP22 Eintreten von Wasser Ladegerät IP21 Akkutyp TENS Komponenten Li Ion Batterietyp Fernbedienung 2 AAA 1 5 V Alkalibatterien Parameter zur Impulsausgabe Frequenzbereich 1 120 Hz Impulsbreite 40 400 µS Stromabgabe Max...

Страница 110: ...50 C Relative Luftfeuchtigkeit Weniger als 93 nicht kondensierend Atmosphärischer Druck Von 700 hPa bis 1060 hPa Hinweis Wenn Sie die Elektroden mehr als einen Monat nicht verwenden sollten sie bei einerTemperatur zwischen 5 C und 27 C aufbewahrt werden Hinweis Bewahren Sie die Elektroden nicht im Gefrier oder Kühlschrank auf Vermeiden Sie extreme Hitze tauchen Sie sie nicht inWasser und bewahren ...

Страница 111: ... Fernbedienung und denTENS Komponenten weisen die gleicheTypennummer auf Auf dem Typenschild der Fernbedienung folgen nach der Typennummer die Buchstaben RC Auf dem Typenschild derTENS Komponenten folgen nach derTypennummer die Buchstaben TU Dies ist das Symbol für die Seriennummer Auf dieses Symbol folgt die Seriennummer des Herstellers Dieses Symbol bedeutet Wechselstrom Dieses Symbol bedeutet G...

Страница 112: ... mit einem Finger und gegen vertikal auftreffende Wassertropfen Dieses Symbol bedeutet dass das Gerät eine nicht ionisierende Strahlung abgibt Alle Geräte und Systeme die mit Hochfrequenz Sendern ausgestattet sind oder absichtlich hochfrequente elektromagnetische Energie anwenden müssen mit diesem Symbol beschriftet sein Dieses Symbol bedeutet Anwendungsteil d h Elektrode desTyps BF Body Floating ...

Страница 113: ... steht für Conformité Européenne 0344 ist die Nummer der gemeldeten Stelle Dieses Symbol bedeutet Nicht mit dem normalen Hausmüll entsorgen Weitere Anweisungen erhalten Sie in Kapitel Recycling Dieses Symbol bedeutet dass der Adapter zweifach isoliert ist Klasse II Dieses Symbol bedeutet dass der Adapter nur im Haus verwendet werden darf Deutsch 113 ...

Страница 114: ...sanleitung durch Dieses Symbol bedeutet Vor Nässe schützen Dieses Symbol ist die Markierung für den Ein Ausschalter Dies ist dasTENS Impulssymbol Es befindet sich neben der Behandlungsstatusanzeige Dies ist das Akkusymbol Es befindet sich neben der Akkustandanzeige Deutsch 114 ...

Страница 115: ... 11 2010 Symbole auf der Elektrodentasche Dieses Symbol bedeutet Nicht verwenden während Sie ein Fahrzeug führen eine Maschine bedienen oder eine andere Aktivität ausführen bei der einVerletzungsrisiko besteht Dieses Symbol bedeutet Verwenden Sie keine beschädigten oder abgenutzten Elektroden oder Elektroden die nicht mehr haften Dieses Symbol zeigt an dass die Elektroden von einer einzigen Person...

Страница 116: ...deutet Legen Sie die Elektroden nicht auf offene Wunden Krebsläsionen Ausschläge und infizierte oder entzündete Haut Dieses Symbol gibt die minimale und maximale Aufbewahrungstemperatur für die Elektroden an wenn sie mehr als einen Monat nicht verwendet werden Dies ist das Haltbarkeitssymbol Es zeigt an nach welchemTag die Elektroden nicht mehr verwendet werden dürfen Deutsch 116 ...

Страница 117: ...ilität EMC Das kabelloseTENS Gerät PR3093 und das kabellose GerätTENS Pro PR3094 erfüllen die EMC Sicherheitsnorm EN 60601 1 2 Die Geräte wurden zurVerwendung in typisch privater oder klinischer Umgebung entwickelt Anleitung zur Elektrodenpositionierung Abb 101 Deutsch 117 ...

Страница 118: ...e il sito www philips com pain management o contattate il Centro Assistenza Clienti Philips del vostro paese Uso previsto WirelessTENS PR3093 e WirelessTENS Pro PR3094 sono destinati all uso da parte di adulti per alleviare dolore cronico muscolo scheletrico da lieve a moderato I dispositivi sono destinati all uso per la stimolazione elettrica transcutanea dei nervi TENS allo scopo di alleviare il...

Страница 119: ...siva per alleviare il dolore la cui efficacia è dimostrata da test clinici LaTENS viene utilizzata quotidianamente dai fisioterapisti e da altri medici professionisti Durante il trattamento conTENS vengono inviati impulsi elettrici attraverso la pelle sana per attivare i nervi sottostanti Le prove scientifiche indicano che la TENS allevia il dolore in modo simile ai meccanismi di riduzione del dol...

Страница 120: ...ima di avvertirne il bisogno Un monitor dell attività può aiutarvi a capire se state distribuendo le vostre attività nel modo giusto durante la giornata Il telecomando del dispositivo WirelessTENS ha un monitor dell attività integrato che tiene traccia della vostra attività quando lo indossate in vita o lo portate in tasca Può registrare e salvare i dati dell attività di 60 giorni per verificare s...

Страница 121: ...ai professionisti di offrire ai loro pazienti programmi di trattamentoTENS più specifici e di tenere traccia e analizzare su un computer l andamento dell attività del paziente in relazione all uso del dispositivo e al dolore provato L applicazione per PC WirelessTENS Pro non è inclusa nella confezione ma può essere scaricata su richiesta Visitate il sito www philips com tens download e digitate i ...

Страница 122: ...mo di contattare il centro assistenza clienti Philips del vostro paese Importante Controindicazioni Non usate il dispositivo se siete portatori di stimolatore cardiaco defibrillatore o altro dispositivo metallico o elettronico sottocutaneo ad esempio un dispositivo di somministrazione di farmaci poiché l uso in questi casi potrebbe provocare scosse elettriche bruciature interferenza elettrica o pe...

Страница 123: ...o manuale dell utente e seguite sempre le istruzioni per il trattamento L apparecchio non è destinato a persone adulte con capacità mentali o sensoriali ridotte Non usate il dispositivo sui bambini Non usate il dispositivo se il dolore non può essere definito in modo chiaro come dolore muscolo scheletrico da lieve a moderato Se non siete certi della causa del dolore consultate il vostro medico Se ...

Страница 124: ...ate la stimolazione su ferite aperte o irritazioni su aree gonfie arrossate infette o infiammate o su eruzioni cutanee ad esempio flebiti tromboflebiti o vene varicose Non applicate la stimolazione su aree della pelle prive della normale sensibilità Applicate la stimolazione solo su pelle normale intatta pulita e sana L uso della stimolazione elettrica e degli elettrodi conduttivi può causare irri...

Страница 125: ...ri consigliati dal produttore Il dispositivo non è impermeabile Non usate il dispositivo in ambienti umidi e non bagnatelo Il dispositivo può essere usato al chiuso e all aperto ma non è stato progettato per resistere a tutte le condizioni climatiche Il dispositivo non è adatto alle temperature troppo alte e troppo basse Verificate le condizioni operative nel capitolo Specifiche La porta di connes...

Страница 126: ...enza clienti Per i dettagli di contatto consultare il capitolo Garanzia e assistenza Conformità agli standard Il dispositivo soddisfa gli standard relativi a questo tipo di apparecchi elettro medicali di Classe IIa che utilizzano la stimolazione elettrica per l uso casalingo Questo apparecchio Philips è conforme a tutti gli standard e alle norme relativi all esposizione ai campi elettromagnetici P...

Страница 127: ...genere è maggiormente percepibile durante la stimolazione L effetto svanisce piuttosto rapidamente una volta terminato il trattamento Vi consigliamo di regolare l intensità del programma in modo da percepire chiaramente la stimolazione In ogni caso la stimolazione non deve generare una sensazione sgradevole o dolorosa Nome del programma TENS con venzionale N del program ma sul teleco mando PR3093 ...

Страница 128: ...uce una stimolazione più profonda Nes sun limite Radiating pulse Impulso che si irradia 6 Produce una stimo lazione che si irradia maggiormente Nes sun limite ProgrammiTENS burst LaTENS burst offre una stimolazione ad alta frequenza con una serie di impulsi È risaputo che questo tipo di stimolazione provoca il rilascio di endorfina una sostanza prodotta dal corpo per sopprimere il dolore Potete us...

Страница 129: ...azione del muscolo nell area in cui è applicata la stimolazione Nome del programma TENS burst N del pro gramma sul teleco mando PR3093 N del program ma sul teleco mando PR3094 Descrizione del pro gramma Du rata con siglia ta del trat ta men to Continuo us Burst Stimola zione burst continua 4 7 Produce una stimola zione burst pulsata per favorire il rilascio di endorfine nel corpo 30 minu ti Slow k...

Страница 130: ...ffuse Burst Stimola zione burst diffusa 11 Produce una stimola zione burst più diffusa per favorire il rilascio di endorfine nel corpo 30 minu ti facoltativamente varie volte al giorno ProgrammiTENS a modulazione di frequenza LaTENS a modulazione di frequenza è un programma in cui la frequenza degli impulsi sale e scende In alcuni casi questo programma può essere più confortevole o efficace degli ...

Страница 131: ...mola zione più pulsata 30 mi nuti Deep massage Massaggio profondo 14 Produce una sensa zione di stimolazione fluida più lenta e profonda 30 mi nuti Gentle massage Massaggio gentile 15 Produce una sensa zione di stimolazione fluida più lieve 30 mi nuti facoltativamente varie volte al giorno Specifiche del programma La tabella seguente fornisce informazioni sulla frequenza ampiezza degli impulsi e t...

Страница 132: ...one completa 2 2 Conven tional Conven zionale 40 Hz 200 µs conti nuo Pre activi ty Attività prepara toria 3 3 Conven tional Conven zionale 100 Hz 150 µs conti nuo Soft stimulus Stimo lazione lieve 4 Conven tional Conven zionale 80 Hz 60 µs conti nuo Deep stimulus Stimo lazione profonda 5 Conven tional Conven zionale 80 Hz 150 µs conti nuo Radiating Pulse Impulso che si irradia 6 Conven tional Conv...

Страница 133: ...st Stimo lazione burst continua 4 7 Burst 100 Hz 2 Hz 250 µs 30 min Slow kneading Impasto lento 5 8 Burst 80 Hz 1 Hz 200 µs 30 min Mild kneading Impasto lieve 6 9 Burst 80 Hz 3 Hz 200 µs 30 min Deep kneading Impasto profondo 10 Burst 80 Hz 2 Hz 150 µs 30 min Diffuse Burst Stimo lazione burst diffusa 11 Burst 80 Hz 2 Hz 180 µs 30 min Italiano 133 ...

Страница 134: ...13 Mod di freq 2 8 Hz 250 µs 30 min Deep massage Massag gio pro fondo 14 Mod di freq 2 80 Hz 180 µs 30 min Gentle massage Mas saggio gentile 15 Mod di freq 8 80 Hz 150 µs 30 min Nota conWirelessTENS Pro PR3094 i medici professionisti possono utilizzare l applicazione per PC WirelessTENS Pro per creare e installare programmi aggiuntivi che si basano sulle esigenze dei loro pazienti come parte di un...

Страница 135: ...elettore con frecce direzionali verso l alto il basso sinistra e destra 7 Clip per cintura rimovibile 8 Coperchio del vano batterie 9 Connettori del canale di estensione per il terzo e il quarto elettrodo solo PR3094 10 Cavo del canale di estensione solo PR3094 11 Spinotto per collegare il canale di estensione all unitàTENS solo PR3094 12 Pulsante on off delle unitàTENS 13 UnitàTENS 14 Elemento an...

Страница 136: ... completamente carica quando cominciate un trattamento la carica potrebbe esaurirsi durante il trattamento Vi consigliamo di caricare sempre completamente le unitàTENS prima di cominciare un trattamento Nota non è possibile effettuare un trattamento quando le unitàTENS sono in carica 1 Inserite l adattatore del caricabatterie in una presa di corrente a muro 2 Posizionate l unità TENS con la batter...

Страница 137: ...Il dispositivo WirelessTENS pro PR3094 è dotato di una prolunga che consente di collegare due elettrodi aggiuntivi Poiché WirelessTENS pro PR3094 dispone di due canali il suo telecomando ha due pulsanti di regolazione dell intensità uno per ciascun canale Preparazione per il trattamento 1 Rimuovete l elemento angolare rimovibile dalle unità TENS per rendere accessibile la presa per la prolunga Not...

Страница 138: ...ota assicuratevi che i poli e seguano quanto indicato nel vano batterie Nota rimuovete le batterie se prevedete di non utilizzare il dispositivo per oltre un mese per evitare perdite della batteria 4 Fate nuovamente scorrere il coperchio del vano batterie sul telecomando fino a bloccarlo in posizione clic 5 Se desiderate indossare il telecomando applicato alla cintura o in vita riposizionate la cl...

Страница 139: ...te OK per sbloccare il telecomando La schermata richiede di premere la freccia rivolta verso l alto 3 Premete la freccia rivolta verso l alto sul selettore Una volta sbloccato il telecomando potete utilizzare nuovamente il pannello di controllo Se avete inserito nuove batterie e le unità TENS sono spente compare la schermata no connection connessione assente Nota questa schermata può comparire anc...

Страница 140: ... di data e ora si apre automaticamente sul display con il campo data evidenziato Nota questa schermata si apre automaticamente solo al primo utilizzo e se sostituite le batterie oltre 24 ore dopo che le precedenti batterie si sono esaurite In tutti gli altri casi è necessario selezionare il simbolo della schermata delle impostazioni per modificare la data e l ora 2 Premete il pulsante OK per poter...

Страница 141: ...delle impostazioni dell ora Viene evidenziato il campo dell ora 8 Usate la freccia verso l alto o verso il basso per scegliere l ora e premete la freccia verso destra per passare al campo dei minuti Viene evidenziato il campo dei minuti 9 Usate la freccia verso l alto o verso il basso per scegliere i minuti e premete il pulsante OK per confermare l ora 10 Usate la freccia verso il basso per passar...

Страница 142: ...ta o infiammata e sulla pelle con ferite aperte lesioni cancerose o irritazioni 2 Pulite la pelle con un panno umido ed asciugatela La pelle su cui desiderate posizionare gli elettrodi deve essere asciutta pulita e priva di creme o lozioni Nota sporco grasso o particelle presenti sulla pelle potrebbero incollarsi all idrogel degli elettrodi riducendone il potere adesivo 3 Estraete gli elettrodi da...

Страница 143: ...ttare Nota posizionate sempre gli elettrodi sulla pelle prima di collegare le unitàTENS Nota non posizionate gli elettrodi uno sull altro o così vicini da toccarsi 6 Collegate le unitàTENS agli elettrodi Le unità TENS hanno dei magneti al centro per semplificare il collegamento ai connettori di metallo degli elettrodi Udirete uno scatto quando le unitàTENS si bloccano in modo corretto sugli elettr...

Страница 144: ...tamente gli elettrodi Assicuratevi sempre di trattare un punto in cui la vostra pelle è sana prima di posizionare gli elettrodi Il punto ottimale può variare da persona a persona perciò provate a spostare gli elettrodi finché non ottenete la massima efficacia dal trattamento In alcuni casi può essere utile contrassegna re il punto per l uso in futuro Per maggiori informazioni sul posizionamento de...

Страница 145: ...questo simbolo per scegliere un programma di trattamento Il simbolo della schermata del timer selezionate questo simbolo per impostare la durata del trattamento Il simbolo della batteria selezionate questo simbolo per controllare lo stato della batteria Il simbolo della schermata dell attività selezionate questo simbolo per visualizzare il monitor dell attività consultare la sezione Monitoraggio d...

Страница 146: ...Nota il programma selezionato viene salvato come predefinito nella memoria del telecomando Il dispositivo selezionerà questo programma all utilizzo successivo Se volete modificare il programma seguite i passaggi da 1 a 3 indicati in precedenza Nota lo stesso programma viene applicato a entrambi i canali del dispositivoWirelessTens Pro PR3094 Impostazione della durata di un programma 1 Sulla scherm...

Страница 147: ... lampeggia nella schermata principale il trattamento continua finché non lo interrompete Nota la durata del trattamento selezionata viene salvata come predefinita nella memoria del telecomando Il dispositivo selezionerà questa impostazione della durata la prossima volta che lo utilizzerete Se volete modificare la durata seguite i passaggi da 4 a 6 indicati in precedenza Nota la stessa durata viene...

Страница 148: ...lore Nota per laTENS burst dovete percepire una stimolazione vigorosa che in genere trasmette una sensazione più nitida e può sembrare vagamente sgradevole Vi consigliamo inoltre di regolare l intensità a un livello che produca contrazioni visibili del muscolo nell area in cui viene applicata la stimolazione Queste contrazioni non sono dannose ma se per voi sono troppo fastidiose potete diminuire ...

Страница 149: ...durla a 0 mA Quando il livello di intensità raggiunge 0 mA le unità TENS non emettono più impulsi Nota potete concludere il trattamento premendo anche il pulsante on off sull unitàTENS In tal caso il trattamento viene interrotto subito su entrambi i canali Avvio e conclusione del trattamento PR3094 Per avviare un trattamento è necessario innanzitutto accendere le unitàTENS con il pulsante on off e...

Страница 150: ...ndicato anche dalla relativa barra sul lato destro della schermata 2 Per concludere il trattamento di uno o entrambi i canali prima della fine della durata impostata o se avete impostato la durata del trattamento su continuous continuo tenete premuto il simbolo sul pulsante dell intensità per 3 secondi per ridurla a 0 mA Quando il livello di intensità raggiunge 0 mA le unità TENS non emettono più ...

Страница 151: ...inché il monitoraggio dell attività sia efficace è necessario indossare il telecomando tutto il giorno Potete indossarlo sulla cintura con una clip oppure portarlo in tasca Lettura dei risultati 1 Premete la freccia verso destra per evidenziare l icona dell attività sulla barra del menu 2 La prima schermata che viene aperta è la vista del giorno Usate la freccia verso l alto o verso il basso per p...

Страница 152: ...umeri sotto il grafico L altezza delle barre indica per quante ore al giorno siete stati attivi nelle ultime quattro settimane La linea orizzontale A indica il livello medio di attività nell ultimo mese e vi consente di stabilire se il vostro livello di attività nel corso del mese è stato superiore o inferiore alla media Inoltre vi consente di stabilire in quali giorni il vostro livello di attivit...

Страница 153: ...ivo Nella vista del mese viene visualizzato il vostro livello di attività delle ultime quattro settimane fino a oggi La linea orizzontale T indica l obiettivo per il livello di attività impostato per il mese e vi consente di stabilire se quest ultimo ha raggiunto l obiettivo e in quali giorni il vostro livello di attività è stato superiore o inferiore all obiettivo Dopo l uso Attenzione Assicurate...

Страница 154: ...oli dai bordi Nota non lasciate gli elettrodi sulla pelle durante la notte In caso di irritazione della pelle provate ad applicare gli elettrodi in un altro punto Assicuratevi di spostare regolarmente gli elettrodi in punti diversi per evitare di applicare la stimolazione nello stesso punto ogni giorno Come conservare gli elettrodi 1 Riponete nuovamente gli elettrodi nella fodera 2 Fate scorrere l...

Страница 155: ...lecomando e le unità TENS in acqua né risciacquateli sotto il rubinetto non immergete gli elettrodi nell acqua 1 Pulite il telecomando il caricabatterie le unità TENS e la prolunga solo PR3094 con un panno umido ed un detergente delicato ad esempio il detersivo per piatti Nota potete pulire le varie parti anche con alcol isopropilico al 70 IPA Attenzione non usate detergenti diversi da quelli indi...

Страница 156: ...cende Le batterie del telecomando sono scariche Sostituite le batterie consultare il capitolo Predisposizione dell apparecchio Le batterie non sono posizionate correttamente Aprite il vano batterie e posizionate le batterie correttamente consultare il capitolo Predisposizione dell apparecchio Il telecomando potrebbe essere rotto Contattate il Centro Assistenza Clienti Philips L indicatore di stato...

Страница 157: ...iano accese L indicatore di stato del trattamento lampeggia in verde se le unitàTENS sono accese e in standby Se le unitàTENS sono spente premete il pulsante on off per accenderle Non c è connessione perché la batteria delle unitàTENS è scarica Ricaricare le unità TENS consultare il capitolo Predisposizione dell apparecchio Le unità TENS si sono surriscaldate In tal caso l indicatore di stato del ...

Страница 158: ...are il livello di intensità per cominciare un trattamento consultare il capitolo Segnali sul dispositivo Il simbolo a croce indica un interruzione della comunicazione con il canale Potrebbe indicare che gli elettrodi non sono posizionati correttamente Assicuratevi che gli elettrodi siano posizionati correttamente sulla pelle Ricordate che il simbolo a croce che indica un interruzione della comunic...

Страница 159: ...ttamente Se il simbolo a croce si trova sopra il pulsante di intensità destro controllate che i connettori della prolunga siano collegati correttamente Ricordate che il simbolo a croce che indica un interruzione della comunicazione con il canale scompare solo se aumentate l intensità Gli elettrodi si sono staccati dalla pelle Gli elettrodi hanno perso il loro potere adesivo perché sono sporchi o p...

Страница 160: ...NS si surriscaldano staccatele dagli elettrodi e lasciatele raffreddare Non appena si sono raffreddate potete riattaccarle agli elettrodi e premere il pulsante on off sulle unitàTENS per riprendere il trattamento Le unitàTENS potrebbero scaldarsi all esterno durante il trattamento ma la temperatura non sale mai tanto da provocare danni o lesioni Ho provato una sensazione sgradevole toccando i conn...

Страница 161: ...itàTENS e scollegatele dagli elettrodi Controllate che gli elettrodi siano applicati correttamente sulla pelle Gli elettrodi sono troppo sporchi Potete provare a pulire gli elettrodi consultare il capitolo Pulizia Se questo non risolve il problema sostituite gli elettrodi Gli elettrodi sono usurati Sostituite gli elettrodi Segnali sul dispositivo Indicazioni di stato della batteria sul telecomando...

Страница 162: ...y del telecomando lampeggia quando le batterie del telecomando sono scariche Quando le batterie sono completamente scariche il telecomando si spegne Il simbolo della batteria nella parte inferiore del display del telecomando lampeggia anche quando la batteria ricaricabile delle unitàTENS è scarica In tal caso l indicatore di stato della batteria sulle unitàTENS è arancione fisso Nota il simbolo de...

Страница 163: ...he gli elettrodi sono applicati correttamente sulla pelle e che le unità TENS sono collegate correttamente agli elettrodi premete il simbolo sul pulsante di intensità per controllare che il canale sia collegato correttamente Se è collegato correttamente il simbolo a croce scompare ed appare il valore dell intensità Segnali di indicazione sulle unitàTENS Indicatore dello stato della batteria L indi...

Страница 164: ...o del trattamento lampeggia in giallo durante il trattamento per indicarne l avanzamento 3 L indicatore di stato del trattamento lampeggia in rosso quando le unitàTENS si sono surriscaldate Quando le unitàTENS si surriscaldano il trattamento si interrompe automaticamente e sul display compare il simbolo che indica assenza di connessione Scollegate le unitàTENS dagli elettrodi e lasciatele raffredd...

Страница 165: ...ivo dal produttore I nuovi elettrodi possono essere ordinati su www philips com tens electrodes Batterie del telecomando Sostituite le batterie del telecomando quando il simbolo della batteria sul display lampeggia Sostituitele sempre con due batterie alcaline AAA da 1 5 volt vedere Preparazione del telecomando nel capitolo Predisposizione dell apparecchio Ordinazione degli accessori Per acquistar...

Страница 166: ...amate all interno della Germania Austria 0800 880932 numero gratuito per le chiamate da rete fissa all interno della Austria i costi per le chiamate da telefono cellulare dipendono dall operatore Svizzera 0800 002050 numero gratuito per le chiamate da rete fissa 0848 000292 i costi per le chiamate da telefono cellulare dipendono dall operatore Regno Unito 0844 338 04 89 5p min da rete fissa BT alt...

Страница 167: ... per l ambiente Non smaltite mai le batterie con gli altri rifiuti domestici Seguite i regolamenti locali per la raccolta differenziata delle batterie Lo smaltimento corretto delle batterie contribuisce a prevenire potenziali effetti negativi sull ambiente e sulla salute Le unitàTENS contengono una batteria ricaricabile incorporata che non può essere rimossa dall utente Recatevi presso un centro d...

Страница 168: ...comando 2 batterie alcaline AAA da 1 5V Parametri in uscita degli impulsi Intervallo di frequenza 1 120 Hz Ampiezza dell impulso 40 400 µs Corrente in uscita Max 60 mA a 500 1000 Ohm Tensione massima in uscita 120V Forma dell impulso di corrente Simmetrico bifase corrente netta 0 cc Condizioni operative Temperatura da 5 C a 40 C Umidità relativa da 15 a 93 senza condensa Pressione atmosferica da 7...

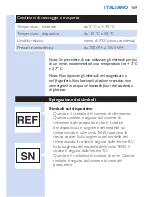
Страница 169: ... immergeteli in acqua né lasciateli fuori dal sacchetto di plastica Spiegazione dei simboli Simboli sul dispositivo Questo è il simbolo del numero di riferimento Questo simbolo è seguito dal numero di riferimento del produttore che è il codice del dispositivo Le targhette del modello sul telecomando e sulle unitàTENS riportano lo stesso codice Sulla targhetta del modello del telecomando il codice ...

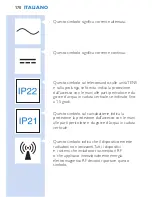
Страница 170: ...ua in caduta verticale se inclinato fino a 15 gradi Questo simbolo sul caricabatterie indica la protezione la protezione dall accesso con le mani alle parti pericolose e da gocce d acqua in caduta verticale Questo simbolo indica che il dispositivo emette radiazioni non ionizzanti Tutti i dispositivi e i sistemi che includono trasmettitori RF o che applicano intenzionalmente energia elettromagnetic...

Страница 171: ...mo Questo simbolo significa attenzione uscitaTENS È posto accanto a tutti i collegamenti degli elettrodi Questo simbolo indica la conformità alle direttive della comunità europea CE significa Conformité Européenne 0344 è il numero del corpo notificato Questo simbolo indica che il prodotto non va smaltito con i normali rifiuti domestici Per ulteriori istruzioni consultare il capitolo Riciclaggio It...

Страница 172: ...uesto simbolo indica che l adattatore può essere utilizzato solo in interni Questo simbolo significa leggere il manuale dell utente prima di cominciare ad utilizzare il dispositivo Questo simbolo significa mantenere asciutto Questo simbolo identifica il pulsante on off Italiano 172 ...

Страница 173: ...i APPARECCHIATURA AD USO DI CORRENTE ENERGIA PER APPLICAZIONE MEDICA PER QUANTO RIGUARDA SCOSSE ELETTRICHE INCENDI E PERICOLI MECCANICI SOLO IN CONFORMITÀ CON ANSI AAMI ES60601 1 2005 C1 09 A2 10 IEC 60601 1 2005 CAN CSA C22 2 No 60601 1 2008 R 2011 IEC 60601 2 10 2012 CAN CSA C22 2 No 60601 1 11 2010 Simboli sul sacchetto degli elettrodi Questo simbolo indica che il dispositivo non va utilizzato ...

Страница 174: ...trodi devono essere usati da una sola persona e non condivisi con altri Questo simbolo indica che gli elettrodi non devono essere posizionati uno sull altro o così vicini da toccarsi Questo simbolo indica che gli elettrodi non devono essere posizionati sul viso o sul collo Questo simbolo indica che gli elettrodi non devono essere posizionati sul torace Italiano 174 ...

Страница 175: ...osti per più di un mese Questo è il simbolo della scadenza Indica la data dopo la quale gli elettrodi non devono essere più usati Emissioni elettromagnetiche e immunità Electromagnetic Compatibility EMC I dispositivi WirelessTENS PR3093 e Wireless TENS Pro PR3094 sono approvati in base allo standard di sicurezza EMC EN 60601 1 2 Sono destinati all uso in ambienti domestici o clinici Guida al posiz...

Страница 176: ...e mode d emploi Si vous avez besoin d informations supplémentaires ou si avez une question consultez le site www philips com pain management ou contactez le Service Consommateurs Philips de votre pays Application Les appareils WirelessTENS PR3093 et Wireless TENS Pro PR3094 sont destinés à être utilisés par des consommateurs adultes qui éprouvent des douleurs musculo squelettiques chroniques faibl...

Страница 177: ...uelles il a été conçu Neurostimulation transcutanée et gestion de la douleur La neurostimulation transcutanée est une méthode de soulagement de la douleur non invasive pour laquelle il existe une preuve clinique de diminution de la douleur L appareil de neurostimulation transcutanée est utilisé quotidiennement par des kinésithérapeutes et autres professionnels de la santé Lors du traitement avec c...

Страница 178: ...offrez vous des périodes d activité et des périodes de repos au cours de la journée selon ce qui vous convient le mieux Pour réussir votre stimulation vous devez répartir vos activités et faire une pause avant d en ressentir besoin Un moniteur d activités peut vous aider à suivre le rythme de vos activités au cours de la journée La télécommande de l appareil WirelessTENS dispose d un moniteur d ac...

Страница 179: ... à leurs modes de traitement à l aide d une application PC externe détermination d un traitement individuel et adaptation des paramètres de l appareilTENS au moyen d une application PC externe L application PC WirelessTENS Pro permet aux professionnels de la santé de proposer des séances de neurostimulation transcutanée plus spécifiques à leurs patients et de suivre et d analyser les modes d activ...

Страница 180: ...stions quant à la disponibilité de l application PC WirelessTENS Pro ou du mini câble USB veuillez contacter le Service Consommateurs Philips de votre pays Important Contre indications N utilisez pas l appareil si vous portez un stimulateur cardiaque un défibrillateur ou tout autre dispositif électronique implanté ou métallique par exemple un système d administration de médicaments Une utilisation...

Страница 181: ...hors de portée des enfants Lisez attentivement ce mode d emploi et conformez vous toujours aux instructions de traitement Cet appareil n est pas destiné à être utilisé par des adultes dont les capacités physiques sensorielles ou intellectuelles sont réduites N utilisez pas l appareil sur les enfants N utilisez pas l appareil si votre douleur ne peut clairement être définie comme douleur musculo sq...

Страница 182: ...le car la stimulation peut avoir un effet négatif sur le processus de guérison N appliquez pas de stimulation sur ou à proximité de lésions cancéreuses N appliquez pas de stimulation sur des plaies ouvertes ou sur des zones blessées rouges infectées ou enflammées ou des éruptions cutanées par exemple phlébite thrombophlébite et varices N appliquez pas de stimulation sur des zones cutanées dont les...

Страница 183: ...sur la peau Vérifiez toujours si l appareil et les électrodes ne présentent pas de signe de détérioration avant utilisation N utilisez pas l appareil ou une électrode si vous constatez un quelconque endommagement Ne modifiez pas l appareil ou les électrodes Attention Utilisez uniquement cet appareil avec le chargeur les câbles les électrodes et les accessoires recommandés par le fabricant L appare...

Страница 184: ...ez pas le traitement vous pouvez éprouver une sensation désagréable dans vos doigts Cette sensation n est pas nuisible mais elle peut être désagréable Utilisez et stockez toujours les électrodes en suivant les instructions des chapitres Utilisation de l appareil et Après utilisation Si l appareil ne fonctionne pas comme décrit dans ce mode d emploi cessez de l utiliser et contactez le Service Cons...

Страница 185: ... porte qui indique que ce type de stimulation entraîne une transmission de signaux de douleur et la bloque dans le système nerveux Il peut être comparable à un système d élimination de la douleur La plupart des utilisateurs emploie la neurostimulation transcutanée classique pendant 30 minutes par session mais vous pouvez l utiliser aussi souvent et aussi longtemps que vous le souhaitez L effet est...

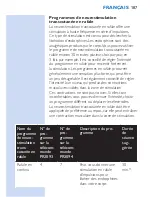
Страница 186: ...en pro fondeur 2 2 Peut vous donner une sensation de stimulation en profondeur Aucune limite Pré acti vité 3 3 Peut vous donner une stimulation plus douce et localisée Aucune limite Stimulus doux 4 Peut vous donner une sensation stimulante douce pour les parties sensibles du corps par exemple Aucune limite Stimulus profond 5 Peut vous donner une sensation stimulante profonde Aucune limite Impulsio...

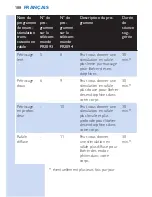
Страница 187: ...tre un peu désagréable Il est également conseillé de régler l intensité à un niveau qui produit des contractions musculaires visibles dans la zone de stimulation Ces contractions ne sont pas nocives Si elles sont inconfortables vous pouvez diminuer l intensité choisir un programme différent ou déplacer les électrodes La neurostimulation transcutanée en rafale doit être appliquée de préférence au r...

Страница 188: ...ur libérer des en dorphines 30 min Pétrissage doux 6 9 Peut vous donner une stimulation en rafale plus douce pour libérer des endorphines dans votre corps 30 min Pétrissage en profon deur 10 Peut vous donner une stimulation en rafale plus locale et plus profonde pour libérer des endorphines dans votre corps 30 min Rafale diffuse 11 Peut vous donner une stimulation en rafale plus diffuse pour libér...

Страница 189: ...fois par exemple Nom du pro gramme en mo dulation de fré quence N de pro gramme sur la télé com mande PR3093 N de pro gramme sur la télécom mande PR3094 Description du pro gramme Durée de séance suggérée Fré quence mixte 7 12 Peut vous donner une sensation de circulation de la stimulation 30 min Massage par im pulsion 8 13 Peut vous donner une sensation de stimula tion plus impulsive 30 min Massag...

Страница 190: ...e PR3093 N de pro gramme PR3094 Type d émis sion Fré quence Largeur de l im pulsion Durée prédéfi nie Clas sique 1 1 Clas sique 100 Hz 200 µs continu Stimulus en pro fondeur 2 2 Clas sique 40 Hz 200 µs continu Pré acti vité 3 3 Clas sique 100 Hz 150 µs continu Stimulus doux 4 Clas sique 80 Hz 60 µs continu Stimulus profond 5 Clas sique 80 Hz 150 µs continu Impul sion rayon nante 6 Clas sique 60 Hz...

Страница 191: ...Hz 3 Hz 200 µs 30 min Pétris sage en profon deur 10 Rafale 80 Hz 2 Hz 150 µs 30 min Rafale diffuse 11 Rafale 80 Hz 2 Hz 180 µs 30 min Fré quence mixte 7 12 Modu lation de fré quence 8 100 Hz 250 µs 30 min Massage par im pulsion 8 13 Modu lation de fré quence 2 8 Hz 250 µs 30 min Massage profond 14 Modu lation de fré quence 2 80 Hz 180 µs 30 min Massage léger 15 Modu lation de fré quence 8 80 Hz 15...

Страница 192: ...le de l écran Paramètres 3 Bouton d intensité PR3093 bouton d intensité pour le canal d extension troisième et quatrième électrodes PR3094 4 Bouton d intensité pour le canal principal première et deuxième électrodes PR3094 5 Bouton OK 6 Sélecteur avec flèches vers le haut le bas la droite et la gauche 7 Clip ceinture détachable 8 Couvercle du compartiment à pile 9 Connecteurs de canal d extension ...

Страница 193: ... elle contient suffisamment d énergie pour pouvoir être utilisée environ 8 heures en continu dans des conditions normales de fonctionnement Remarque Si la batterie rechargeable des unités TENS n est pas complètement chargée lorsque vous démarrez une séance les piles peuvent s épuiser en cours de traitement Nous vous conseillons de toujours charger complètement les unitésTENS avant de commencer une...

Страница 194: ...secteur Préparation au traitement avec deux canaux et quatre électrodes PR3094 uniquement L appareil WirelessTENS Pro PR3094 est livré avec un câble d extension qui permet de connecter deux électrodes supplémentaires Cet appareil possède deux canaux Sa télécommande dispose de deux boutons d intensité un pour chaque canal Préparation pour la séance 1 Retirez le coin détachable des unités TENS pour ...

Страница 195: ...ouvercle du compartiment des piles de la télécommande 3 Insérez deux piles alcalines AAA 1 5V neuves dans la télécommande Remarque Veillez à respecter la polarité des piles indiquée dans le compartiment à piles Remarque Retirez les piles si vous n utilisez pas l appareil pendant un mois ou plus pour éviter toute fuite 4 Repositionnez le couvercle du compartiment des piles sur la télécommande Franç...

Страница 196: ...omatiquement après un certain temps d inactivité pour empêcher toute utilisation accidentelle 1 Lorsque vous appuyez sur une touche de la télécommande vous êtes invité à appuyer sur la touche OK puis sur la flèche vers le haut 2 Appuyez sur la touche OK pour déverrouiller la télécommande Vous êtes invité à appuyer sur la flèche vers le haut 3 Appuyez sur la flèche vers le haut sur le sélecteur Lor...

Страница 197: ...rmet de porter la télécommande attachée à votre ceinture ou dans une poche sans aucun risque de modification accidentelle des réglages Réglage de la date et de l heure Si vous souhaitez utiliser le suivi des activités pour enregistrer les modes de traitement et les activités vous devez régler la date et l heure de votre télécommande 1 L écran de réglage de la date et de l heure s ouvre automatique...

Страница 198: ...r accéder au champ Année Le champ Année est mis en surbrillance 5 Utilisez la flèche vers le haut ou vers le bas pour choisir l année et appuyez sur la touche OK pour confirmer la date 6 Utilisez la flèche vers le bas pour accéder au champ de réglage de l heure 7 Appuyez sur la touche OK pour modifier le réglage de l heure L écran de réglage de l heure s ouvre Le champ Heure est mis en surbrillanc...

Страница 199: ...Utilisation de l appareil Fixation des électrodes et des unitésTENS 1 Assurez vous que la peau est saine et sans blessures ou rougeurs avant d y placer les électrodes Remarque Ne placez pas les électrodes sur une peau irritée ou enflammée avec des plaies ouvertes des lésions cancéreuses ou des rougeurs 2 Nettoyez la peau avec un tissu humide et séchez la La peau sur laquelle vous allez placer les ...

Страница 200: ...cotement ou de pincement désagréable 4 Retirez l électrode du sachet et placez la sur la peau sur la zone de traitement Reportez vous à la section Mise en place des électrodes ci dessous et au guide de positionnement figurant à la fin de ce mode d emploi 5 Placez la deuxième électrode sur la partie du corps que vous allez traiter Dans le cas du PR3094 vous pouvez placer également une troisième et ...

Страница 201: ... unitésTENS sur votre corps Vous pouvez également continuer à porter les unitésTENS sur votre corps entre les séances Remarque Si vous souhaitez effectuer une séance avec quatre électrodes PR3094 uniquement attachez d abord les unitésTENS à deux électrodes puis fixez les connecteurs du câble d extension aux deux autres électrodes 7 Appuyez sur le bouton marche arrêt pour passer les unités TENS en ...

Страница 202: ...d emploi Veuillez noter que vous aurez peut être besoin d aide pour placer les électrodes sur certains endroits de votre corps En règle générale les électrodes doivent être placées sur ou à proximité de la zone douloureuse Il possible que la stimulation entraîne une contraction de muscle visible dans la zone traitée Cela ne présente aucun danger mais si vous trouvez que ces contractions sont incon...

Страница 203: ... activité reportez vous à la section Suivi des activités de ce chapitre Le symbole de l écran Paramètres sélectionnez ce symbole pour modifier la date ou l heure reportez vous au chapitre Avant utilisation pour obtenir plus de détails sur le réglage de la date et de l heure Remarque La barre de menus de l écran d accueil et des autres écrans disparaît au bout d un instant mais elle réapparaît dés ...

Страница 204: ...isé Si vous voulez modifier le programme suivez les étapes 1 à 3 ci dessus Remarque Le même programme s applique aux deux canaux de l appareilWirelessTens Pro PR3094 Réglage de la durée d un programme 1 Vous pouvoir voir la durée sélectionnée par défaut sur l écran d accueil Si vous souhaitez la modifier utilisez la flèche gauche ou droite pour mettre en surbrillance l icône du programmateur sur l...

Страница 205: ...ine fois vous utiliserez l appareil ce réglage de durée sera utilisé Si vous souhaitez modifier la durée suivez les étapes 4 à 6 ci dessus Remarque La même durée s applique aux deux canaux de l appareilWirelessTENS Pro PR3094 Démarrage et arrêt d une séance PR3093 Pour commencer une séance vous devez d abord mettre les unitésTENS sous tension avec le bouton marche arrêt avant d appuyer sur le côté...

Страница 206: ... est également conseillé de régler l intensité à un niveau qui produit des contractions musculaires visibles dans la zone de stimulation Ces contractions ne sont pas nocives Si elles sont inconfortables vous pouvez diminuer l intensité choisir un autre programme ou déplacer les électrodes Le niveau d intensité est indiqué par des chiffres situés au dessus du bouton d intensité Les plages d intensi...

Страница 207: ...émettent plus de pulsations Remarque Vous pouvez également mettre fin à la séance en appuyant sur le bouton marche arrêt des unitésTENS Dans ce cas le traitement sur les deux canaux s arrête immédiatement Démarrage et arrêt d une séance PR3094 Pour commencer une séance vous devez d abord mettre les unitésTENS sous tension avec le bouton marche arrêt avant d appuyer sur les côtés des boutons d inte...

Страница 208: ...barre de niveau d intensité figurant sur le côté droit de l écran 2 Pour mettre fin à la séance de l un ou des deux canaux avant la durée définie ou si vous avez réglé la durée de la séance sur continu maintenez enfoncé le côté du bouton d intensité pendant 3 secondes pour faire descendre l intensité à 0 mA Une fois cette intensité atteinte les unités TENS n émettent plus de pulsations Remarque Ét...

Страница 209: ...commande sur ou à proximité de votre taille toute la journée Vous pouvez l attacher à votre ceinture avec le clip ceinture ou vous pouvez la transporter dans la poche de votre pantalon ou jupe Lecture des résultats 1 Appuyez sur la flèche droite pour mettre en surbrillance l icône d activité sur la barre de menus 2 Le premier écran à s ouvrir est l affichage Jour Utilisez la flèche vers le haut ou...

Страница 210: ...de la semaine précédente pendant lesquels votre niveau d activité a été au dessus ou en dessous de la moyenne L affichage Mois indique votre niveau d activité au cours des quatre dernières semaines y compris aujourd hui Les semaines sont représentées par des numéros sous le graphique La hauteur des barres représente le nombre d heures par jour pendant lesquelles vous avez été actif au cours des qu...

Страница 211: ...tre niveau d activité au cours de la journée correspond à l objectif L affichage Semaine indique votre niveau d activité au cours des 7 derniers jours jusqu à aujourd hui La ligne horizontale T illustre l objectif d activité défini pour la semaine Elle permet d établir si le niveau d activité au cours de la semaine précédente a atteint l objectif et les jours où votre niveau d activité a été supér...

Страница 212: ...ur le bouton marche arrêt 2 Retirez les unités TENS des électrodes en les détachant Remarque Si vous avez oublié de mettre les unités TENS hors tension elles s éteindront automatiquement dans les 5 minutes après avoir été détachées 3 Rechargez les unités TENS pour qu elles soient prêtes pour le prochain traitement 4 Retirez les électrodes de la peau en tirant sur le bord Remarque Ne laissez pas le...

Страница 213: ...ac refermable quand elles ne sont pas fixées à votre corps pour un traitement Fermez le sac refermable afin de garantir un stockage sans poussière Remarque Si vous souhaitez stocker les électrodes pendant plus d un mois conservez les à des températures comprises entre 5 C et 27 C Ne conservez pas les électrodes dans le congélateur ni dans le réfrigérateur Évitez les chaleurs extrêmes et l expositi...

Страница 214: ...ger le matériau perte de brillance par exemple 2 Si les électrodes sont sales mettez une goutte d eau sur votre doigt et ôtez doucement la poussière de la surface Remarque N utilisez pas de savon ni d alcool pour nettoyer les électrodes Dépannage Cette rubrique présente les problèmes les plus courants que vous pouvez rencontrer avec vos appareils WirelessTENS et WirelessTENS Pro Si vous ne parvene...

Страница 215: ...ntactez le Service Consommateurs Philips Le voyant d état de la batterie des unitésTENS a clignoté en orange et l appareil s est éteint La batterie des unitésTENS est vide Chargez les unitésTENS reportez vous au chapitre Avant utilisation Le voyant d état de la batterie des unitésTENS reste allumé en orange La batterie des unitésTENS est déchargée L icône de la batterie de la télécommande clignote...

Страница 216: ...batterie des unitésTENS est vide Chargez les unitésTENS reportez vous au chapitre Avant utilisation Les unitésTENS ont surchauffé à l intérieur Le cas échéant le voyant d état de traitement clignote en rouge Détachez les unitésTENS et laissez les refroidir Dès qu elles ont suffisamment refroidi vous pouvez les rattacher aux électrodes et appuyer sur le bouton marche arrêt situé sur les unitésTENS ...

Страница 217: ...ymbole canal interrompu ne disparaît que lorsque vous augmentez l intensité Le symbole canal interrompu peut indiquer que l unité ou les unités TENS ne sont pas placées correctement sur les électrodes Vérifiez si les unitésTENS sont placées correctement sur les électrodes WirelessTENS Pro PR3094 uniquement si le symbole canal interrompu se situe au dessus du bouton d intensité gauche vérifiez si l...

Страница 218: ...cez les électrodes Notez que le symbole canal interrompu ne disparaît que lorsque vous augmentez l intensité Le symbole de pile de la barre de menus de la télécommande clignote Ceci signifie que les piles de la télécommande sont faibles Le voyant d état des piles situé sur les unités TENS reste allumé en orange Vous pouvez poursuivre le traitement comme à l ordinaire Lorsque vous appuyez sur le bo...

Страница 219: ...gréable lorsque j ai touché les connecteurs des unités TENS ou les électrodes Vous n avez pas diminué l intensité à 0 pour terminer le traitement avant de retirer les unitésTENS Diminuez toujours l intensité à 0 mA avant de retirer les unités TENS De cette manière vous évitez une sensation désagréable quand vous touchez les connecteurs des unitésTENS le câble d extension ou les électrodes Cette se...

Страница 220: ...trodes Signaux de l appareil Indications du niveau des piles sur la télécommande 1 Pour vérifier le niveau des piles de la télécommande ou des unités TENS utilisez la flèche vers la gauche ou vers la droite pour sélectionner l icône de batterie dans la barre de menus L écran de la batterie s ouvre et affiche le niveau de charge de la batterie rechargeable des unités TENS à gauche et le niveau de c...

Страница 221: ... faible Si tel est le cas le voyant d état de la batterie des unitésTENS reste allumé en orange Remarque Le symbole de batterie commence à clignoter lorsque les piles de la télécommande ou lorsque la batterie rechargeable des unitésTENS disposent de moins de 30 de leur capacité totale Aucune connexion avec les unitésTENS Ce symbole aucune connexion sur l écran indique qu il n y a aucune connexion ...

Страница 222: ...paraît et la valeur d intensité s affiche Voyants des unitésTENS Indicateur d état de la batterie L indicateur d état de la batterie des unitésTENS clignote 1 L indicateur d état de la batterie clignote en orange brièvement lorsque la batterie rechargeable est vide puis les unitésTENS s éteignent 2 L indicateur d état de la batterie clignote en vert lorsque les unitésTENS sont en charge L indicate...

Страница 223: ...lignote en rouge lorsque les unitésTENS sont en surchauffe Lorsque les unitésTENS sont en surchauffe le traitement s arrête automatiquement et le symbole aucune connexion apparaît sur l afficheur Détachez les unitésTENS des électrodes et laissez les refroidir Dès qu elles ont suffisamment refroidi rattachez les et reprenez le traitement Remarque Il est normal que les unitésTENS deviennent chaudes ...

Страница 224: ...lectrodes recommandées pour cet appareil par le constructeur Les nouvelles électrodes peuvent être commandées à l adresse www philips com tens electrodes Piles de la télécommande Remplacez les piles de la télécommande lorsque le symbole de batterie clignote à l écran Remplacez les uniquement par deux piles alcalines AAA de 1 5 volts reportez vous à la section Préparation de la télécommande dans le...

Страница 225: ...hilips à l adresse www philips com support Vous pouvez également contacter le Service Consommateurs Philips de votre pays Son numéro de téléphone est le suivant Allemagne 0800 0007522 gratuit pour les appels nationaux en Allemagne Autriche 0800 880932 gratuit pour les appels nationaux vers des lignes fixes en Autriche les coûts des appels vers des téléphones portables dépendent de l opérateur Suis...

Страница 226: ...riques et électroniques Ne jetez pas ce produit avec les ordures ménagères ordinaires La mise au rebut correcte de votre produit permet de préserver l environnement et la santé Ce symbole indique que les piles contiennent des substances pouvant être nocives pour la santé et l environnement Ne jetez pas les piles avec les ordures ménagères ordinaires Suivez les réglementations locales relatives au ...

Страница 227: ...minale adaptateur 5V 500 mA Classe Appareil médical de classe IIa Entrée d eau appareil sauf chargeur IP22 Entrée d eau chargeur IP21 Type de batterie unitésTENS Li Ion Type de pile télécommande 2 piles alcalines AAA 1 5V Paramètres de sortie d impulsion Gamme de fréquences 1 120 Hz Largeur de l impulsion 40 400 µs Sortie courant 60 mA à 500 1 000 ohms max Tension de sortie maximale 120V Français ...

Страница 228: ... électrodes de 0 C à 40 C Température appareil de 10 C à 50 C Taux d humidité relative moins de 93 sans condensation Pression atmosphérique de 700 hPa à 1 060 hPa Remarque Si vous souhaitez stocker les électrodes pendant plus d un mois gardez les à des températures comprises entre 5 C et 27 C Remarque Ne stockez pas les électrodes dans le congélateur ou le réfrigérateur Ne les laissez pas dans une...

Страница 229: ... des lettres RC Sur celle des unitésTENS elle est suivie des lettresTU Ce symbole représente le numéro de série Il est suivi du numéro de série du fabricant Ce symbole signifie courant alternatif Ce symbole signifie courant direct Ce symbole présent sur la télécommande les unitésTENS et le câble d extension s il est fourni signifie Protection contre le toucher des parties dangereuses et protection...

Страница 230: ...ils et systèmes qui incluent des émetteurs RF ou qui appliquent intentionnellement de l énergie électromagnétique RF doivent porter ce symbole Ce symbole signifie Partie appliquée de type BF Body Floating électrode par exemple conforme à la norme IEC 60601 1 Ce symbole signifie Fabriqué par et apparaît à côté de l adresse du fabricant légal Ce symbole signifie Attention sortie de la neurostimulati...

Страница 231: ...r l appareil avec les ordures ménagères normales Pour de plus amples instructions consultez le chapitre Recyclage Ce symbole indique que cet adaptateur bénéficie d une double isolation classe II Ce symbole indique que l adaptateur ne peut être utilisé qu à l intérieur Ce symbole signifie Lire le mode d emploi avant de commencer à utiliser l appareil Français 231 ...

Страница 232: ...rie Il est affiché à côté du voyant de niveau de la batterie Cette marque de classification UL indique que cet appareil est conforme aux exigences canadiennes et américaines MATÉRIEL MÉDICAL EN CONFORMITÉ AVEC LES NORMES ANSI AAMI ES60601 1 2005 C1 09 A2 10 IEC 60601 1 2005 CAN CSA C22 2 No 60601 1 2008 R 2011 IEC 60601 2 10 2012 CAN CSA C22 2 No 60601 1 11 2010 CONCERNANT LES CHOCS ÉLECTRIQUES LE...

Страница 233: ...s utiliser d électrodes endommagées usées ou ayant perdu leur pouvoir adhésif Ce symbole indique que les électrodes doivent être utilisées par une seule personne et qu elles ne doivent pas être partagées avec d autres Ce symbole signifie Ne pas placer les électrodes les unes au dessus des autres ou éviter qu elles soient en contact Ce symbole signifie Ne pas placer les électrodes sur votre visage ...

Страница 234: ...ctrodes si leur stockage dure plus d un mois Il s agit du symbole de Date d expiration Il indique la date après laquelle les électrodes ne doivent plus être utilisées Émissions électromagnétiques et immunité Compatibilité électromagnétique EMC Les appareils WirelessTENS PR3093 et Wireless TENS Pro PR3094 sont conformes aux normes de sécurité EMC EN 60601 1 2 Ils sont conçus pour être utilisés à do...

Страница 235: ...101 ...

Страница 236: ...4222 100 0803 1 05 2013 ...

Отзывы: