background image

7

English

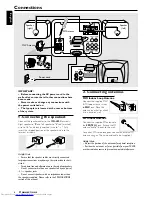
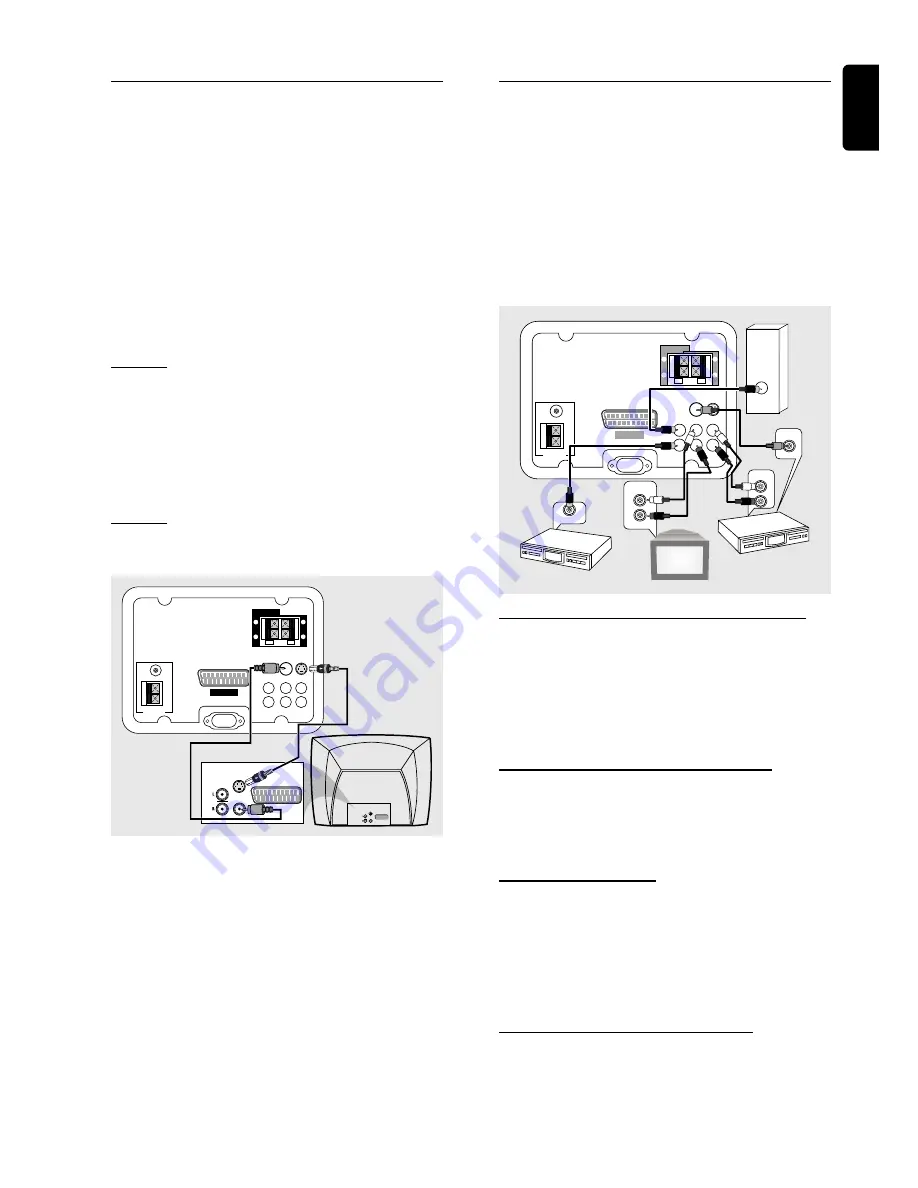
3. Connecting a TV

You must connect a TV to your DVD micro system in order
to view the DVD/VCD playback.

IMPORTANT!

There are various ways to connect the system

to a TV.  You only need to make one of the best
connections, depending on the capabilities of your
TV system.

Use the supplied Scart cable to connect 

SCART OUT

jack to the corresponding SCART VIDEO IN jack on a TV.

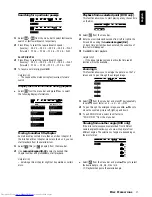
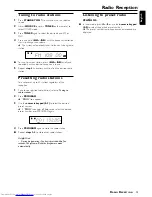
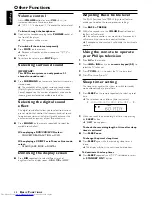
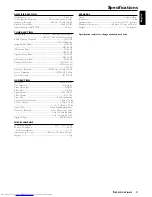
If your TV is not equipped with a Euroconnector, you can
select one of the following alternative connections :

Option 1

Connect the 

S-VIDEO OUT

 jack to the S-Video input

jack on the TV using a S-Video cable (not supplied).

If S-Video jack is used for video connection, the system’s
VIDEO OUT setting will need to be set accordingly.  Details
are on page 11.

OR

Option 2

Connect the 

VIDEO OUT 

jack to the video input jack on

the TV using a video cable (yellow).

AC MAINS

ANTENNA

MW

FM

75

SCART OUT

VIDEO

OUT

S-VIDEO

OUT

SUBWOOFER

OUT

DIGITAL

OUT

AUX/TV

IN

LINE 
OUT

L

R

SPEAKERS 

(8

)

L

R

+

+

AUDIO 

OUT

S-VIDEO

IN

VIDEO IN

SCART IN

AUDIO 

OUT

S-VIDEO

IN

VIDEO IN

SCART IN

Helpful Hints:
– To avoid magnetic interference, do not position the front
speakers too close to your TV.

C

ONNECTIONS

Connecting additional
equipment

IMPORTANT!
– Some DVDs are copy-protected.  You cannot
record the disc through a VCR or digital recording
device.
– When making connections, make sure the
colour of cables matches the colour of jacks.
– Always refer to the owner’s manual of the other
equipment for complete connection and usage
details.

ANTENNA

MW

FM

75

SCART OUT

VIDEO

OUT

S-VIDEO

OUT

SUBWOOFER

OUT

DIGITAL 

OUT

AUX

IN

LINE 
OUT

L

R

SPEAKERS 

(8

)

L

R

+

+

DIGITAL IN

AUDIO 

INPUT

AUDIO OUT

L

R

1

3

4

AUDIO IN

L

R

2

VIDEO IN

AC MAINS

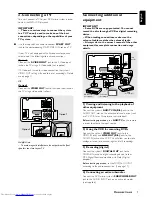
1)  Viewing and listening to the playback of
other equipment

Connect the system’s 

AUX/TV IN (R/L)

 jacks to the

AUDIO OUT jacks on the other audio/visual device (such
as a TV,  VCR, Laser Disc player or cassette deck).

Before starting operation,

 press 

AUX/TV

 on the remote

in order to activate the input source.

2)  Using the VCR for recording DVDs

Connect the system’s 

VIDEO OUT

 jacks to the

VIDEO IN jacks and 

LINE OUT (R/L)

 jacks to the

AUDIO IN jacks on the VCR.  This will allow you to make
analogue stereo (two channel, right and left) recordings.

3)  Recording (digital)

Connect the system’s 

DIGITAL OUT

 jack to the

DIGITAL IN jack on a digital recording device (such as
DTS-Digital Theatre compatible, with Dolby Digital
decoder).

Before starting operation,

 set the DIGITAL OUTPUT

according to the audio connection.  (See page 11).

4)  Connecting an active subwoofer

Connect the DVD micro system’s 

SUBWOOFER OUT

jack to the AUDIO INPUT jack on an active subwoofer
(not supplied).

VCR

(for example)

CD Recorder

(for example)

Television

(for example)

Active

subwoofer

Option 1

Option 2

Содержание MCD370

Страница 1: ...r Home Cinema experience FM antenna Scart cable AA size batteries AC power cable MW AM loop antenna Composite video cable yellow Helpful Hints You only need to make one video connection to your TV in order to view the DVD playback If yourTV is not equipped with a SCART connector connect yourTV through the corresponding S VIDEO IN orVIDEO IN connection S VIDEO OUT VIDEO OUT You should find the belo...

Страница 2: ...partment Make sure the disc label is facing up For double sided discs load the side you want to play face up 4 Press É Å to start playback If a disc menu appears use 3 4 1 2 buttons on the remote to make the necessary selection then press OK to confirm Or use the numeric keypad on the remote to select features Follow the instructions given in the disc menu 5 To stop playback press STOPÇ got sound ...

Страница 3: ...1 DVD MICRO SYSTEM MCD370 MCD370 ...

Страница 4: ...å redusere faren for brann eller elektrisk støt skal apparatet ikke utsettes for regn eller fuktighet Italia DICHIARAZIONE DI CONFORMITA Si dichiara che l apparecchio MCD370 Philips risponde alle prescrizioni dell art 2 comma 1 del D M 28 Agosto 1995 n 548 Fatto a Eindhoven Philips Consumer Electronics Philips Glaslaan 2 5616 JB Eindhoven The Netherlands DK Advarsel Usynlig laserstråling ved åbnin...

Страница 5: ...by Laboratories Dolby and the double D symbol are trademarks of Dolby Laboratories Confidential Unpublished Works 1992 1997 Dolby Laboratories Inc All rights reserved Manufactured under license from DigitalTheater Systems Inc US Pat No 5 451 942 5 956 674 5 974 380 5 978 762 and other world wide patents issued and pending DTS and DTS Digital Surround are registered trademarks of Digital Theater Sy...

Страница 6: ...rch within a track chapter Continue playback from the last stop point Selecting different play mode Repeat and Shuffle 14 Repeat A B Programme favourite tracks audio CD orVCD only 14 15 Using the display screen Using the menu bar Playing MP3 Picture disc Kodak JPEG 15 Contents Special DVD VCD SVCD features 16 18 Changing subtitle language Changing sound track language Playing in slow motion mode S...

Страница 7: ...materials cardboard box polystyrene foam buffer and polyethylene bags protective foam sheet Your system consists of materials which can be recycled and reused if disassembled by a specialised company Please observe the local regulations regarding the disposal of packaging materials exhausted batteries and old equipment Installation Place the player on a flat hard and stable surface In a cabinet al...

Страница 8: ... with an impedance lower than the speakers supplied Please refer to the SPECIFICATIONS section of this manual 2 Connecting antennas MW Indoor Loop Antenna Connect the supplied MW AM loop antenna s wires to MW jack Place the antenna on a shelf or attach it to a stand or wall FM Indoor Antenna Connect the supplied FM antenna to the FM 75 Ω jack Extend the FM antenna and fix its ends to the wall For ...

Страница 9: ...VCR or digital recording device When making connections make sure the colour of cables matches the colour of jacks Always refer to the owner s manual of the other equipment for complete connection and usage details ANTENNA MW FM 75Ω SCART OUT VIDEO OUT S VIDEO OUT SUBWOOFER OUT DIGITAL OUT AUX IN LINE OUT L R SPEAKERS 8Ω L R DIGITAL IN AUDIO INPUT AUDIO OUT L R 1 3 4 AUDIO IN L R 2 VIDEO IN AC MAI...

Страница 10: ...hones 8 TUNE 4 3 S T In Disc mode press to skip to the previous next chapter track In Disc mode hold down to fast reverse forward the disc In Tuner mode tune to a lower or higher radio frequency 9 STOP Ç Stops playing the disc or erases a programme 0 PLAY PAUSEÉ Å Starts or interrupts disc playback iR Points the remote control towards this sensor Display screen OPEN CLOSE 0 Opens or closes the dis...

Страница 11: ...ific section on a disc SUBW Adjusts the subwoofer s sound level for optional active subwoofer that connected to this DVD micro system REAR CENTER Not applicable for this model TV VOL Adjusts TV s volume Philips TV only SLEEP Sets the sleep timer auto off function DIM Selects different levels of brightness for the display screen NIGHT in Dolby Digital mode only Optimises the dynamics of the sound o...

Страница 12: ...c aTV set needs to be connected refer to Connections Connecting a TV Switch on theTV and set to the correct video in channel for example EXT1 EXT2 AV1 AV2 Refer to yourTV instruction manual for details The default screen appears on theTV System Setup DVD The system setup is carried out via theTV enabling you to customise the DVD micro system to suit your particular requirement If the preferred opt...

Страница 13: ...ng theVIDEO OUT jack yellow to connect the DVD micro system to yourTV SCART Select this if you have connected the DVD micro system to yourTV using the Scart jack S VIDEO Select this if you have connected the DVD micro system to yourTV using S Video jack SCR SAVER Screen Saver OFF Select this to disable the screen saver function ON Select this if you wish to dim theTV screen when the disc playback ...

Страница 14: ...3 Material is unsuitable for children under age 13 3 PG Parental Guidance suggested 1 G General Audience recommended as acceptable for viewers of all ages Helpful Hints Some DVDs are not encoded with a rating though the movie rating is printed on the disc jacket The rating level feature does not work for such discs If the player s parental level is set below 8 only discs with a lower or equal leve...

Страница 15: ...splay panel or DISC on the remote 2 Press OPEN CLOSE 0 button to open the disc compartment and load a disc then close the disc compartment Make sure the label side is facing up For double sided discs load the side you want to play face up Some discs will start playing automatically and others will display the Disc Contents Menu on theTV screen If the menu is presented use 3 4 1 2 keys to highlight...

Страница 16: ...h menu on only Repeat Disc Repeat Off To cancel all the repeat shuffle mode In stop mode press Ç again Helpful Hints Repeat play might not work correctly with some DVDs ForVCD repeat play will not be possible if the PBC mode is turned on For MP3 disc Repeat Album will not be possible if the menu is turned off Shuffle function is not applicable for programmed tracks DVD MP3 CD and Picture CD playba...

Страница 17: ... ON You can press DISC MENU to turn on the MP3 menu a list of albums titles will appear on theTV During playback you can Press S T to select another title picture in the current folder Press REPEAT to select available repeat mode Press ÉÅto pause resume playback For picture disc only you can press RESUME to select different slide show playback modes Mode 0 no special transition effect by default M...

Страница 18: ...ess SYSTEM MENU Changing subtitle language This operation works only on DVDs with multiple subtitle languages Select from the menu bar and press 4 key to select the desired language Changing sound track language This operation works only on DVDs with multiple soundtrack language Select from the menu bar and press 4 key to select the desired language For VCD SVCD Press 4 to select the desired audio...

Страница 19: ... Selecting a title or chapter might not be possible on certain discs Playback from a selected point DVD only This function allows you to start playing at any chosen time on the disc 1 Select from the menu bar 2 Enter hours minutes and seconds from left to right in the time edit box using the numeric keypad 0 9 Each time an item has been entered the underline of this item will disappear 3 PressÉ Åt...

Страница 20: ...PBC ON the PBC menu if available will appear on the TV screen for selection Use the numeric keypad 0 9 to enter your choice Helpful Hints If PBC mode is switched on TIME SEARCH and REPEAT functions are not available Checking the contents of DVD 1 Press DISC MENU on the remote If the current title has a menu the menu will appear on the screen Otherwise the disc menu will be displayed 2 Use 1 2 3 4 ...

Страница 21: ... can preset up to 40 stations regardless of the reception 1 Tune to your desired radio station refer to Tuning to radio stations 2 Press PROGRAM PROG icon appears 3 Use the numeric keypad 0 9 to select the desired preset number If PROG icon goes off before you select the desired preset number press PROGRAM again PROG L R 4 Press PROGRAM again to store the radio station Repeat steps 1 4 to store ot...

Страница 22: ...OCK or DIGITAL Dimming the display screen Press DIM repeatedly to select different levels of brightness for the display screen HIGH MID or LOW Adjusting Bass Treble level The BASS low tone andTREBLE high tone features enable you to define the sound processor settings 1 Press BASS or TREBLE 2 Within five seconds use the VOLUME control to adjust the Bass orTreble level If the volume control is not u...

Страница 23: ...ereoThreshold FM 23 5 dB DVD SECTION LaserType Semiconductor Disc Diameter 12cm 8cm Video Decoding MPEG 2 Video DAC 10 Bits Signal System PAL NTSC Video Format 4 3 16 9 Video S N 56 dB minimum CompositeVideo Output 1 0Vp p 75 Ω S Video Output Y 1 0Vp p 75 Ω C 0 286Vp p 75 Ω Audio DAC Direct Digital Amplification Frequency Response 4 Hz 20 kHz 44 1 kHz 4 Hz 22 kHz 48 kHz 4 Hz 44 kHz 96 kHz Digital ...

Страница 24: ... pause slow motion or fast forward reverse mode press PLAY to resume normal play mode The micro DVD player does not Insert a readable disc with the playback side facing down start playback Check the disc type colour system and regional code Check for any scratches or smudges on the disc Press SYSTEM MENU to turn off the setup menu screen Cancel the parental control rating function or change the ra...

Страница 25: ...data volume as a regular CD can Parental control A function of the DVD to limit playback of the disc by the age of the users according to the limitation level in each country The limitation varies from disc to disc when it is activated playback will be prohibited if the software s level is higher than the user set level PCM Pulse Code Modulation A system for converting analogue sound signal to dig...

Отзывы: