background image

10

e


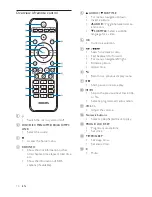
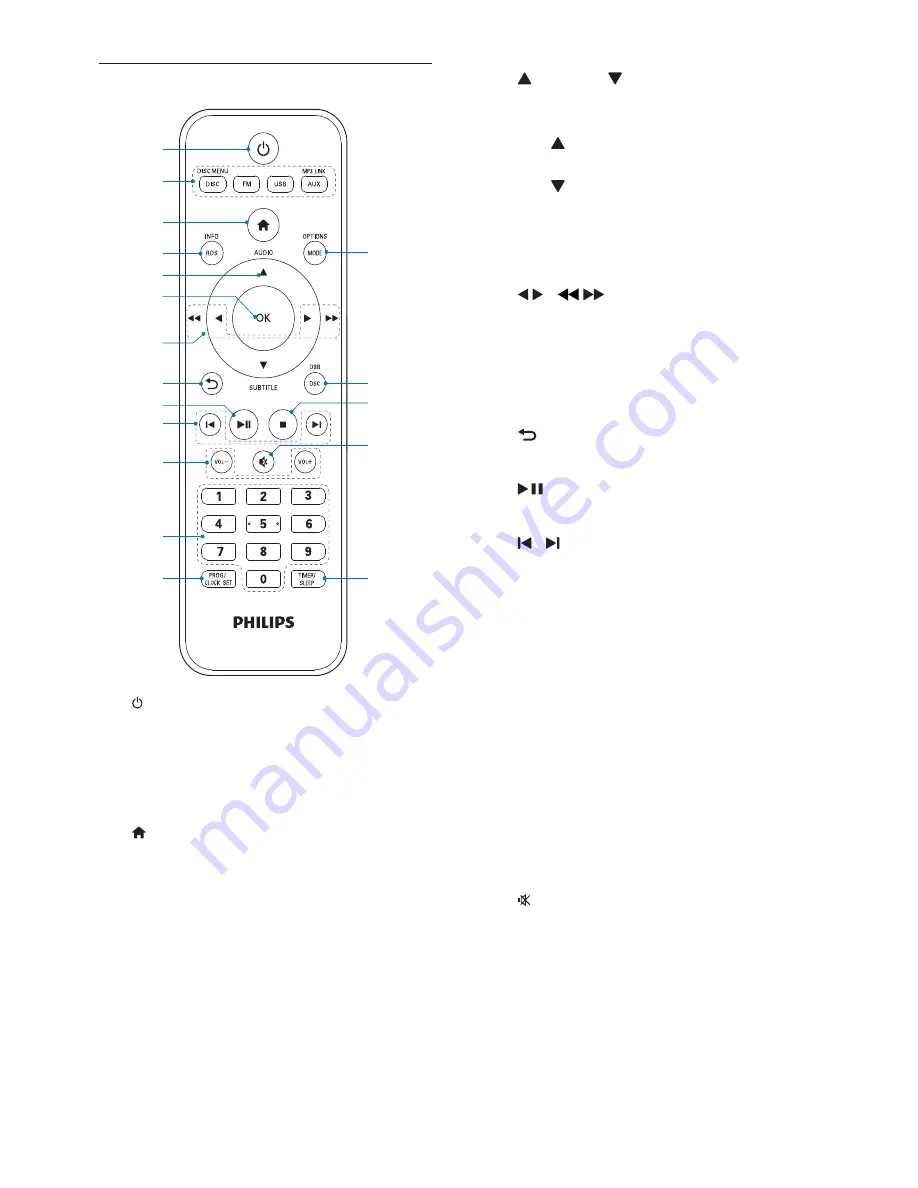
 AUDIO /   SUBTITLE

For menus: navigate up/down.

Invert a picture. 

 AUDIO

: Toggle between stereo 

and mono.

 SUBTITLE

: Select a subtitle 

language for a video.

f

 OK

 %

g


 / 


Search in a track or disc.

Fast backward or forward.

For menus, navigate left/right.

Rotate a picture.

Adjust time.

h


Return to a previous display menu.

i


Start, pause or resume play.

j


 / 

Skip to the previous/next track, title, 
%

Select a programmed radio station.

k

 VOL +/-

Adjust the volume.

l

 Numeric buttons

Select a title/chapter/track to play.

m

 PROG/CLOCK SET

Program radio stations.

Set clock.

n

 TIMER/SLEEP

Set sleep timer.

Set alarm timer.

o


Mute.

Overview of remote control

a

b

d

e

f

g

h

j

i

k

m

l

c

r

q

n

p

o

a


Switch the micro system on/off.

b

 DISC/DISC MENU/FM/USB/AUX/MP3 

LINK

Select the source.

c


Access the home menu.

d

 RDS/INFO

Show the disk information such as 
title, chapter, time elapsed, total time 
etc.

Show the information of RDS 
stations (if available).

EN

Содержание MCD2010

Страница 1: ...et support at www philips com welcome EN User manual 3 DE Benutzerhandbuch 27 ES Manual del usuario 53 FR Mode d emploi 79 IT Manuale utente 105 NL Gebruiksaanwijzing 131 PT Manual do utilizador 157 SV Användarhandbok 183 MCD2010 ...

Страница 2: ......

Страница 3: ...lations 7 Feature introduction 7 What s in the box 7 Overview of the main unit 8 3 Before use 11 Place the unit 11 Connect 12 Install replace the battery of remote control 13 4 Get started 14 Turn on 14 Store radio stations automatically 14 Find the correct video input channel 14 Select the correctTV system 15 Select a language for on screen display 15 5 Play disc USB 15 Basic operation 15 Play a ...

Страница 4: ...Over time your hearing comfort level adapts to higher volumes of sound So after prolonged listening what sounds normal can actually be loud and harmful to your hearing To guard against this set your volume to a safe level before your hearing adapts and leave it there To establish a safe volume level Set your volume control at a low setting 1 Important Know these safety symbols This bolt of lightni...

Страница 5: ...ycled and reused if disassembled by a specialized company Please observe the local regulations regarding the disposal of packaging materials exhausted batteries and old equipment Slowly increase the sound until you can hear it comfortably and clearly without distortion Listen for reasonable periods of time Prolonged exposure to sound even at normally safe levels can also cause hearing loss Be sure...

Страница 6: ...tured under license from Dolby Laboratories Dolby and the double D symbol are trademarks of Dolby Laboratories DVD Video is a trademark of DVD Format Logo Licensing Corporation ABOUT DIVX VIDEO DivX is a digital video format created by DivX Inc This is DivX video Visit www divx com for more information and software tools to convert ABOUT DIVX VIDEO ON DEMAND This order to play DivX Video on Demand...

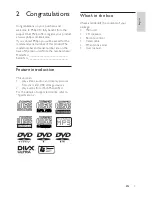
Страница 7: ... www philips com welcome If you contact Philips you will be asked for the model and serial number of this product The model number and serial number are on the back of the main unit Write the numbers here Model No __________________________ Serial No ___________________________ Feature introduction This unit can play videos audios and display pictures from discs and USB storage devices play audios...

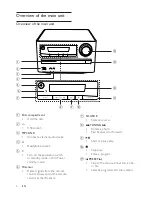
Страница 8: ...rogrammed radio station Overview of the main unit Overview of the main unit a Disc compartment Hold the disc b USB socket c MP3 LINK Connect external audio device d Headphone socket e Turn on the apparatus switch to standby mode or Eco Power standby mode f IR sensor Detect signals from the remote control Always point the remote control at the IR sensor a b c d e f g h i j n m l k EN ...

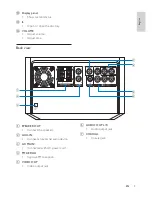
Страница 9: ...Show current status m Open or close the disc tray n VOLUME Adjust volume Adjust time Back view a SPEAKER OUT Connect the speakers b AUX IN Connect an external audio device c AC MAIN Connected with AC power cord d FM AERIAL Improve FM reception e VIDEO OUT Video output jack a b g f d e c EN ...

Страница 10: ...ious next track title Select a programmed radio station k VOL Adjust the volume l Numeric buttons Select a title chapter track to play m PROG CLOCK SET Program radio stations Set clock n TIMER SLEEP Set sleep timer Set alarm timer o Mute Overview of remote control a b d e f g h j i k m l c r q n p o a Switch the micro system on off b DISC DISC MENU FM USB AUX MP3 LINK Select the source c Access th...

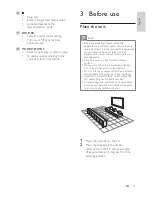
Страница 11: ...unit near the AC outlet where the AC power plug can be easily reached To avoid magnetic interference or unwanted noise never place the main unit and speakers too close to any radiation devices 1 Place the unit near to the TV 2 Place the speakers at a suitable distance from the TV and at an angle of approximately 45 degrees from the listening position p Stop play Erase a programed radio station Act...

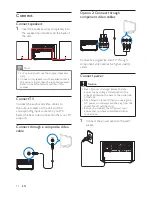
Страница 12: ...ct the AC power cord ensure that you have completed all other connections 1 Connect the power cable to the wall socket Pr Cr Y Pb Cb Connect Connect speakers 1 Insert the speaker wires completely into the speaker input sockets on the back of the unit Note For optimal sound use the supplied speakers only Connect only speakers with impedance that is the same or higher than the supplied speakers manu...

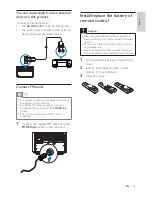
Страница 13: ...olarity as indicated 3 Close the cover You can route audio from an external device to this product Connect an audio cable to the AUX IN L R sockets on this product the audio output sockets on the external device for example audio player Connect FM aerial Tip For optimal reception fully extend and adjust the position of the antenna For better FM stereo reception connect an outdoor FM antenna to the...

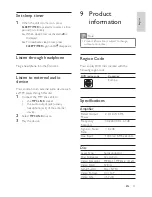
Страница 14: ...een video in channels 4 Get started Turn on 1 Press The unit switches to the last selected source Note If no source is played within 15 minutes the unit switches to standby mode If no operation is performed within 15 minutes in standby mode the unit switches to Eco power standby mode Press to switch the unit to the last source when it was turned off Demonstrate the unit s features 1 In the standby...

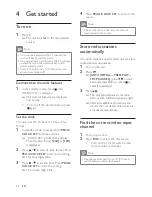
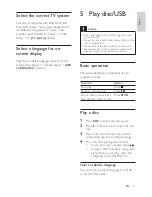
Страница 15: ... to select the disc source 2 Press on the main unit to eject the disc tray 3 Place a disc onto the disc tray with the printed side upward and then press 4 The unit starts playing automatically To start the play manually press To play a DVD that has a rating level higher than your setting enter the XJJ Select a subtitle language You can select a subtitle language for a DVD or DivX Ultra video Selec...

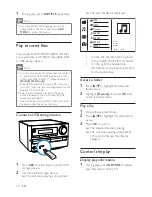
Страница 16: ...e TV MP3 WMA Picture Title Artist Album 00 13 01 19 000001 000002 000001 000022 1 During play press SUBTITLE repeatedly Note For some DVDs the language can only be changed from the disc menu Press DISC MENU to access the menu Q Q Q Y are copied onto a CD R RW recordable DVD or USB storage device Note You can only play DivX videos that are rented or purchased with DivX registration code DivX R VOD ...

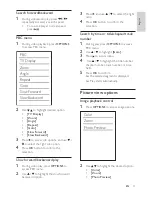
Страница 17: ...ghlight the desired option Color Zoom Photo Preview Color Zoom Photo Preview Search forward backward 1 During video audio play press repeatedly to select a search speed To resume play at normal speed press PBC menu 1 During video playback press OPTIONS to access PBC menu 2 Use to highlight desired option TV Display Zoom Angle Repeat Goto Slow Forward Slow Backward 3 Press to access sub options and...

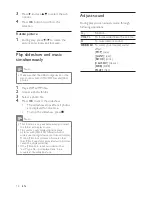
Страница 18: ...d music simultaneously Note Make sure that the USB storage device or the Q Y photos 1 Q 2 Access a photo folder 3 4 Press OK to start the slideshow The slideshow stops after all photos are displayed for one time To stop the slideshow press Note This function is only available when you select the folder as the play source This unit can only display digital camera pictures with JPEG EXIF format whic...

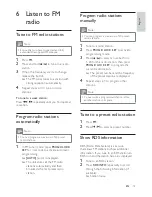
Страница 19: ...mation If you tune to an RDS station an RDS icon and the station name are displayed 1 Tune to an RDS station 2 Press RDS INFO repeatedly to scroll through the following information if available Station name 6 Listen to FM radio Tune to FM radio stations Note Ensure that you have connected and fully extended the supplied FM antenna 1 Press FM 2 Press and hold to tune to a radio station 3 When the f...

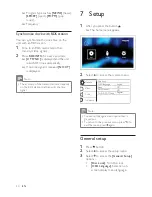
Страница 20: ...USB Disc Setup General Disc Lock OSD Language English Off Off Register Sleep Auto Standby DivX R VOD Code Video Audio Preference Program type such as NEWS news SPORT sport POP M pop music Frequency Synchronize clock with RDS station You can synchronize the clock time on the unit with an RDS station 1 Tune to an RDS radio station that transmits time signals 2 Press RDS INFO for over 2 seconds CT SY...

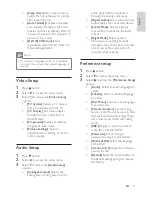
Страница 21: ...ubtitle Select the language of the DivX Version Info Display the software version for the Default Reset the home theater to the default settings programmed at the factory Sleep Timer Sets a sleep timer to switch the home theater to standby Auto Standby Enables or disables auto standby If enabled the home theater switches to standby after 30 minutes of inactivity for example in pause or stop mode D...

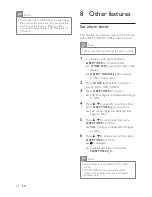
Страница 22: ...ect a source DISC USB TUNER 3 Press SLEEP TIMER The hour digits are displayed and begin to blink 4 Press repeatedly to set hour then press SLEEP TIMER The minute digits are displayed and begin to blink 5 Press to set minute then press SLEEP TIMER VOL volume is displayed and begins to blink 6 Press to adjust volume then press SLEEP TIMER is displayed To deactivate alarm timer press SLEEP TIMER agai...

Страница 23: ...deo DAC 12 Bits Signal System PAL NTSC Video Format 6 Q 6X Video S N Set sleep timer 1 When the unit is turned on press SLEEP TIMER repeatedly to select a time period in minutes When sleep timer is activated is displayed To deactivate sleep timer press SLEEP TIMER again until disappears Listen through headphone Plug a headphone into the socket Listen to external audio device You can listen to an e...

Страница 24: ... Dolby Digital Plus 5 1 PCM Audio MP3 MP3 ID3 Tag WMA WMA Tags The following formats are not supported Files like VMA DLF M3U Audio DAC Q X Total Harmonic Distortion 1 1 kHz Frequency Response 4 Hz 20 kHz 44 1 kHz 4 Hz 22 kHz 48 kHz X S N Ratio Tuner FM Tuning Range 87 5 108MHz Tuning grid 50KHz S N Ratio 22 dBf S N Ratio 43 dBf Search Selectivity 28dBf Total Harmonic Distortion 2 Signal to Noise ...

Страница 25: ... no control is operated No disc detected Insert a disc Check if the disc is inserted upside down Wait until the moisture condensation at the lens has cleared Replace or clean the disc No picture Check the video connection Turn on the TV to the correct Video In channel Black and white or distorted picture The disc does not match the TV color system standard PAL NTSC Sometimes a slight picture disto...

Страница 26: ...The aspect ratio may not be changed for some TV systems No sound or poor sound Adjust the volume Disconnect the headphones Check that the speakers are connected correctly Check if the stripped speaker wires are clamped Remote control does not work Before you press any function button remote control instead of the main unit Reduce the distance between the remote control and the unit Insert the batt...

Страница 27: ...nn för utomhusbruk i stället Ljud eller textningsspråk kan inte ställas in Skivan är inte inspelad med ljud eller _ _ _ _ _ har överskridit angiven gräns Detta är inte ett fel Filernas format kan inte hanteras USB enheten kan inte hanteras USB enheten är inte kompatibel med enheten Försök med en annan Timern fungerar inte Ställ in klockan rätt _ _ Klock timerinställningen har raderats _ _ Återstäl...

Страница 28: ... 2011 Koninklijke Philips Electronics N V All rights reserved MCD2010_12_UM_V1 0 ...

Отзывы: