background image

Information

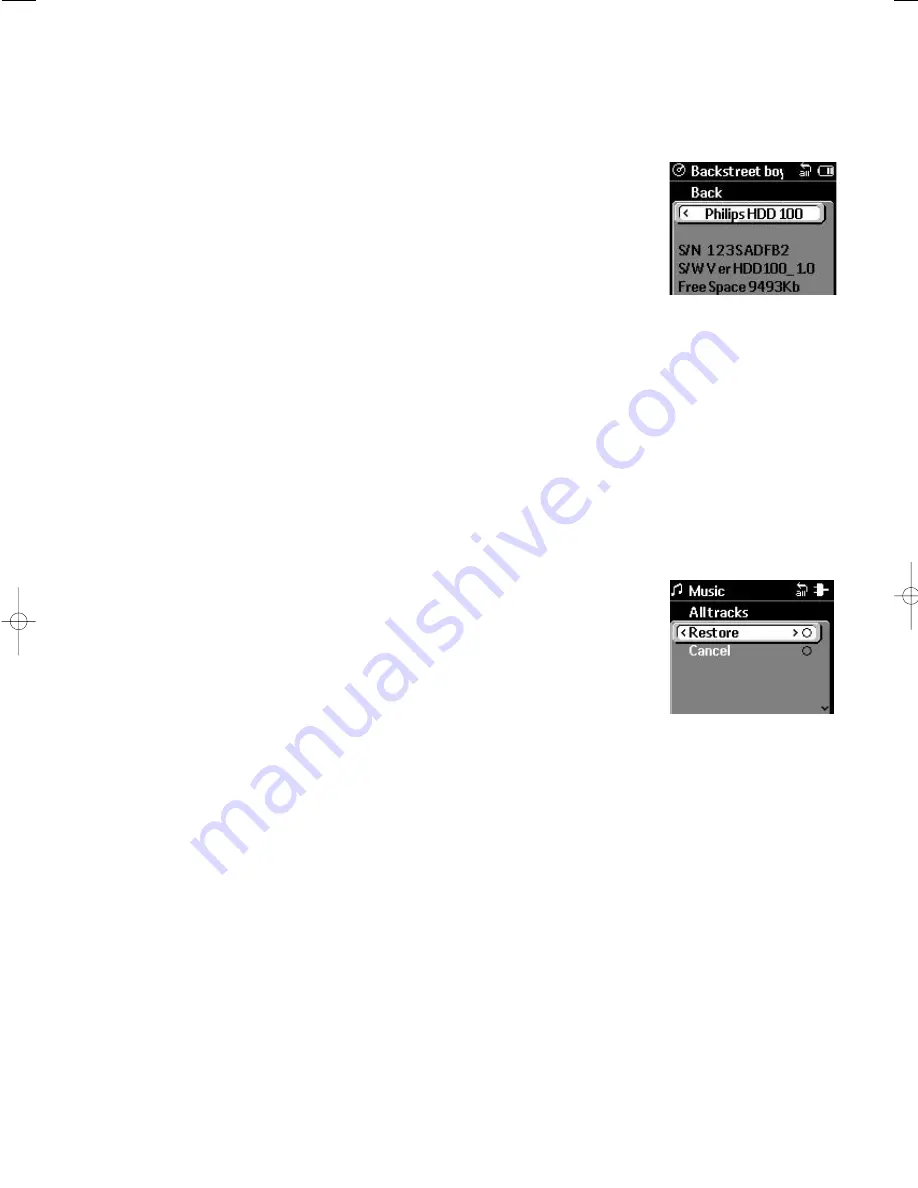
For basic information on your Jukebox such as:

PhilipsHDD 100 - the model name and number of your
Jukebox
S/N - the serial number 
S/W VerHDD100    - software version
Free Space - remaining storage space available

1

In Music Library or the play display, press 

MENU/ HOLD

.

2

Use the 

4

or 

3

and 

2

controls to scroll and select 

Settings

Information

.

3

Press 

MENU/ HOLD

once, or press 

1

once or more to exit the display.

Factory Settings

This feature allows you to restore your device to the original default settings for all the
adjustable menu options.

1

In Music Library or the play display, press 

MENU/ HOLD

.

2

Use the 

4

or 

3

and 

2

controls to scroll and select 

Settings

Factory Settings

.

Restore option is highlighted.

3

To restore your device to the original default settings, confirm 
Restore by pressing 

.

4

Press 

MENU/ HOLD

once, or press 

1

once or more to exit the display.

If you are unsure or don't want to change your current settings, select 

Cancel or

follow step 4 above.

Setting

30

HDD100_ENG  19/8/03  16:31  Page 30

Содержание HDD100

Страница 1: ...recording audio jukebox hdd100 user manual ...

Страница 2: ...ng your battery 13 Battery power level 14 Basic Operation Shutdown mode Switching on Standby 15 Button lock 16 Busy animation screen 16 Main screen Music Library 17 SuperScroll 18 Playback playback display 19 Searching within a track Selecting a different track Adjusting Volume Menu navigation 20 Menu options Repeat Shuffle DBB Bass Boost 21 Playlists 22 Erase 23 Recording Record settings 24 25 Se...

Страница 3: ...l Media Manager DMM to avoid problems Do not drop your Jukebox or allow objects to fall on your Jukebox Do not allow your Jukebox to be submersed in water Do not expose connection jacks to water as water entering the set may cause major damage Clean your hdd100 with a slightly damp cloth Don t use any cleaning agents containing alcohol ammonia benzene or abrasives as these may harm the finishing o...

Страница 4: ...s and can radiate radio frequency energy and if not installed and used in accordance with the instruction manual may cause harmful interference to radio communications However there is no guarantee that interference will not occur in a particular installation If this equipment does cause harmful interference to radio or television reception which can be determined by turning the equipment off and ...

Страница 5: ...d100 and PC Connect your hdd100 to your PC using the supplied USB 2 0 cable You can do this while the hdd100 is still charging TIP Make sure your hdd100 is powered by the supplied power adapter when connecting to your computer in case battery power is low or needs charging Step 4 Transfer your music and enjoy Before you fill in your details to register for the Digital Media Manager DMM please read...

Страница 6: ... used as a handy external hard disk for easy transport and backup Actual formatted capacity of hdd100 will be less Minimum computer system requirements PC with Windows 98SE Me 2000 XP USB port 1 1 For best performance use USB2 0 CAUTION Computers that were upgraded from Win 95 may not have USB compatibility XP users you may see a warning message if your hdd100 is connected to a PC with 1 1 USB por...

Страница 7: ...io files managed from your PC music library can only be downloaded to Jukebox via DMM Only audio files created via direct recording Analog Line in or MIC on your Jukebox can be uploaded to your PC music library via DMM You will not be able to playback audio files on your Jukebox if your music has been transferred via Windows Explorer Environmental information We have done our best to reduce the pa...

Страница 8: ...ur computer 5V DC Connect the battery charger here and to the power source OPTICAL LINE IN Connect an optical or line in source here p Insert your remote control plug here and then connect your headphones to your remote control MIC microphone for voice recordings VOLUME Increases decreases the volume ...

Страница 9: ...rds within a track 2 LIBRARY enters submenu options Menu if prompt shown press to see more info options if O prompt shown press 2 again to confirm a selected menu option During playback toggles between the spectrum analyzer playback display Recording mode pauses recording 2 LIBRARY Scrolls down list of options in the Music Library and Menu displays During playback press briefly to select the next ...

Страница 10: ...e control cannot be used for operating the Jukebox menu displays Supplied accessories Make sure all items listed are in the package purchased If any item is missing please contact your dealer 1 x USB 2 0 cable AY3911 1 x installation CD ROM AY3498 1 x set of in line earphones HE570 1 x remote control AY3779 1 x power adapter charger AY3192 1 x travel pouch AY3274 1 x Quick Start booklet 1 x Safety...

Страница 11: ...irm installation 3 If you are prompted to restart your PC please do so 4 Connect hdd100 to your PC using the supplied USB 2 0 cable Windows will detect for New Hardware hdd100 and install the USB driver automatically For Windows 98SE users disconnect your hdd100 if you are prompted to restart your PC TIP If the installation program doesn t launch automatically eject the CD and insert again For Win...

Страница 12: ...ar and select Stop USB Mass Storage Device from the pop up menu Follow the screen instructions to unplug your Jukebox If you see a Try stopping the device again later message on your PC screen try closing DMM or other applications which are running on your PC and then click on 2 Disconnect the USB 2 0 cable from hdd100 and your PC TIP To avoid file error damage do not disconnect hdd100 during file...

Страница 13: ... 100 is switched on indicates that the power adapter is connected and the battery is charging When the battery is fully charged indicates hdd100 is now adapter operated 2 Always disconnect the adapter if you are not charging the battery or not using hdd100 If hdd100 is switched on appears when you disconnect the adapter TIP Battery charging time is the same irrespective of whether your hdd100 is i...

Страница 14: ...re the blinking operation of Jukebox will eventually power down automatically after the display briefly shows the exhausted battery final screens BATTERY DISPOSAL CAUTION Batteries contain chemical substances and should be disposed of properly Dispose in accordance with applicable local state provincial or federal regulations The model and serial numbers are located on the back of the set low 50 7...

Страница 15: ...y mode is the power saving mode and allows a fast wake up Press 2 for 1 second to switch to standby TIP You can charge Jukebox in standby mode No charging indication appears Charging time is the same as for power shutdown or if Jukebox is switched on By default hdd100 automatically also switches to standby if no audio file is being played and no controls are pressed after 2 minutes If you like you...

Страница 16: ...ress MENU HOLD for 2 seconds to activate deactivate the button lock function appears if the button lock feature is activated Busy animation screen A series of box patterns appears on your Jukebox display This animation screen appears for features that require a few extra seconds to perform and indicates your Jukebox is busy ...

Страница 17: ...ists by artist name Albums by album name Genres by music type All tracks all tracks stored on your hdd100 Recordings all songs recorded optical source Line in and Mic on hdd100 TIP Press 2 to play the current item highlighted The respective Library icon will be shown in the status bar display For example Sample Music Library display by Artists actual Artists not included on your hdd100 Press to re...

Страница 18: ...akes you down up in the list of songs one song at a time Repeat as desired to view each song down up the list Press 4 or 3 halfway down to scroll quicker Press down completely and hold 4 or 3 for SuperScroll The list will scroll very fast Songs are indicated by an alphabet icon pop up showing the first letter of the song title 4 Release 4 or 3 when you reach your desired song location TIP In the M...

Страница 19: ...e used for operating the Jukebox menu displays and features Other playback display icons Progress bar indicating elapsed playtime time shown next to bar during playback Playback status 2 play II pause 9 track in stop position only after wake up from standby Current Equalizer option selected e g Off Rock etc Soft key Press 1 to change to Music Library screen Soft key Press 2 to toggle between the S...

Страница 20: ...e volume The keys on the remote control affect audio operation only during playback Volume cannot be adjusted during recording Navigating Menu options Some features have further options so you will need to navigate through more levels into the menu 1 Press MENU HOLD briefly to access the menu 2 Use the 4 3 1 or 2 controls on your Jukebox to scroll through the display options E g Repeat Shuffle 3 F...

Страница 21: ...and 2 controls to scroll and select Repeat Shuffle 3 Use the 4 or 3 and 2 controls to scroll and select your playback option When 2 is pressed your option is activated and the display automatically returns to the previous menu 4 Press MENU HOLD once or press 1 once or more to exit the display DBB Bass Boost Default setting Off Dynamic Bass Boost allows you to de activate bass sound enhancement 1 I...

Страница 22: ...n with the new playlist For further details on creating and editing your playlist please read the Digital Media Manager user manual page 15 for details Add to Playlist You can add an individual track or even entire collections of tracks as arranged within a selected name of genre album artist or specified recorded source to your Jukebox s latest created playlist 1 During playback or in the track s...

Страница 23: ...e menu display 3 Use the 4 or 3 and 2 controls to scroll and select Erase 4 To confirm select Yes and press 2 Otherwise press 1 or select No the busy animation screen appears whilst your track is deleted When deleted the previous menu is displayed 5 Press MENU HOLD once or press 1 once or more to exit the display TIP When deleting a song from a Playlist your selected track is only removed from the...

Страница 24: ...if you want to adjust from 3 available settings Volume Line Rec quality or Auto Track Nr 1 In the Music Library or play display press MENU HOLD 2 Use the 4 or 3 and 2 controls to scroll and select Settings Record Settings 3 Use the 4 or 3 and 2 controls to scroll and select the desired setting is shown next to your currently selected option 4 Use the 4 or 3 and 2 controls to scroll and select the ...

Страница 25: ...riginal recording includes silence found between the begin ning and end of tracks Auto track numbering automatically assigns a track number to each track TIP You can also access the Record settings screen in Record Mode just before making a recording by pressing MENU HOLD Adjustments are not effective during recording Recording 25 ...

Страница 26: ...input levels recording bitrate in Kbs recording source and track number and the soft key controls for Stop and Pause For Line in and Optical 1 Use a connection cable not supplied to connect the OPTICAL OUT LINE OUT jack on your audio recording source to the OPTICAL LINE IN jack on your Jukebox 2 Press play on your connected audio source 3 Press 4 to start recording on your Jukebox For microphone r...

Страница 27: ... once or more to exit the display TIP Off deactivates the power saving standby function on your Jukebox We recommend you select 30 Sec 2 Mins 5 Mins to help extend battery playback time Language Default setting English Select from 11 language options 1 In Music Library or the play display press MENU HOLD 2 Use the 4 or 3 and 2 controls to scroll and select Language 3 Use the 4 or 3 and 2 controls ...

Страница 28: ... Metal and Rock Pop You can match up to 96 genres for your equalizer settings by using the DMM software 1 Press MENU HOLD to see the menu display 2 Scroll and select Settings Equalizer Match Genre is shown next to Match Genre when activated TIP The default Off equalizer setting disables all equalizer settings on Jukebox The Equalizer function in the DMM software is also the equalizer manager for t...

Страница 29: ...LD 2 Use the 4 or 3 and 2 controls to scroll and select Settings Display Backlight 3 Use the 4 or 3 and 2 controls to scroll and select your time option 4 Press MENU HOLD once or press 1 once or more to exit the display Contrast Default setting level 15 You can adjust the display contrast brightness 1 In Music Library or the play display press MENU HOLD 2 Use the 4 or 3 and 2 controls to scroll an...

Страница 30: ...ore to exit the display Factory Settings This feature allows you to restore your device to the original default settings for all the adjustable menu options 1 In Music Library or the play display press MENU HOLD 2 Use the 4 or 3 and 2 controls to scroll and select Settings Factory Settings Restore option is highlighted 3 To restore your device to the original default settings confirm Restore by pr...

Страница 31: ...BR WAV 32 192 Kbps ID3 tag support Yes version 1 2 2 0 MP3 Audio recording Voice recording MP3 Via built in microphone mono 64Kbps Audio recording MP3 Via 3 5mm line in jack stereo Analog 64 128 192 Kbps Digital optical 64 128 192 Kbps PC Connectivity USB 2 0 File Transfer via Digital Media Manager for music playback or Windows Explorer of data in general music playback disabled Power supply Built...

Страница 32: ...ft Corporation Pentium is a registered trademark of Intel Corporation Acrobat Reader is a registered trademark of Adobe Corporation Internet Explorer is a registered trademark of Microsoft Corporation All rights reserved All trade names referenced are the service mark trademark or registered trademarks of their respective manufacturers Technical Specifications 32 PHILIPS reserves the right to make...

Страница 33: ...ply at wall outlet Press and hold POWER 2 until display turns on minimum 1 second Headphones not properly connected Insert headphone plug into the remote control jack completely Make sure you also insert the remote control jack in the set properly Make sure you have the required computer and software See page 6 Minimum system requirements Q Malfunction No reaction to controls Possible electrostati...

Страница 34: ...dom or repeat option See the Repeat Shuffle option in the menu Q What s the meaning of these display messages If your hdd100 displays this icon you have a file error system files may be missing or there is a format error on hdd100 To remedy please try the following 1 Connect the supplied adapter to the 5V DC jack on your hdd100 and your power supply This ensures uninterrupted power supply Switch o...

Страница 35: ...pdate To ensure uninterrupted power supply during transfer please use the supplied adapter to power hdd100 especially when transferring a large number of files Transfer your files to hdd100 only through DMM Always eject your hdd100 using the Eject Hardware icon if available on the task bar If your hdd100 displays this icon you have a serious error with your Jukebox possibly caused by a faulty hard...

Страница 36: ...hdd 100 Meet Philips at the Internet http www philips com http www audio philips com Created in HK LYW hk328 ...

Отзывы: