24
EN
3
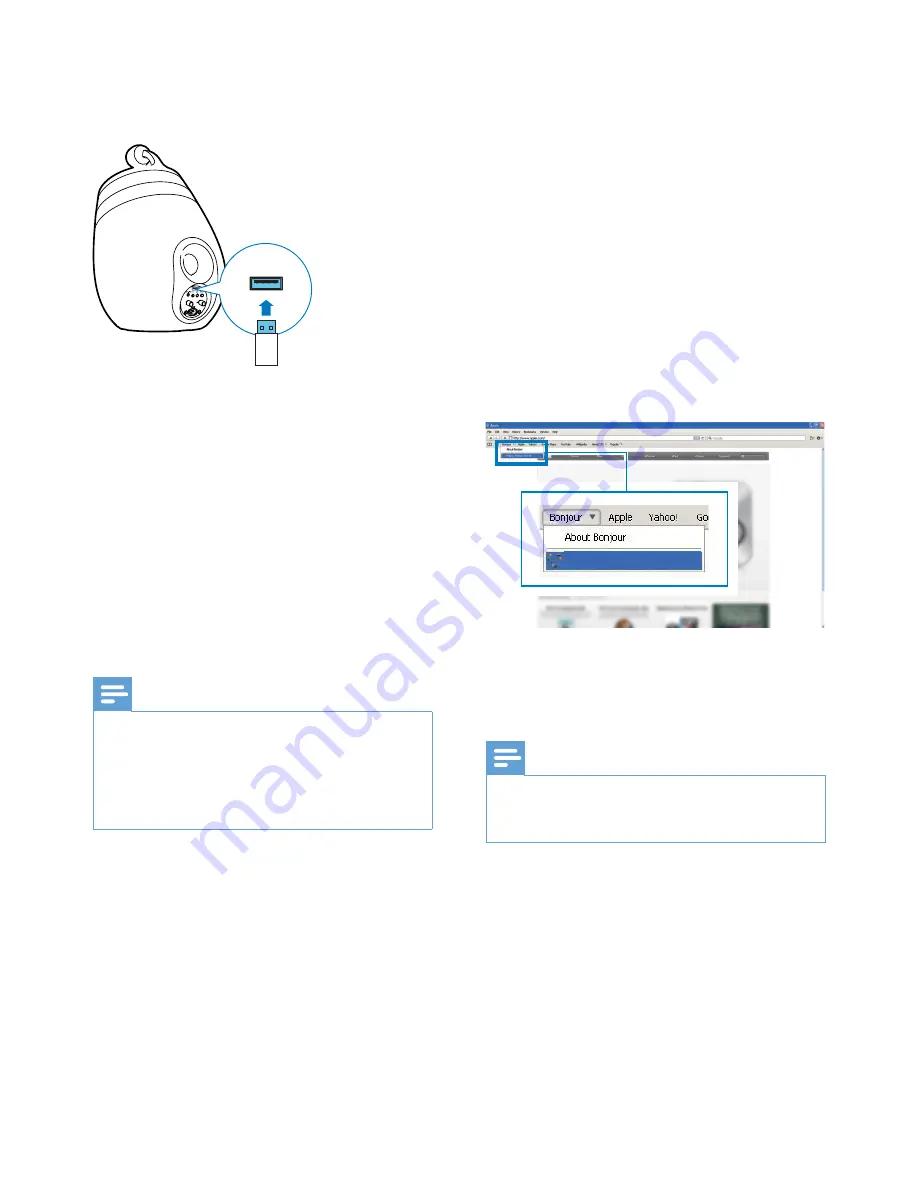
Plug the USB mass storage device into
the USB socket on the back of the main
speaker.
4
Press and hold
WI-FI SETUP
for more
than 10 seconds.
»
The
WI-FI STATUS
indicator flashes
red, and the upgrade process starts.
»
At completion of the firmware
upgrade, the
WI-FI STATUS
indicator
flashes yellow and the unit reboots.
Update from a PC/Mac
Note
•
To use an Internet browser other than Apple Safari
on your PC/Mac, remember to go to the Wi-Fi router
configuration page and write down the IP address of
your DS9860W. See the user manual of your Wi-Fi
router for how to find the IP addresses of devices
connected to the Wi-Fi router.
1
Power on DS9860W (see 'Turn DS9860W
on' on page 8
).
»
It takes about 35 seconds for the unit
to boot up. During boot-up, the
WI-FI
STATUS
indicator on the back of the
main speaker blinks yellow.
»
After boot-up, you can hear a beep
and the
WI-FI STATUS
indicator turns
solid green.
»
DS9860W is connected to the last
configured Wi-Fi network automatically.
2
Make sure that DS9860W and your PC/
Mac are connected to the same Wi-Fi
router.
3
Open Apple
Safari
on your PC/Mac, then
select '
Philips SoundSphere XXXXXX
'
from the Bonjour pull-down list.
•
Or open any other Internet browser
on your PC/Mac, then type in the IP
address of DS9860W (available on the
Wi-Fi router configuration page) at the
address bar.
»
The DS9860W configuration web
page is displayed.
4
Select the
Firmware Update
tab and
follow the on-screen instructions to
complete the update process.
Note
•
In case the firmware update fails, you can upgrade
through a USB mass storage device or try the above
procedures again.
After successful firmware update, if there is
any problem with the Wi-Fi connection, restart
DS9860W, and then try to
set up the Wi-Fi
network for DS9860W again (see 'Connect to
your home Wi-Fi network for AirPlay' on page
10
).
Philips SoundSphere XXXXXX
Содержание DS9860W
Страница 2: ......


