11
English
EN
4
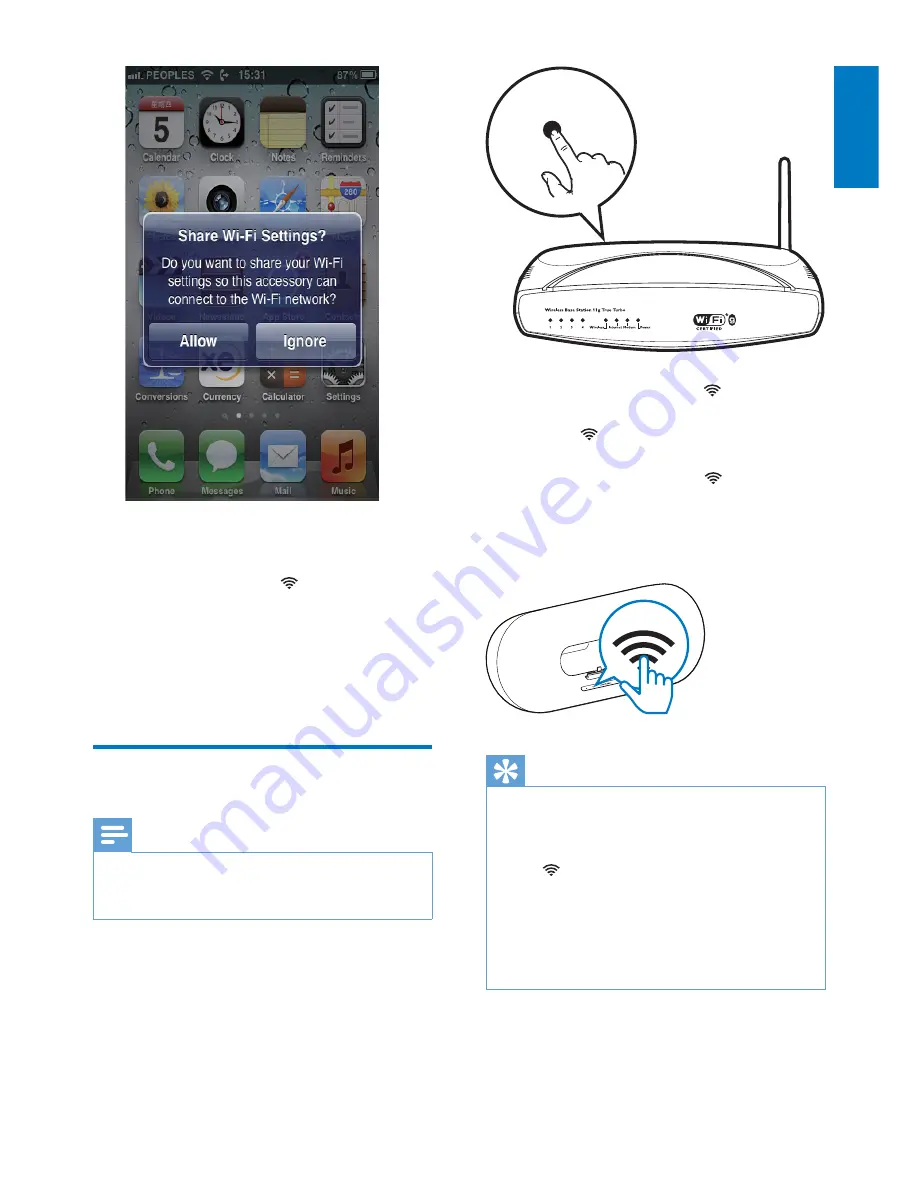
Tap
ALLOW
(allow) to share your Wi-Fi
settings with DS9100W.
»
After a while, the indicator on the
front panel turns solid white, and the
unit beeps.
»
DS9100W is connected to your
existing home Wi-Fi network
successfully.
Method 2: Connect to a WPS
router
Note
•
Before you press any button on DS9100W, make sure
that DS9100W has been booted up successfully (see
'Turn DS9100W on' on page 8).
1
Press the WPS button on your home Wi-Fi
router.
2
Shortly after step 1, press on the front
panel of the unit.
»
The indicator blinks yellow and
green alternately.
»
Within 2 minutes, the indicator
turns solid white, and the unit beeps.
»
DS9100W is connected to your home
Wi-Fi network successfully.
Tip
•
For some Wi-Fi routers, you may need to hold the
WPS button for Wi-Fi connection or enable the WPS
PBC function from the router configuration pages. See
the user manuals of the specific routers for details.
•
If the indicator on DS9100W stays yellow, it means
that the Wi-Fi connection has failed. Please wait for 2
minutes and try again. If the problem remains, try to
set up the Wi-Fi connection manually (see 'Method 3:
Connect to a non-WPS Wi-Fi router' on page 12).
•
If the Wi-Fi connection fails again, restart DS9100W,
and then try again.
WPS


